When you click on links to various merchants on this site and make a purchase, this can result in this site earning a commission. Affiliate programs and affiliations include, but are not limited to, the eBay Partner Network.
I had once been one of those poor-unfortunates, who accidentally broke my Clockspring while doing a Steering Wheel modification..
I hear many of you have also had a similar problem,
and so I bring you this here "How-to.."
Clocksprings are a one time deal unfortunatly.. You bust it, its busted;
It can't be fixed, & Yes their expensive.
They control your Horn, and SRS, and keep the Steering Wheel Electronics
connected to the rest of the vehicle, as a sort of gyroscoping conductor,
coiled-up like Measuring-Tape.
Heres how to replace it if yours broke...
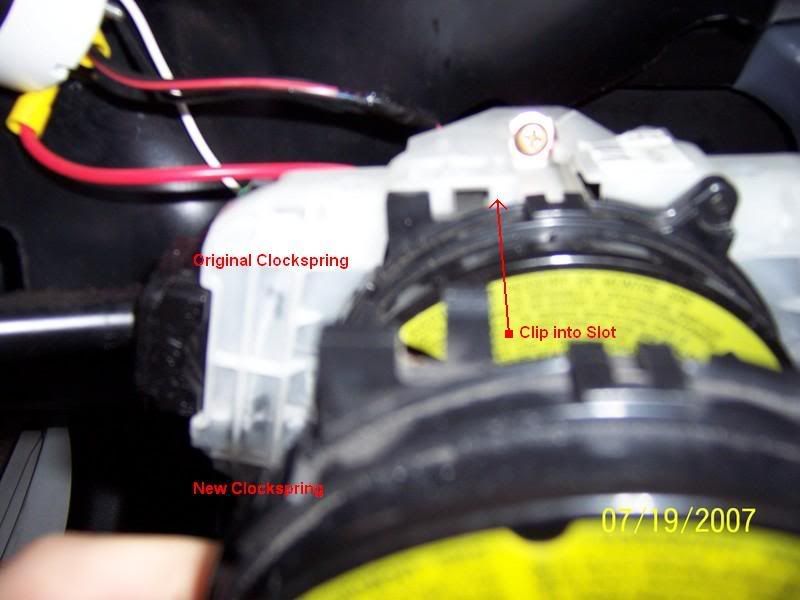
Once you've taken off the steering wheel/hub-adaptor;
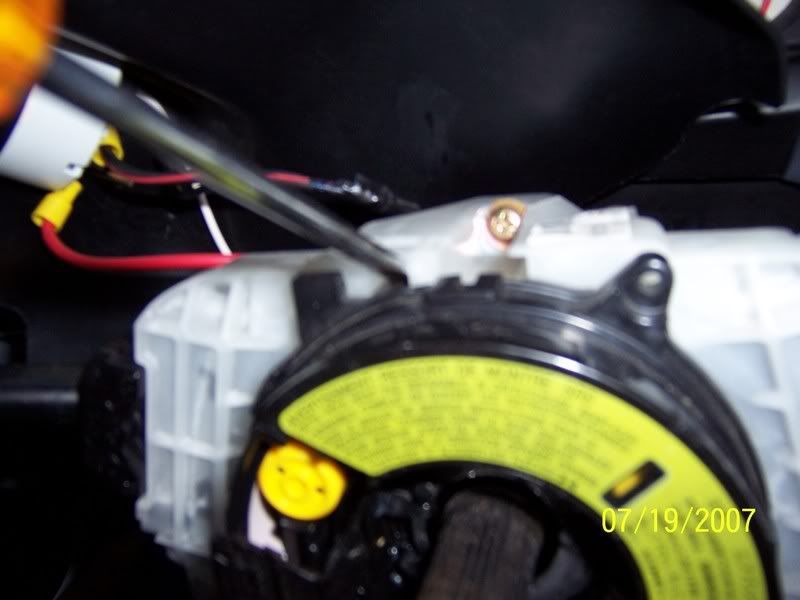
First remove the obvious screws that are right on the front of the device
(Theres only two on my Clockspring; ) and then UnPlug the Wires attached
at the bottom of the original Clockspring.
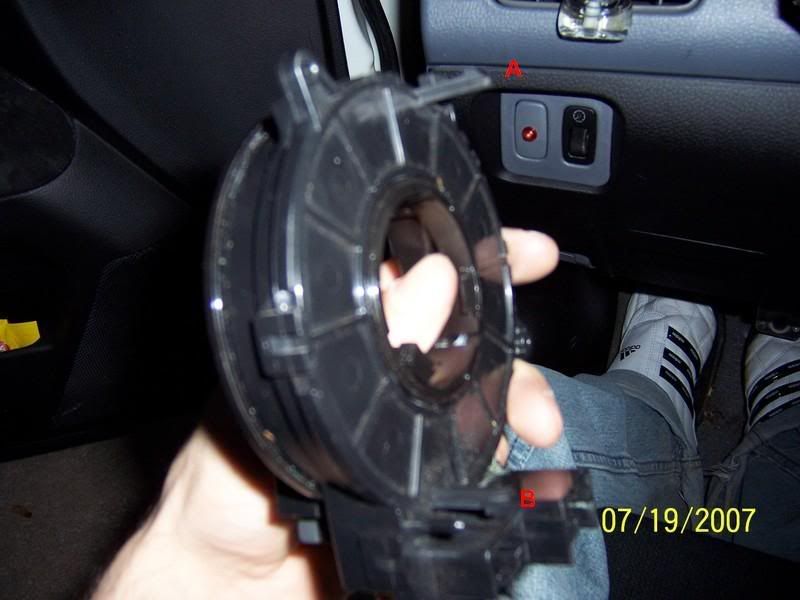
The Clockspring attaches using 2 Clips (A and B)
Which slide into a slot like so...
Use a Flat Head, and insert, then lift gently, and the Clockspring should pop right out (also relieving Clip B at the bottom, automatically.)
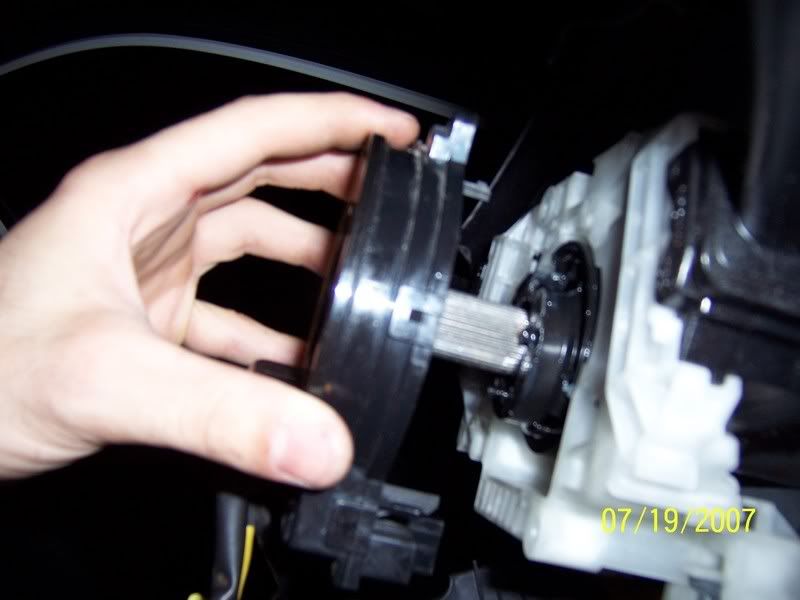
Lift the Clockspring right out...
Slide the New Clockspring on, Clip your Wires back on, Replace Screws... Done.
Hope this helps!
Last edited by CityKnight; Jul 19, 2007 at 10:57 PM.
Well there is a piece of plastic on the clockspring which keeps the clockspring from rotating, when do you pull that out? When the clockspring is installed on the wheel I assume to insure its centerred
how much does a clock spring run us lancer ralliart owners? considering my ribbon is completely damaged. lol thinking well maybe if i wind it back up no problem but then i got a paper crushing sound and tryed to fix it even more and it got worse and worse haha. so tell me can we just cut it and things will be fine considering i dont really need the horn or air bag just want the paper crushing sound to go away. but it would be nice to keep the horn and airbag. lol
So I had the unfortunate luck of disconnecting the air bag but forgetting the ground wire or airbag wire or whatever the other quick connect is and ended up with the tape in my lap saying H E double hockey sticks.
Anyway it just looks like any other electronic tape you find in computers etc and I didn't damage the tape or yank on any connectors so I tried rewinding it.
Took all the slack out by winding the piece that came off. That allowed me to get it all in the correct tape "home" between the inner black clips/ ring and the little yellow wheels. After that I followed the instructions printed on the front. I chose the english version that said to wind it tight so the is no slack then turn it back approximately 3 3/4 turns till you line up the arrows. Get a flash light cause the arrows are hard to see but they're there, just like I tell the ladies in the bedroom.
Anyway, steering wheel works perfect lock to lock and no crunching noises. No SRS light and airbag works so I'll chalk it up as fixed and hopefully save someone else.
Hi Guys sorry to bring this back from the very passed past but unlike what this thread is about I haven't actually broken anything , YET,
the ribbon has just blown up in my face and I am not sure how to wind it back on.
I know there is a certain way to roll on the cable but not sure with all the little yellow wheel in the hub,
Would prefer to save my dineros
if anyone can chime in with some useful info I would be appreciative and so would anyone in the future that this happens to
I have not yet been been able to find a thread about actually winding the ribbon back on and how to prep it.
THANKS HEAPS in ADVANCE. STAY safe peeps.
Last edited by Evo2372; Apr 21, 2020 at 04:39 AM.
Reason: adding some more info
So you have to put all the tape back into the housing (obviously with no twists) and then line up those arrows and follow the instructions on the clockspring. I forget but I believe it goes around all the yellow wheels. After you put it back together do one more step and make sure your turn indicator resets are at the top. Mine somehow are on the bottom and it only resets if I manually do it or turn the wheel to 3/4 round instead of the 1/4 or less turning (basically a u turn). Good luck. Obviously can test with horn and stuff and no SRS light.
Ok i had another look and it worked. ribbon goes on the outside and actually winds on as you turn the plastic wheel as it guides it on.
Thanks heaps again.
 Jul 19, 2007, 10:53 PM