Install Interior LED Lights
 Nov 1, 2009, 07:32 PM
#1
Newbie
Thread Starter

Join Date: Jul 2009
Location: San Jose, CA
Posts: 3
Likes: 0
Received 0 Likes
on
0 Posts
Install Interior LED Lights
I finally got around to installing my interior LED kit from LEDGLOW and thought I would take a few pics for anyone interested. I chose to install the kit through the in-dash fuse block, you can also wire it directly to the battery but I didn't feel like poking around under the hood for this.
Here is what you will need;
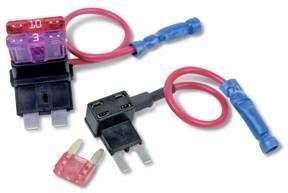
-Standard or MINI Fuse adapter/splitter: 3.99 at Kragen (Comes with 10A fuse).
-Adjustable wrench or socket.
-Wire strippers/scissors.
-Pliars/fuse puller.
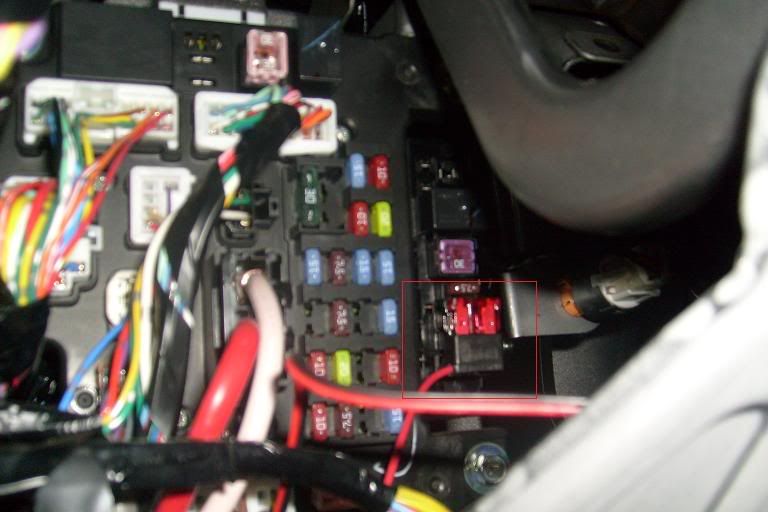
1: To start, you will need to open the in-dash fuse panel to find out where you will place the fuse adapter. I chose Fuse#25 which has a 30A fuse for the heated seats (GTS doesn't have heated seats so I went for this one in case anything went wrong). Use the manual or the poorly visible imprint on the back of the fuse panel to find #25.
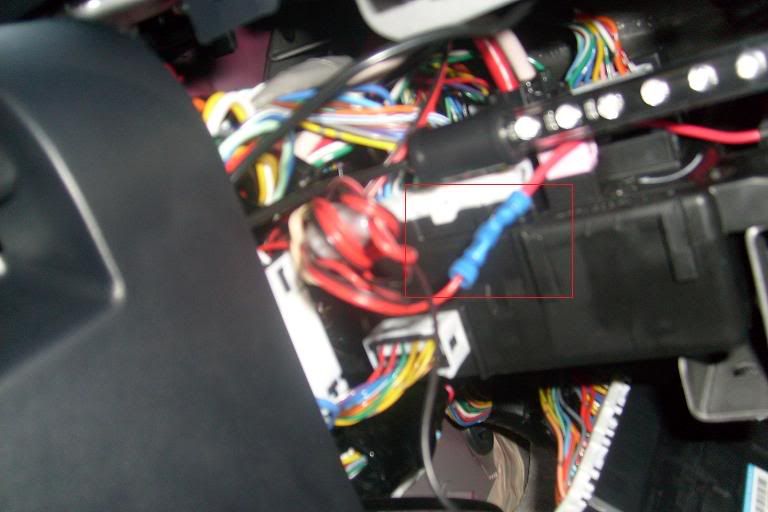
2: Once you found where to place it you will want to start by stripping back some more of the wire on the positive side of your LED kit if needed. Then insert the wire into the blue butt connector and crimp it down slightly past the divot using a pair of pliers/crimpers/ or wire strippers.
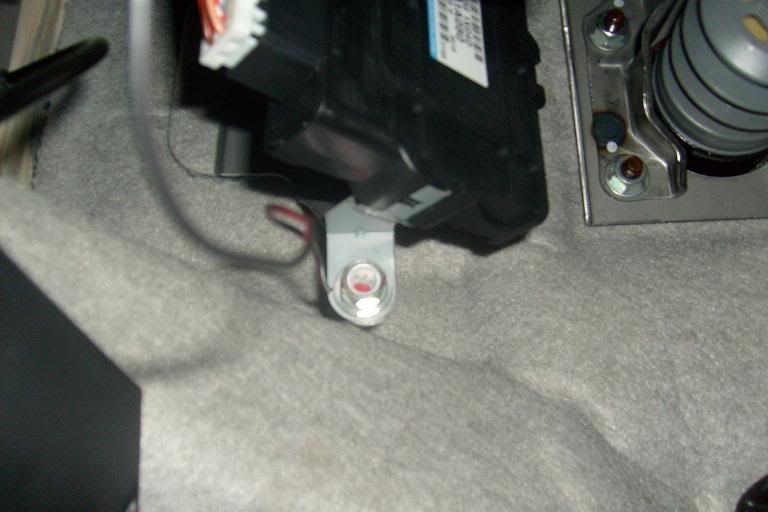
3: Now that the wire is securely connected you can now ground it, locate the bolt below the drivers seat directly above the footrest. Remove the bolt with an adjustable wrench or socket driver and place the ground wire under the head of the bolt, make sure to strip enough of the wire back as my kit needed to be re-stripped.
4: After grounding it now take a pair of needle-nose pliers and remove the fuse you selected earlier, be careful not to bump around too much when doing this and accidentally set off your knee airbag!
5: Place the removed fuse into the lower part of the adapter and the supplied 10A fuse in the top accessory slot and insert it back into the fuse block. There should be no need for you to disconnect your battery when doing this if you follow this method, make sure to ground first before you place anything into the fuse block.
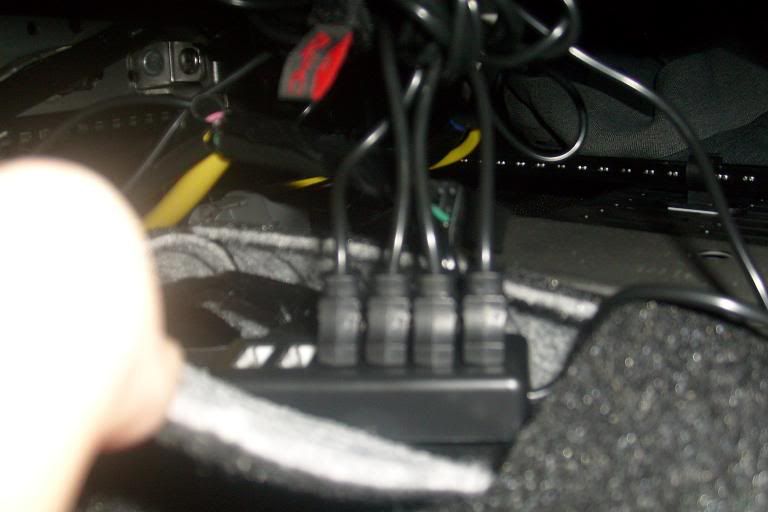
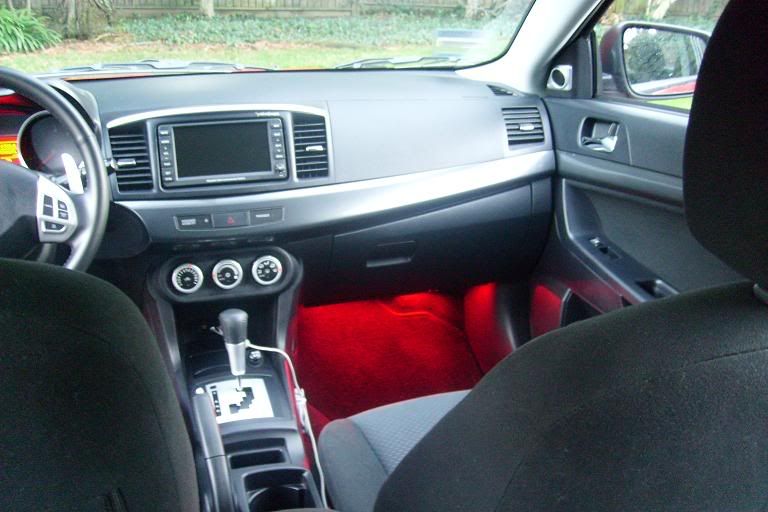
6: Now you can turn your LED kit on and start placing your LED tubes. The wires are easily concealed by tucking them under the plastic interior molding. I placed the hub under the drivers seat inside and used Velcro to tie up the wires under the seat. The rest is just a matter of finding the sweet spot of getting the best light without having to worry about accidentally kicking your LED's.
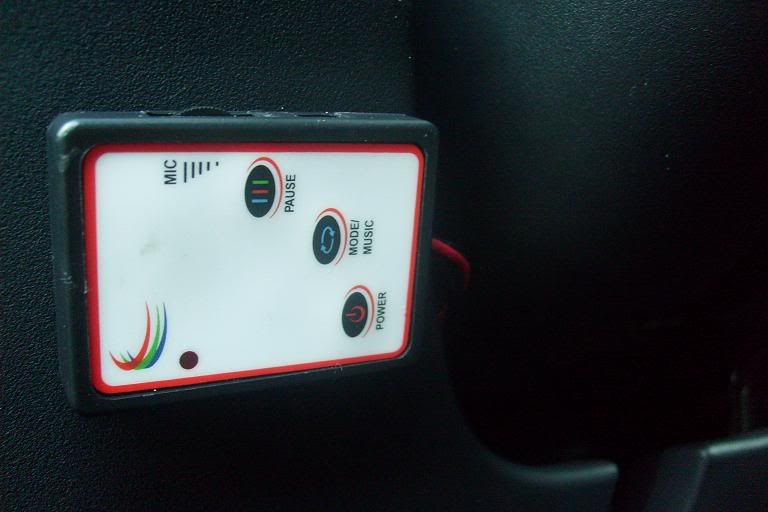
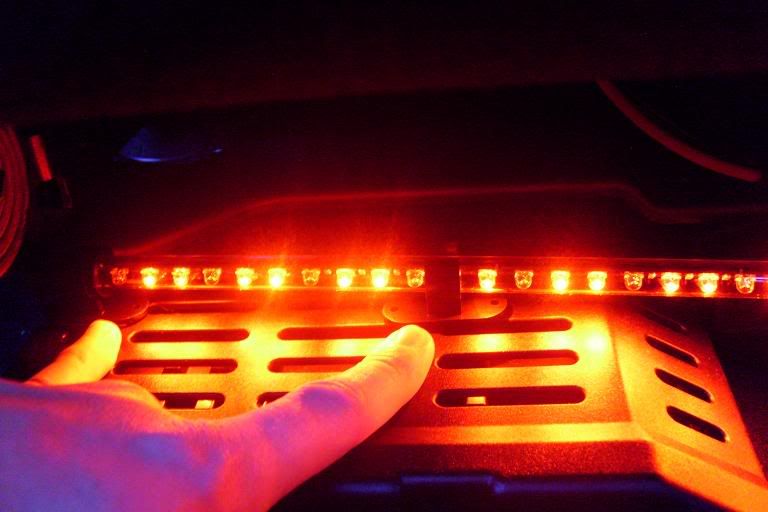
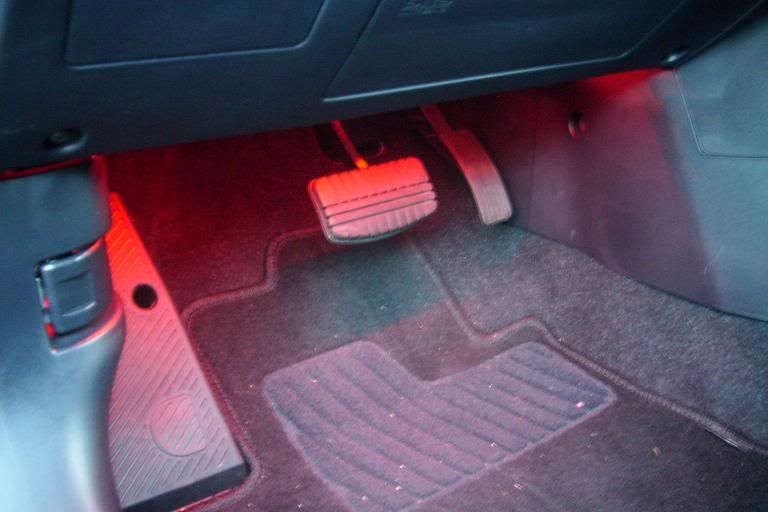
I still have a little adjusting to do, I will end up using Velcro to hold the LED's up rather than the supplied double sided tape and holders.
If anyone has questions let me know or discuss.
Hope this helps someone.
Here is what you will need;
-Standard or MINI Fuse adapter/splitter: 3.99 at Kragen (Comes with 10A fuse).
-Adjustable wrench or socket.
-Wire strippers/scissors.
-Pliars/fuse puller.
1: To start, you will need to open the in-dash fuse panel to find out where you will place the fuse adapter. I chose Fuse#25 which has a 30A fuse for the heated seats (GTS doesn't have heated seats so I went for this one in case anything went wrong). Use the manual or the poorly visible imprint on the back of the fuse panel to find #25.
2: Once you found where to place it you will want to start by stripping back some more of the wire on the positive side of your LED kit if needed. Then insert the wire into the blue butt connector and crimp it down slightly past the divot using a pair of pliers/crimpers/ or wire strippers.
3: Now that the wire is securely connected you can now ground it, locate the bolt below the drivers seat directly above the footrest. Remove the bolt with an adjustable wrench or socket driver and place the ground wire under the head of the bolt, make sure to strip enough of the wire back as my kit needed to be re-stripped.
4: After grounding it now take a pair of needle-nose pliers and remove the fuse you selected earlier, be careful not to bump around too much when doing this and accidentally set off your knee airbag!
5: Place the removed fuse into the lower part of the adapter and the supplied 10A fuse in the top accessory slot and insert it back into the fuse block. There should be no need for you to disconnect your battery when doing this if you follow this method, make sure to ground first before you place anything into the fuse block.
6: Now you can turn your LED kit on and start placing your LED tubes. The wires are easily concealed by tucking them under the plastic interior molding. I placed the hub under the drivers seat inside and used Velcro to tie up the wires under the seat. The rest is just a matter of finding the sweet spot of getting the best light without having to worry about accidentally kicking your LED's.
I still have a little adjusting to do, I will end up using Velcro to hold the LED's up rather than the supplied double sided tape and holders.
If anyone has questions let me know or discuss.
Hope this helps someone.
Last edited by Innesnet; Nov 1, 2009 at 07:54 PM.

 Dec 16, 2009, 06:55 PM
#3
Newbie

Join Date: Dec 2009
Posts: 3
Likes: 0
Received 0 Likes
on
0 Posts
Thanks man for posting this know i can do this without using the firewall for my car which would be hard .. but i have a question were can i buy that Standard or MINI Fuse adapter/splitter ? please help me thanks a lot

 Dec 17, 2009, 09:41 AM
#6
Newbie
Thread Starter
Join Date: Jul 2009
Location: San Jose, CA
Posts: 3
Likes: 0
Received 0 Likes
on
0 Posts
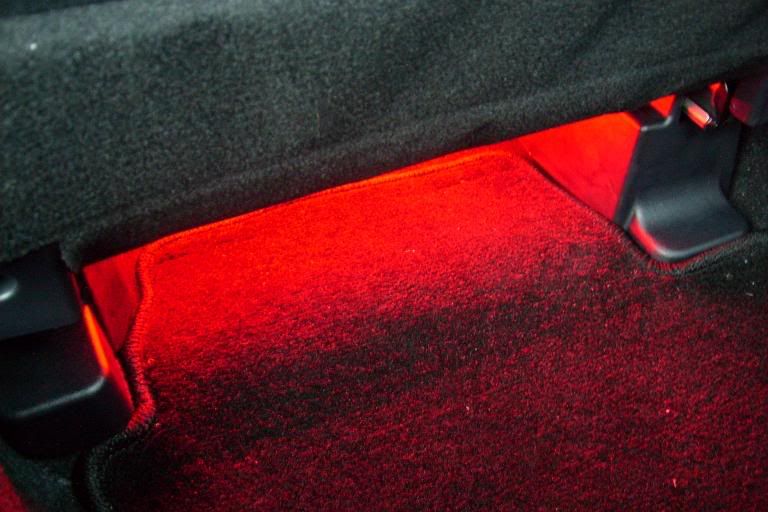
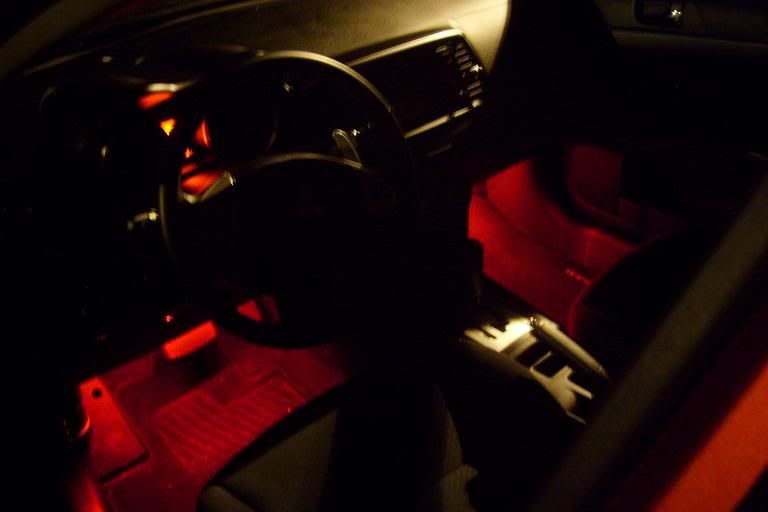
I like the ambiance it gives while driving at night, but the 90's were sewper hip btw.
Bigchris828 sorry I missed you! The US Lancer (or any lancer?) doesn't have heated seats so you can still use this on any trim. You just want to make sure that you are using the same 30A fuse along with a 10A fuse in your splitter.
Bigchris828 sorry I missed you! The US Lancer (or any lancer?) doesn't have heated seats so you can still use this on any trim. You just want to make sure that you are using the same 30A fuse along with a 10A fuse in your splitter.
Dec 17, 2009, 12:07 PM
#7
Newbie
Join Date: Dec 2009
Posts: 3
Likes: 0
Received 0 Likes
on
0 Posts
Its okay thanks for responding back .... Mmmmm oo okay i have another car that is a toyota paseo 92 i was wondering if its the same thing idk ?? can you please help me out .. what fuse do i have to replace to use the Standard or MINI Fuse adapter/splitter ? Help .. and thanks a lot
Trending Topics
 Dec 19, 2009, 01:14 PM
#10
Newbie
Thread Starter
Join Date: Jul 2009
Location: San Jose, CA
Posts: 3
Likes: 0
Received 0 Likes
on
0 Posts
Its okay thanks for responding back .... Mmmmm oo okay i have another car that is a toyota paseo 92 i was wondering if its the same thing idk ?? can you please help me out .. what fuse do i have to replace to use the Standard or MINI Fuse adapter/splitter ? Help .. and thanks a lot
Jan 24, 2018, 08:14 PM
#11
Newbie
Join Date: Nov 2016
Location: Scarborough
Posts: 2
Likes: 0
Received 0 Likes
on
0 Posts
Wifi controlled interior lights
Here Is an Instructable/YT video on how to Hardwire Internal LEDs for the Mitsubishi Lancer.
https://www.instructables.com/id/Wif...or-Lights-car/
Hope that helps.
https://www.instructables.com/id/Wif...or-Lights-car/
Hope that helps.

Thread
Thread Starter
Forum
Replies
Last Post
jid2
Evo How To Requests / Questions / Tips
120
Oct 18, 2020 08:26 AM
SRT-TO-EVO
Evo How To Requests / Questions / Tips
61
Aug 17, 2020 11:05 AM
Clipse3GT
Evo X How Tos / Installations
118
Dec 27, 2016 06:59 PM
mrwickd123
Evo X How Tos / Installations
11
Nov 2, 2016 10:19 PM