How to Make an Intake Heat shield
 Jul 6, 2012, 02:00 PM
#1
Newbie
Thread Starter
Join Date: Apr 2010
Location: CA
Posts: 35
Likes: 0
Received 0 Likes
on
0 Posts
How to Make an Intake Heat shield
A few months back I made a heat shield to keep some of that hot air away from my intake. I figured I'd take pics and make a how to while I was at it.
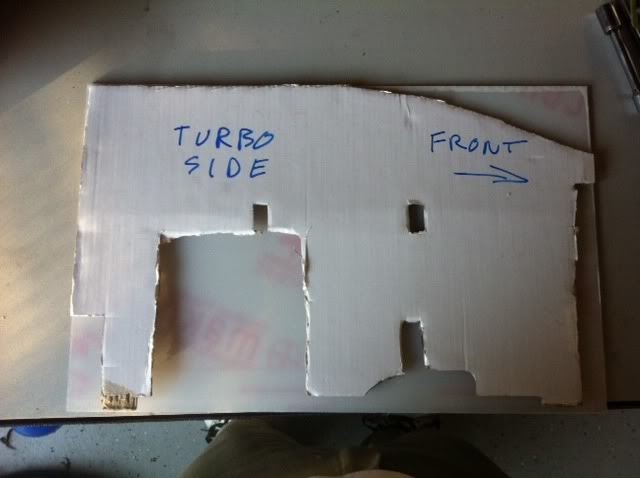
I started out with piece of cardboard. I used this as a template of which I would make a plastic version of. I wanted my heat shield to be as simple as possible so I designed it to fit over the maf and between the battery and the front of the car.
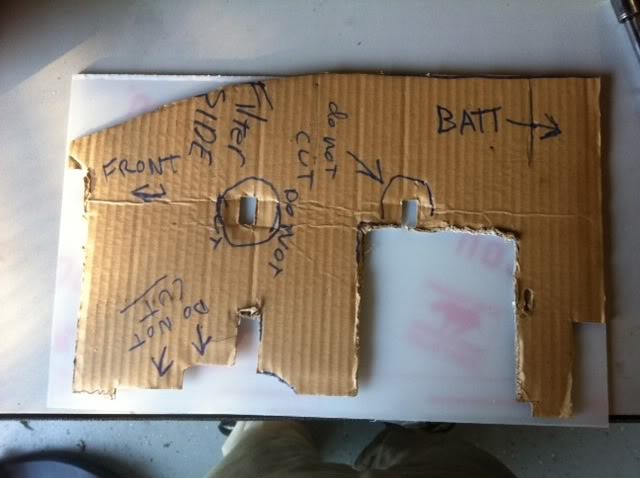
Once I got the shape and size dialed in (took lots of trimming) I taped it down to the high temp polycarbonate that I was using as my actual shield.
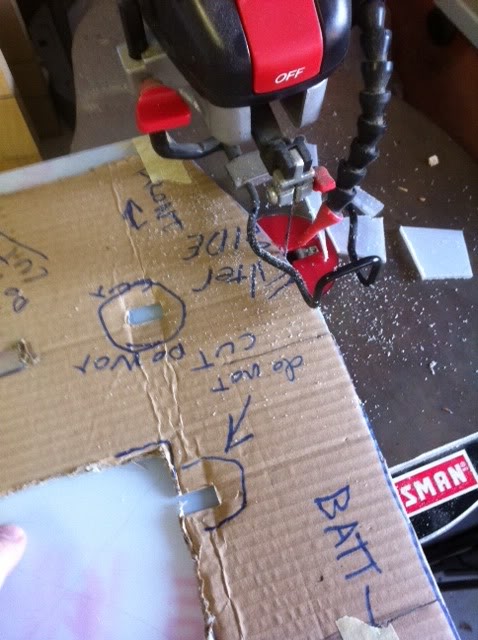
To cut it out, I used a scroll saw (because I'm lazy and I have one lol) but any fine tooth saw should work.
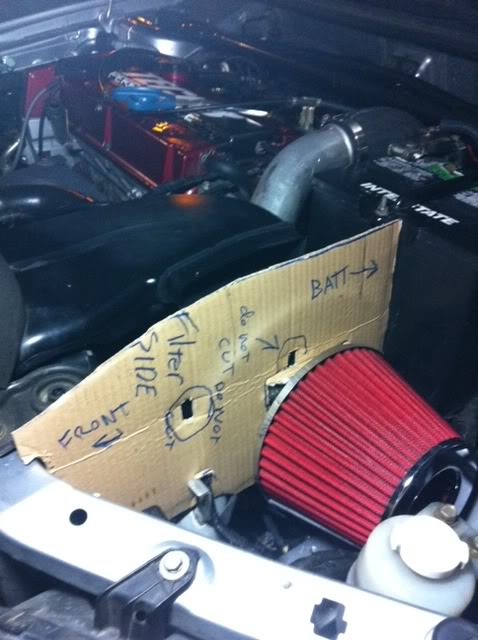
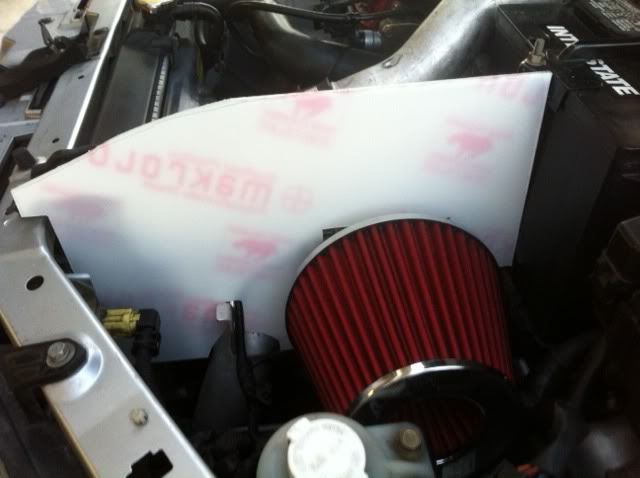
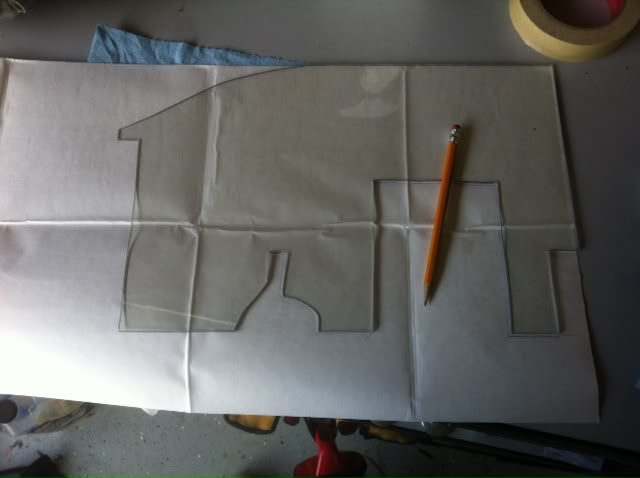
Now that I have the shape cut out and have test fitted it on the car (make sure you check for hood clearance, you don't want to dent your hood!), it was time to trace out the heat reflector.
Test fit
Tracing the reflecting material
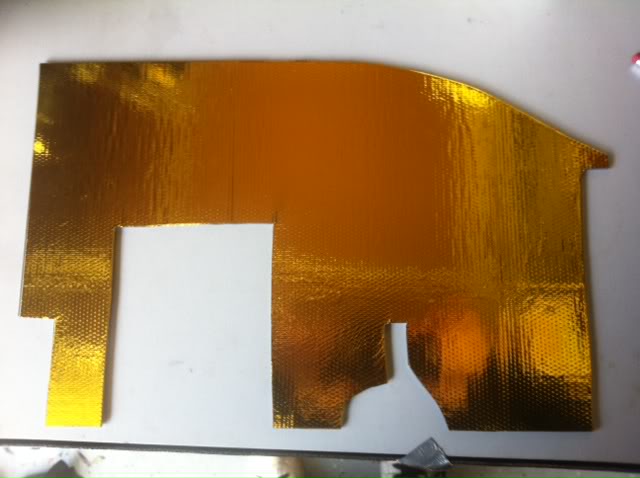
Sadly I don't have pictures of sticking the reflector to the shield, it was quite tricky trying to align everything! But eventually it did work. Now you might want to put some sunglasses on for this next part lol. I decided to use DEI gold reflector because its supposed to reflect the most heat....yes and because its gold lol.
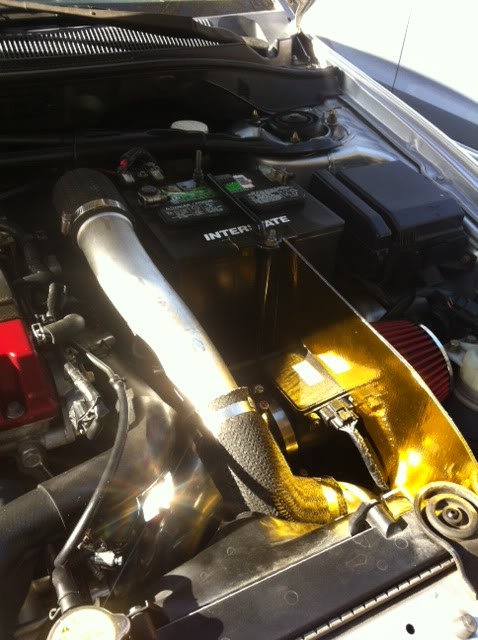
And the final finished product on the car....quite bright lol. I haven't measured any temps yet but you can feel a big difference simply by putting your hand on either side. Does it help? Possibly. Is it scientific, not really but I was bored lol hope this helps.
I started out with piece of cardboard. I used this as a template of which I would make a plastic version of. I wanted my heat shield to be as simple as possible so I designed it to fit over the maf and between the battery and the front of the car.
Once I got the shape and size dialed in (took lots of trimming) I taped it down to the high temp polycarbonate that I was using as my actual shield.
To cut it out, I used a scroll saw (because I'm lazy and I have one lol) but any fine tooth saw should work.
Now that I have the shape cut out and have test fitted it on the car (make sure you check for hood clearance, you don't want to dent your hood!), it was time to trace out the heat reflector.
Test fit
Tracing the reflecting material
Sadly I don't have pictures of sticking the reflector to the shield, it was quite tricky trying to align everything! But eventually it did work. Now you might want to put some sunglasses on for this next part lol. I decided to use DEI gold reflector because its supposed to reflect the most heat....yes and because its gold lol.
And the final finished product on the car....quite bright lol. I haven't measured any temps yet but you can feel a big difference simply by putting your hand on either side. Does it help? Possibly. Is it scientific, not really but I was bored lol hope this helps.


 Jul 6, 2012, 03:05 PM
#5
Newbie
Thread Starter
Join Date: Apr 2010
Location: CA
Posts: 35
Likes: 0
Received 0 Likes
on
0 Posts
Lol you know, someone told me to do that and I have meant to do it every since! I will have to do that!

 Jul 6, 2012, 03:22 PM
#7
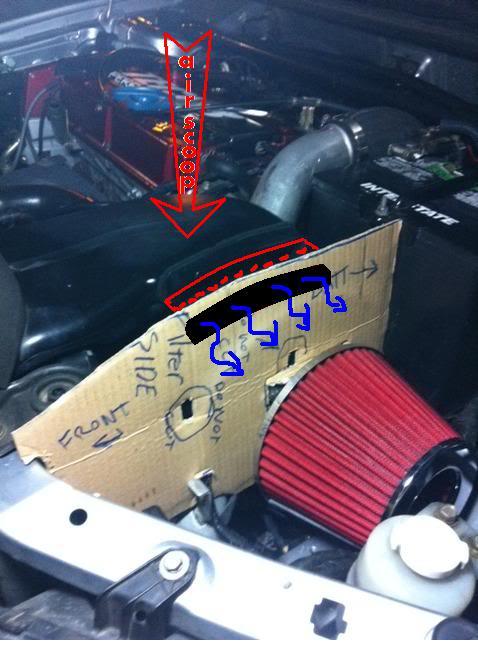
Since this heat shield is tailored to each individual engine bay. You can further improve the design by using the factory airbox scoop or rather ducting fresh air through the customized heat shield.
Last edited by Sil'vr-Boi6; Jul 6, 2012 at 03:35 PM. Reason: grammatical errors
Trending Topics
Jul 6, 2012, 05:49 PM
#8
Newbie
Thread Starter
Join Date: Apr 2010
Location: CA
Posts: 35
Likes: 0
Received 0 Likes
on
0 Posts
That is very cleaver, I thought about doing something similar since there is very little airflow to the filter now. Having seen the pic, I may do that. Lol at this rate with all the good EvoM suggestions, this thread will need a part 2!
 Jul 9, 2012, 01:21 PM
#10
Newbie
Thread Starter
Join Date: Apr 2010
Location: CA
Posts: 35
Likes: 0
Received 0 Likes
on
0 Posts
Jul 15, 2012, 11:46 AM
#11
Newbie

I really like this idea. I have been thinking about attempting something similar after first reading this post . What kind of high temp polymer did you use? and where did you purchase it from?
I like the idea of using the factory air duct. Would the ram air effect be reason for a re-tune? I am leaning towards no, but am unsure.
Awesome write up!
I like the idea of using the factory air duct. Would the ram air effect be reason for a re-tune? I am leaning towards no, but am unsure.
Awesome write up!

 Jul 17, 2012, 12:30 PM
#15
Newbie
Thread Starter
Join Date: Apr 2010
Location: CA
Posts: 35
Likes: 0
Received 0 Likes
on
0 Posts
I really like this idea. I have been thinking about attempting something similar after first reading this post . What kind of high temp polymer did you use? and where did you purchase it from?
I like the idea of using the factory air duct. Would the ram air effect be reason for a re-tune? I am leaning towards no, but am unsure.
Awesome write up!
I like the idea of using the factory air duct. Would the ram air effect be reason for a re-tune? I am leaning towards no, but am unsure.
Awesome write up!
For the actual shield itself I went to Tap Plastics and asked for the highest temp plastic that was 1/8th inch thick. Its been awhile now so I don't completely remember the name of it but I think it was something along the lines of a high temp poly carbonate.
For the gold reflector I used DEI gold. I thiiiiink I bought this size but it all depends on how you make yours. I had a bit left over to tart up the rest of the engine bay

I personally don't think a retune would be needed since you more than likely tuned with that on anyway. Plus its just increasing available air to the filter area and not directly into the filter like a true ram air system.