DIY plywood front splitter for Evo 8/9
 Sep 15, 2011, 09:25 AM
#1
DIY plywood front splitter for Evo 8/9
WHY: to increase downforce/grip on the front end of the car, at track speeds (70+ MPH), on a budget
TOOLS: jigsaw, drill, drill bits, 4'-long level or straightedge, tape measure, tin snips, bench grinder, Sharpie marker, basic hand tools
MATERIALS: V1: 15/32" 4-ply sanded fir plywood (4' x 8' sheet), 1" wide, 12-gauge steel plate, 18" 18-gauge car audio backstrap (4), Minwax Helmsman Spar Urethane (32 oz. can), black spray paint, assorted bolts, speed nuts, and hardware
V2: assorted hardware from McMaster-Carr, 4' x 8" sheet of 1/16" (.060") ABS plastic, #8 black oxide screws, #8 speed clips
$$$: V1: $75 or less; V2: $160–176
DOES IT WORK: yes (general explanation of how splitters work here)
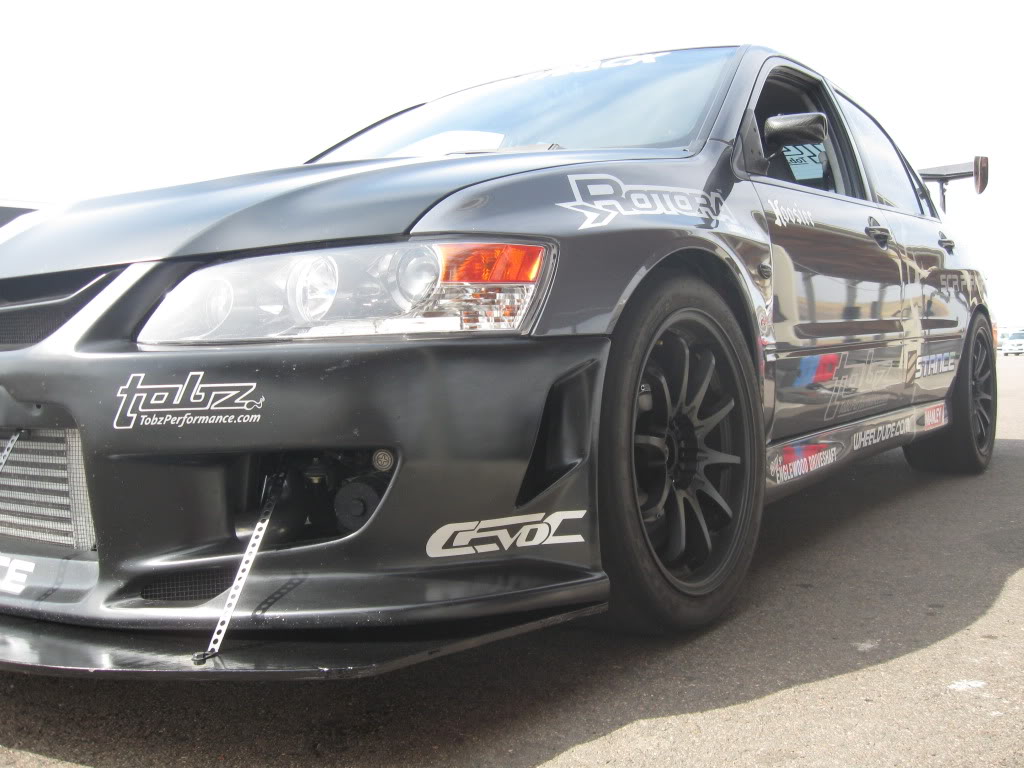
So, for a long time I've been planning on adding some sort of front splitter to the Evo, in the hopes that it would help cut down lap times at the track, and balance out the downforce I'm assuming I'm getting from the APR GTC-300 rear wing. I finally got around to my DIY splitter project in late August.
Of course, I'd love to make one out of CF, or at least a lightweight aluminum/foam composite like what SCR Performance in Loveland, CO uses on their track cars, and I've talked extensively to a local plastics company about using a sheet of 1/2"-thick foamed ABS. But I figured it would be prudent to do a "Version 1.0" prototype out of plywood, just to get the shape/details worked out, and to see if it even seemed to have the desired effect out at the track.
It was my assumption that making a splitter out of plywood would be next to free, but of course it turned out to be much more expensive than anticipated. Still, total cost was around $75—pocket change compared to what a custom carbon-fiber splitter of the same size would have been.
The overall shape of this splitter is designed to be in compliance with SCCA's rules for SM autocross—no more than 6" outward from any part of the leading edge of the bumper cover (I checked this on both the OEM Evo9 bumper cover, and the fiberglass C-West replica bumper cover), and no wider than the bumper cover:
Street Modified Category, Allowed Modifications (16.1.M):
M. Front splitters are allowed and shall be installed parallel to the ground (within +/-3 degrees fore to aft) and may extend a maximum of 6 inches from the front bodywork/fascia as viewed from above. Splitters may not extend rearward past the centerline of the front wheels. No portion of the splitter may extend beyond the widest part of the front bumper/fascia as viewed from above.
Plus, it extends as far back as the rearward edges of the sides of the bumper cover. This is to help ensure maximum airflow through the intercooler and radiator.
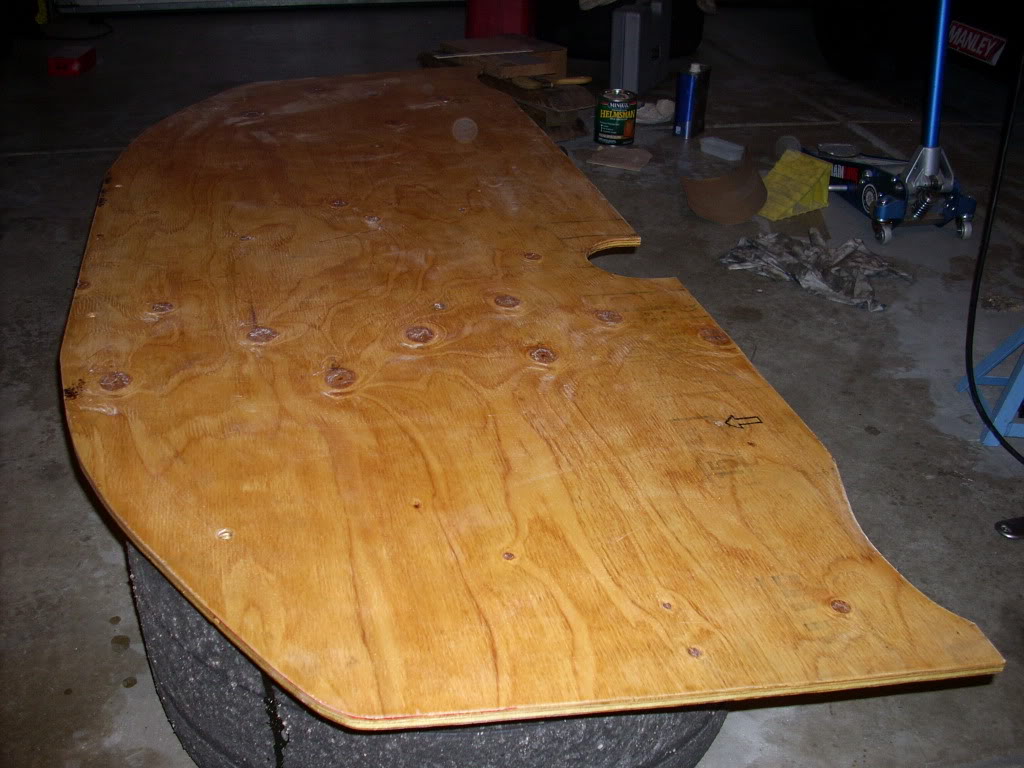
A pic of the cardboard tracing, and the plywood, before I got jiggy with the jig-saw:
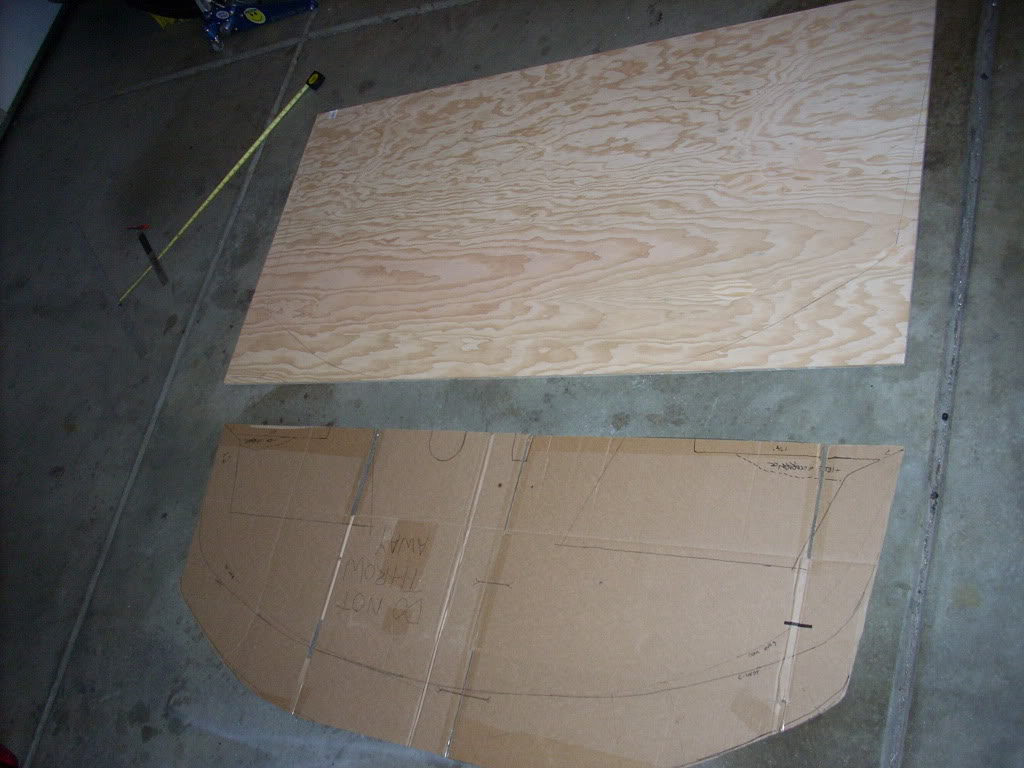
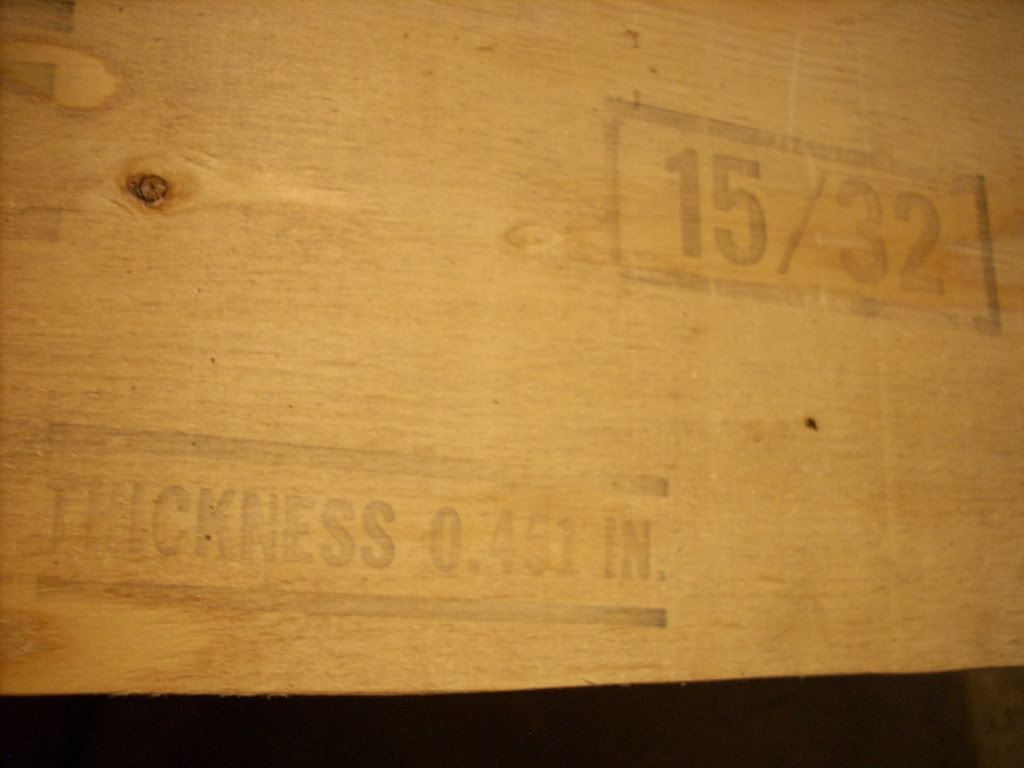
Speaking of the plywood: after some Googling (resulting in no definitive, authoritative info on the ideal material for building front splitters), I decided to go with 15/32" thick, 4-ply sanded fir plywood (model #577278) courtesy of the Home Depot, at the much-higher-than-anticipated cost of $31.22 per 4' x 8' sheet (and no, it's not possible to make more than one Evo splitter from that sheet of wood):
http://www.homedepot.com/h_d1/N-5yc1...1&ddkey=Search
I'd done a little basic research on plywood, and found out that "pressure-treated" plywood was relatively inexpensive, but the chemicals that it's injected with is to protect it against rotting in outdoor environments—by no means does "pressure treated" = "waterproof."
Marine-grade plywood was at least "water resistant," but it was significantly more expensive, plus Home Depot didn't carry it in the 15/32" or 1/2" thickness that I wanted, so I said "F**k it, I'll just use this nice-lookin' sanded fir stuff and waterproof it myself."
So, once I got the basic outer shape carved out, the next task was to figure out and create the mounting brackets. Aside from the aforementioned waterproofing, which I'll describe later, this was the most time-consuming part of the project.
I wanted to attach the splitter only to the Evo's structure—not the bumper cover—for two reasons: if/when the splitter got ripped off at speed, I wanted the greatest chance of the fiberglass bumper cover surviving the incident undamaged; and because attaching the splitter directly to metal would assumedly be stronger and better transmit any marginal downforce created by the splitter's actual surface (as opposed to the downforce created by the splitter diverting airflow up and over the entire front of the car, which is how the main aerodynamic benefit of a properly designed splitter is generated) into the chassis/suspension/tires, rather than just flexing the bodywork.
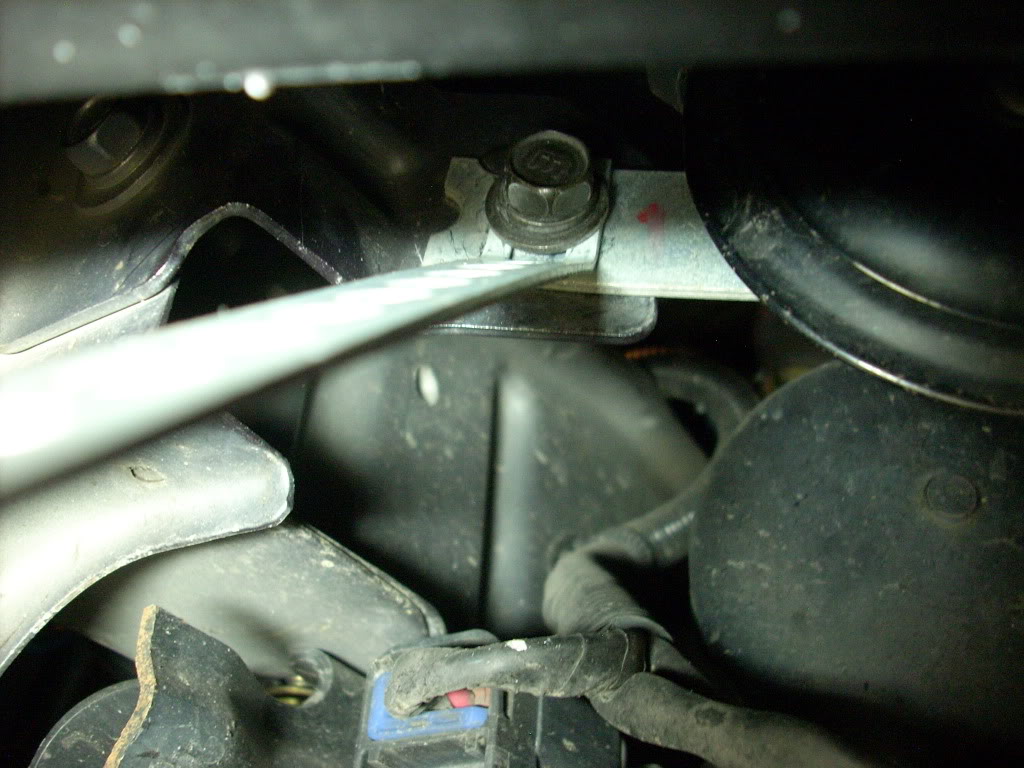
I decided to do this by using two existing threaded bolt holes in the radiator support beam across the bottom of the Evo, which are used for securing the ACD (Active Center Diff) fluid line. This beam is almost exactly 3 3/4" higher up than where the splitter would attach across the bottom plane of the bumper cover, though (determined with a 4' long Stanley level and a tape measure), so I needed to build some brackets to bring these to mounting points down.
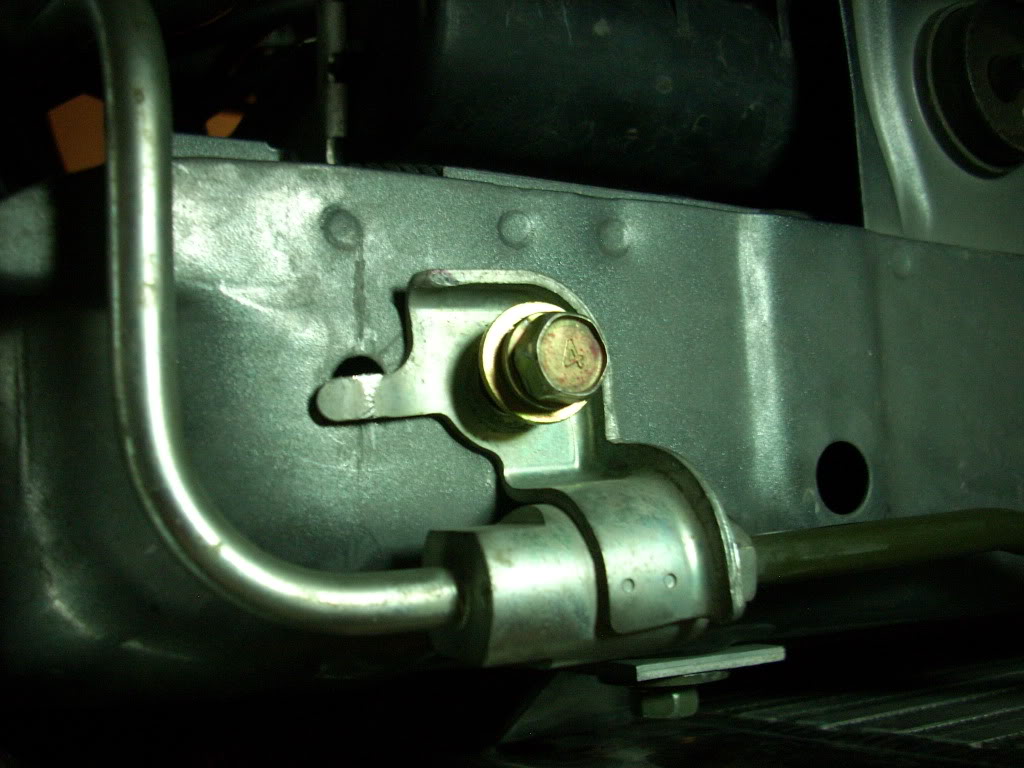
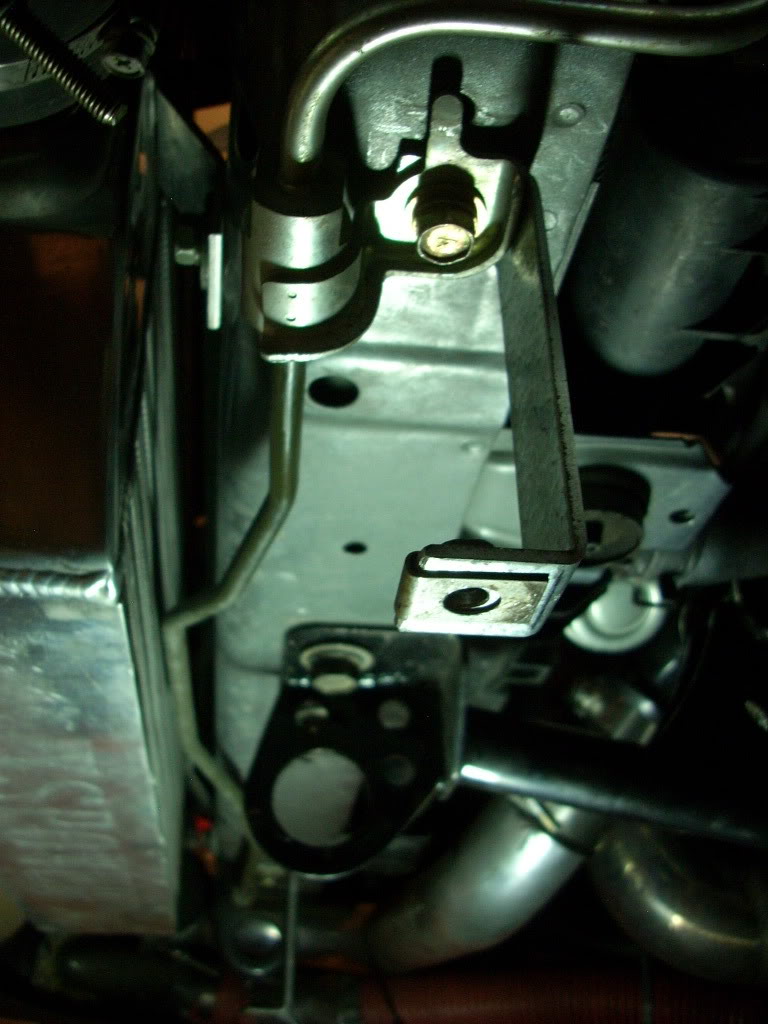
Here's the OEM mounting point on the driver's side (I've smashed the locating tab on the ACD line bracket flat, a "mod" done for reasons unrelated to this project—it allows a little more clearance between the ACD line and my intercooler piping):
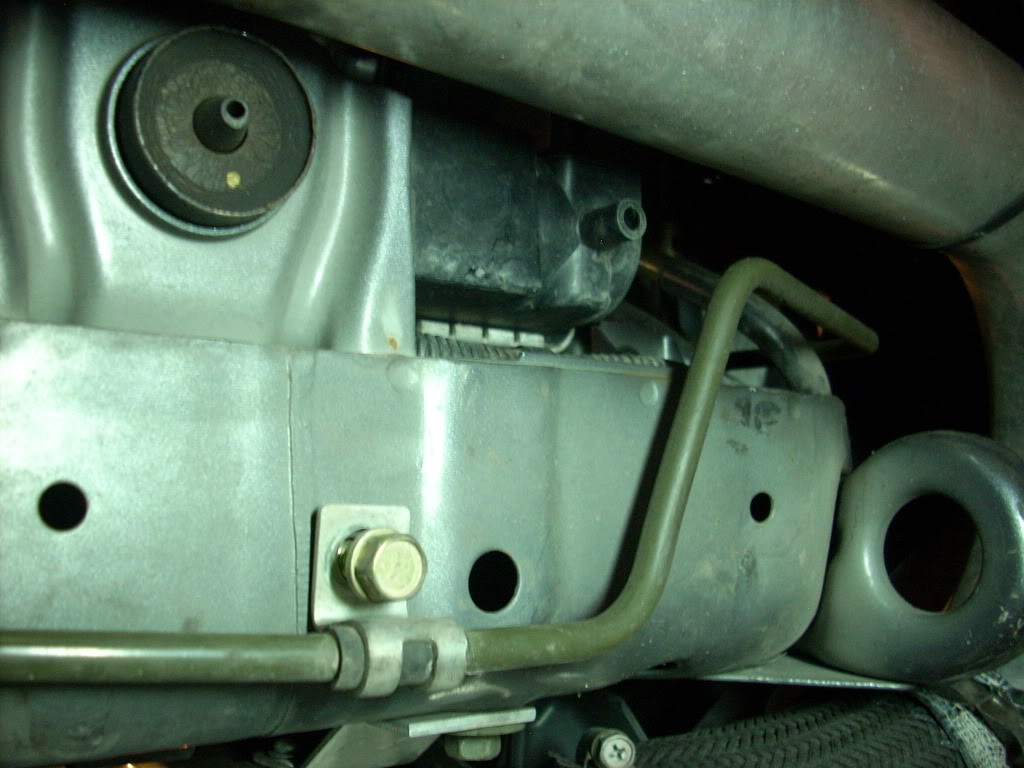
And the passenger side:
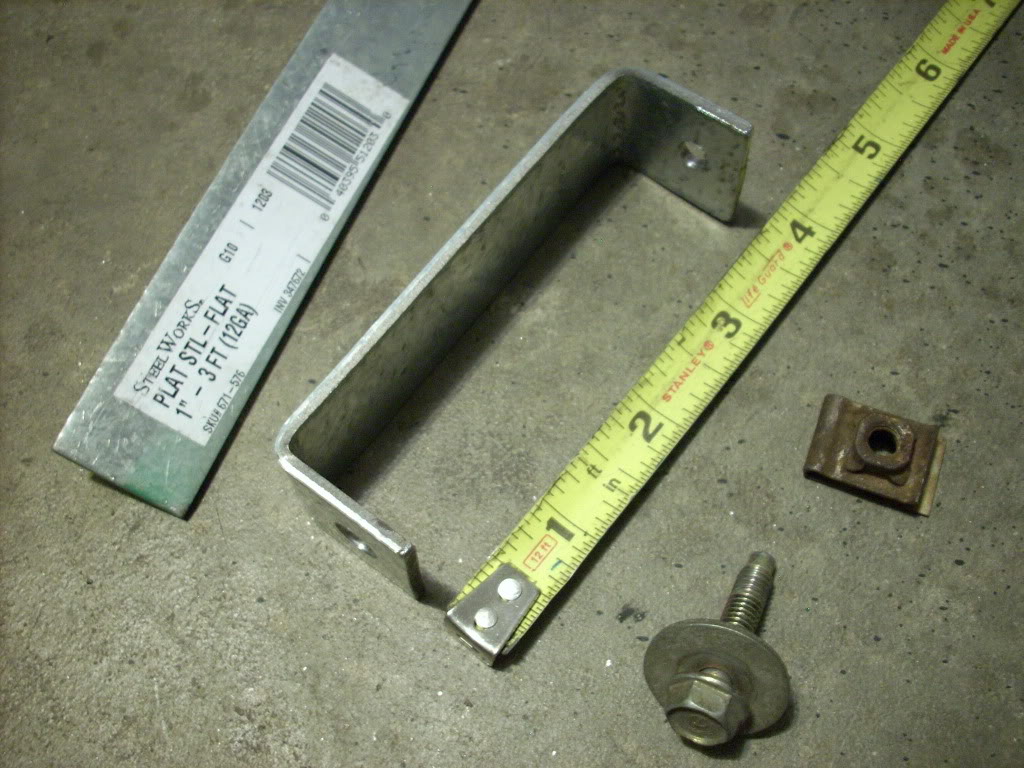
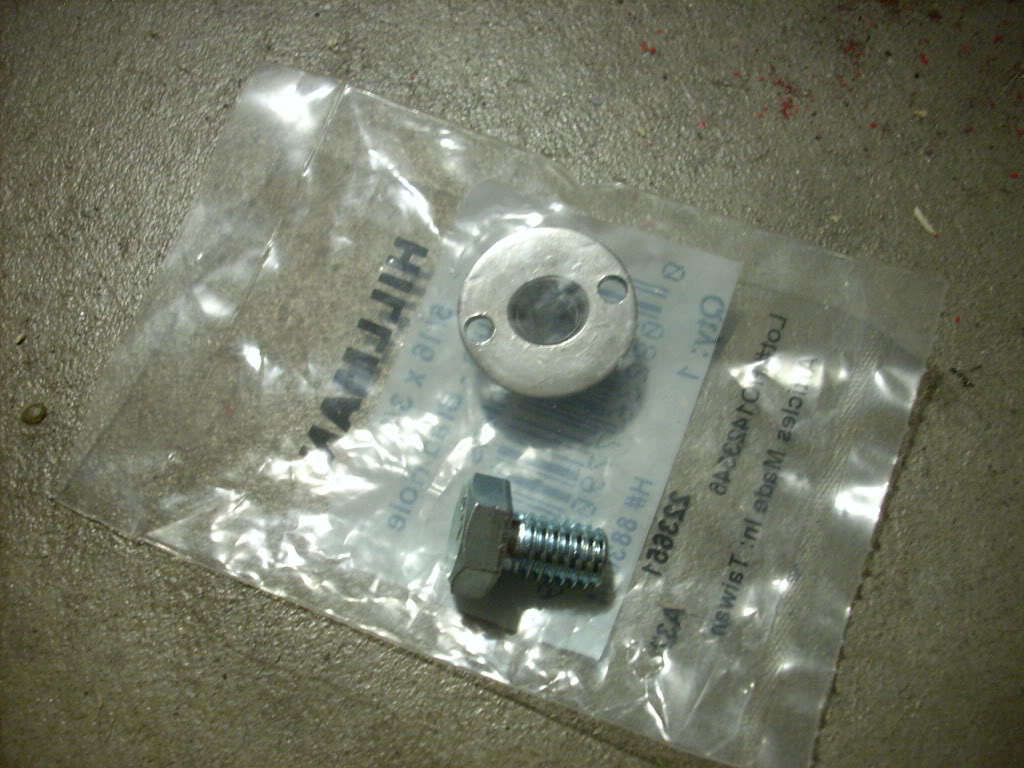
Here's the 1" wide, plate steel material I used to make the brackets, which I already had lying around the garage (available at both Lowes and Home Depot, IIRC); what the completed, double-ended 90-degree bend brackets look like; and the OEM-style, metric speed clip I used as the receptacle for the 6mm x 1.0 thread OEM mounting bolts that will go through the plywood splitter:
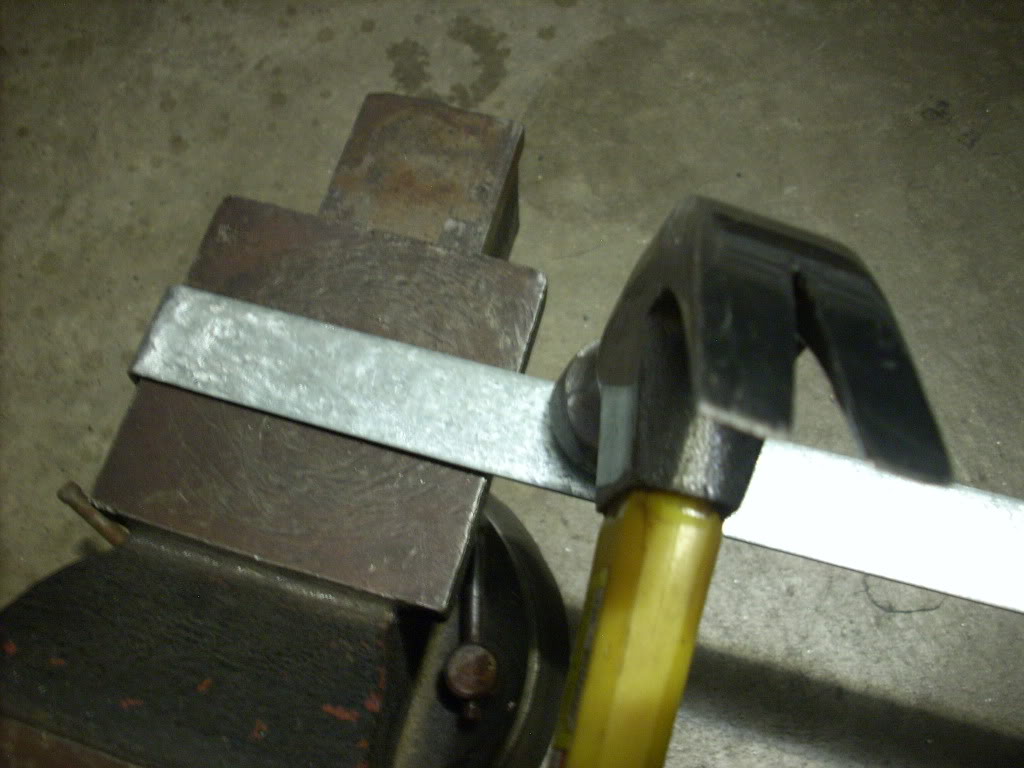
Amazingly, the flat, anvil portion of my Harbor Freight bench vise was EXACTLY the right size to bend the legs of the bracket over, resulting in two perfectly symmetrical brackets, in terms of their height, anyway:
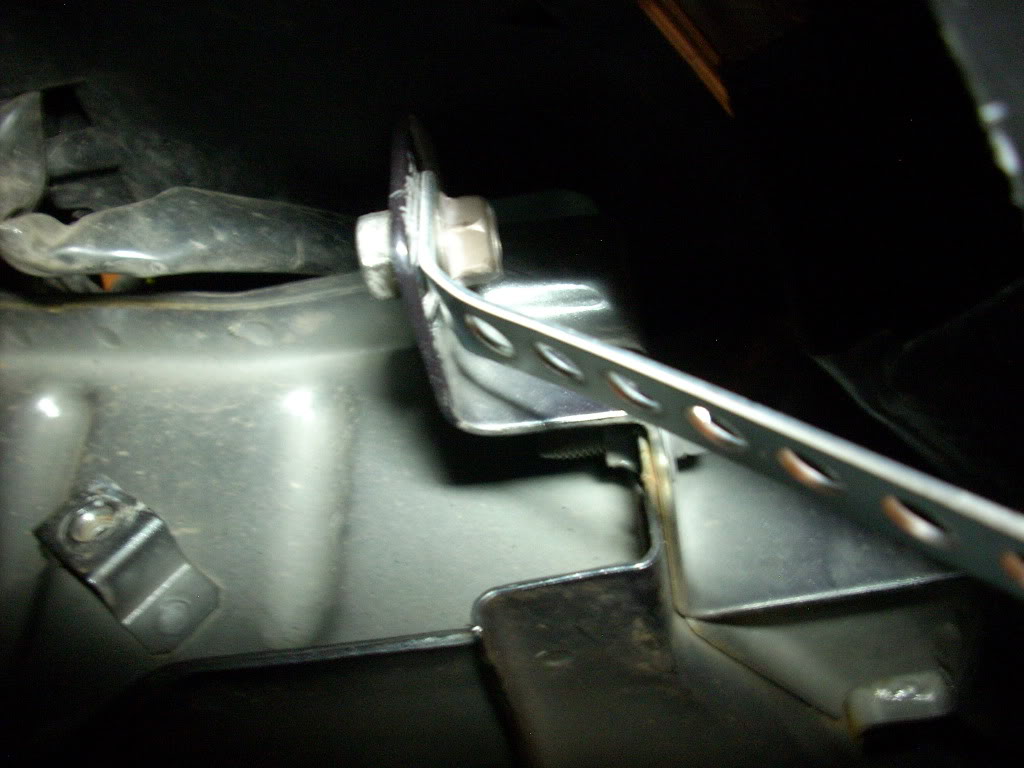
The completed driver's side bracket bolted under the bumper beam:
To secure the outer edges of the splitter, towards the back edge, I opted to tie into the OEM brackets for the oil cooler (passenger side) and the ACD pump (driver's side). Not as strong as attaching to the unibody structure itself, but these are the lowest and easiest to work with attachment points out towards the sides of the car.
Here's the bracket for the oil cooler bracket... essentially the same as the middle two, same 6mm captured-washer OEM bolt and tinnerman clip, but with only a 90-degree bend towards the plywood:
I actually didn't take pictures of the driver's side mounting, but there's no bracket on that side... just a 4"-long 8mm diameter metric bolt that takes the place of the about 1"-long OEM outer bolt in the bottom of the ACD bracket, with a large washer to keep the bolthead from ripping through the plywood.
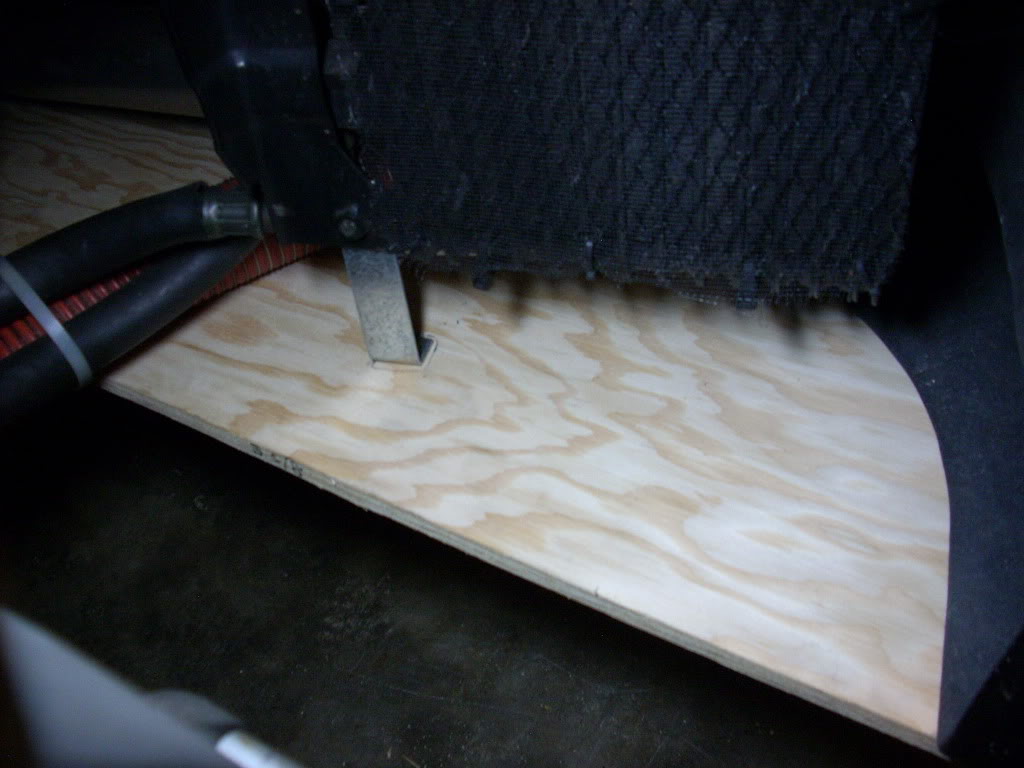
Once the holes were drilled in right places in the plywood to accommodate the mounting bolts (a difficult process that required repeated measuring, a Sharpie marker, and a bit of luck), and I successfully testfitted the splitter to the car with these four rear mounting points, I moved on to the next step: carving out openings in the rearmost edge of the splitter for the downpipe and the front tires.
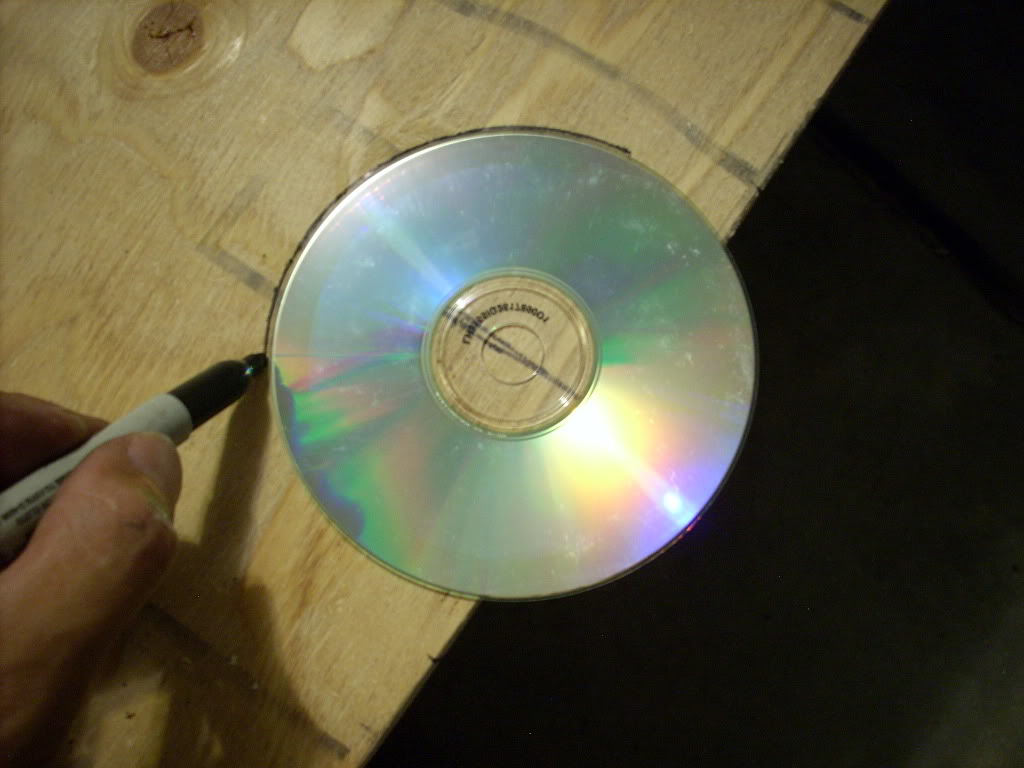
I wanted to make sure there was plenty of airgap around the downpipe, even though I kinda doubt if any more than 3/8" was really necessary. After determining the center point of where the downpipe sat in relation to the splitter, I used a CD to trace a nice even circle:
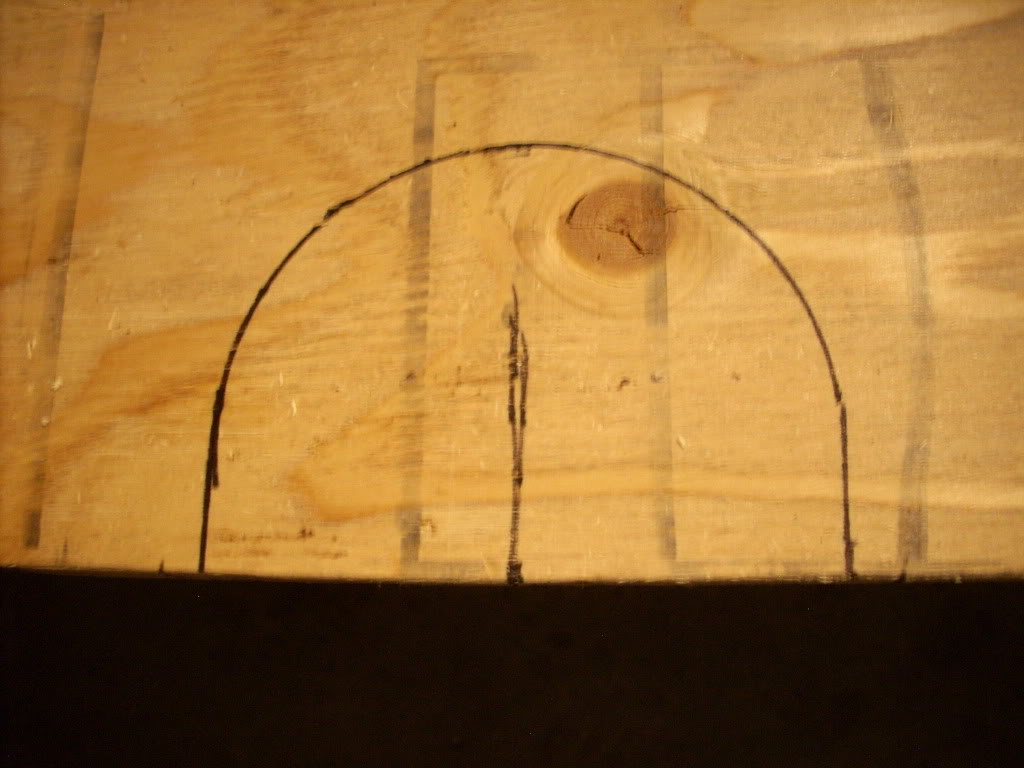
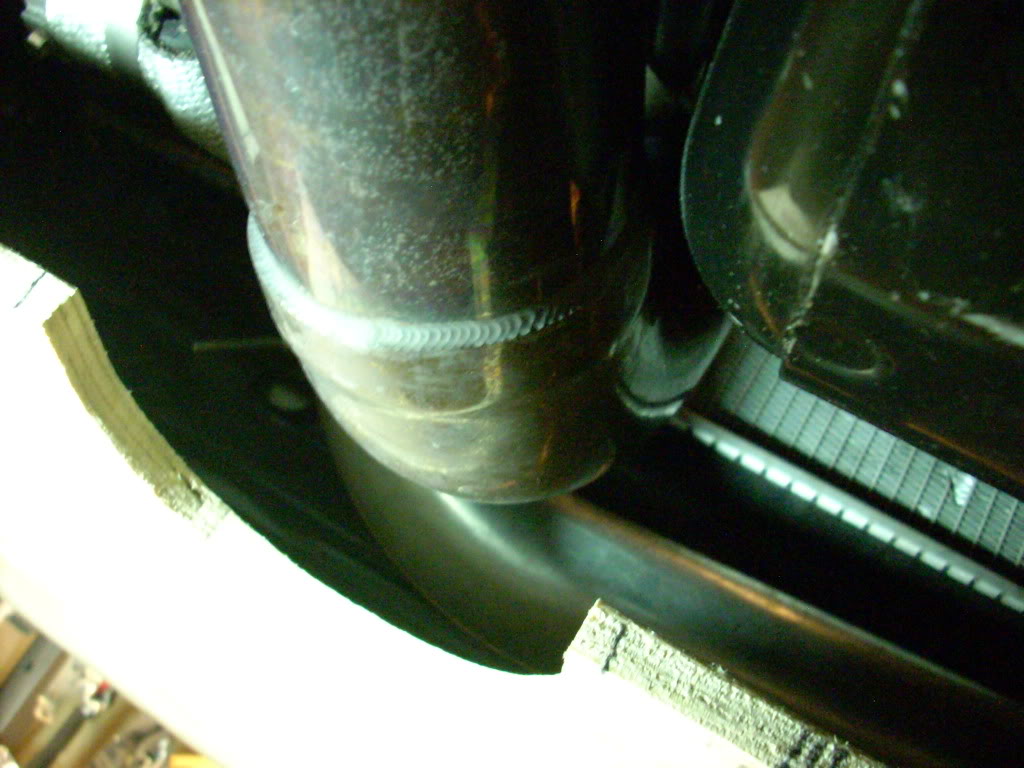
Tons of room:

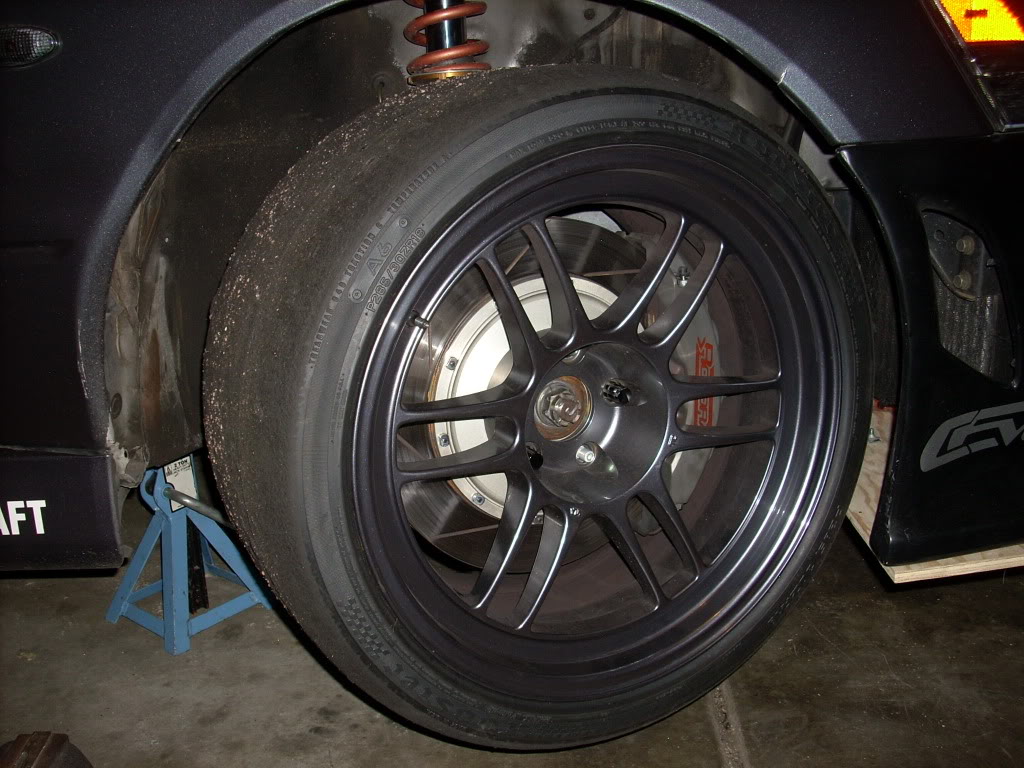
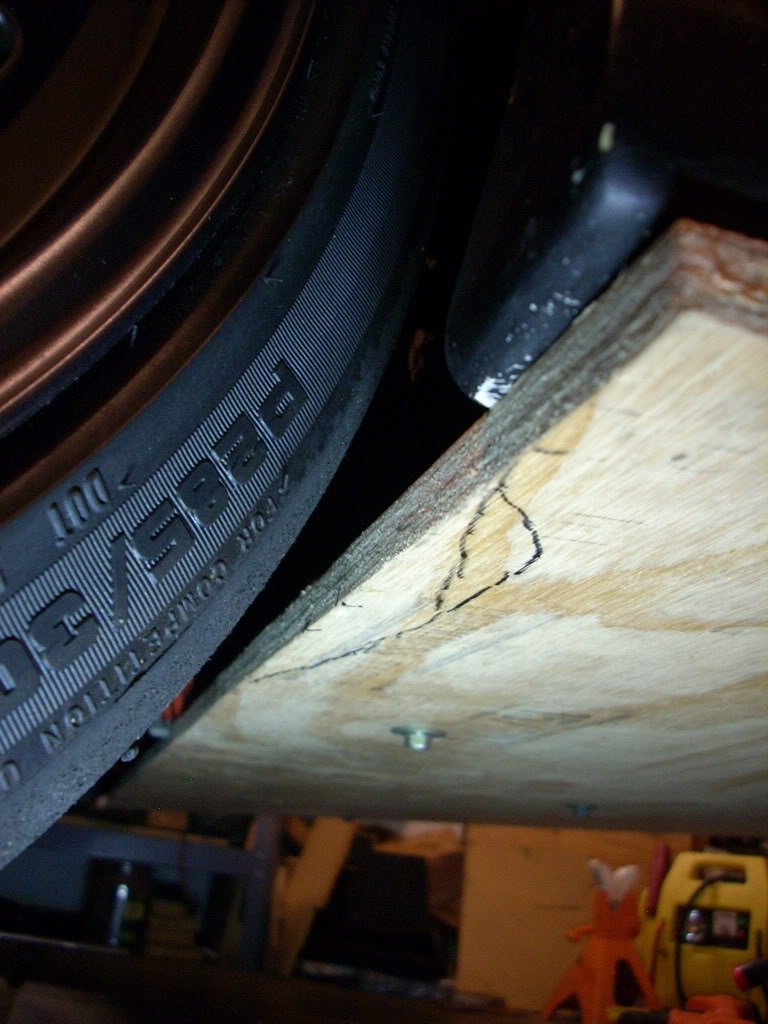
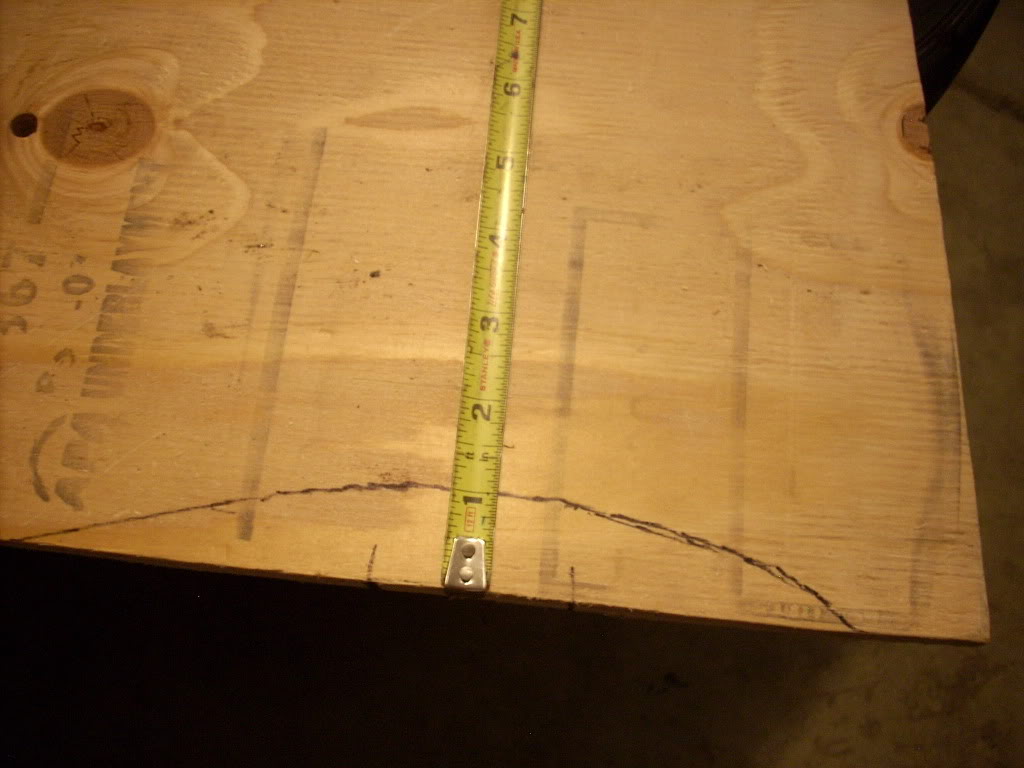
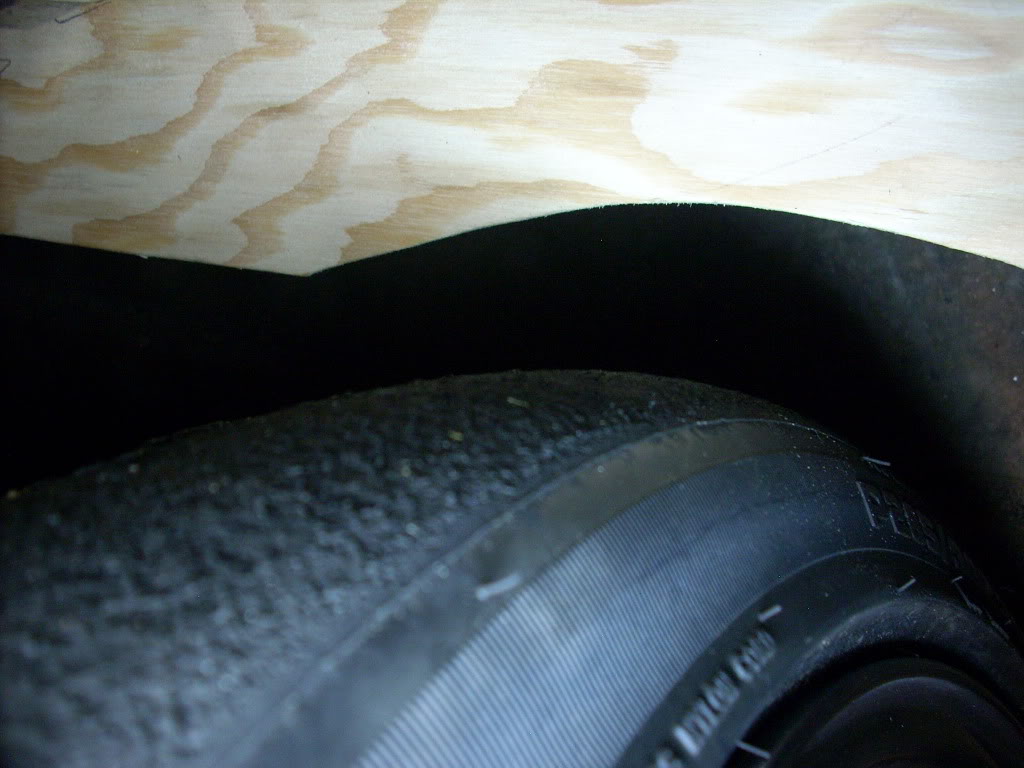
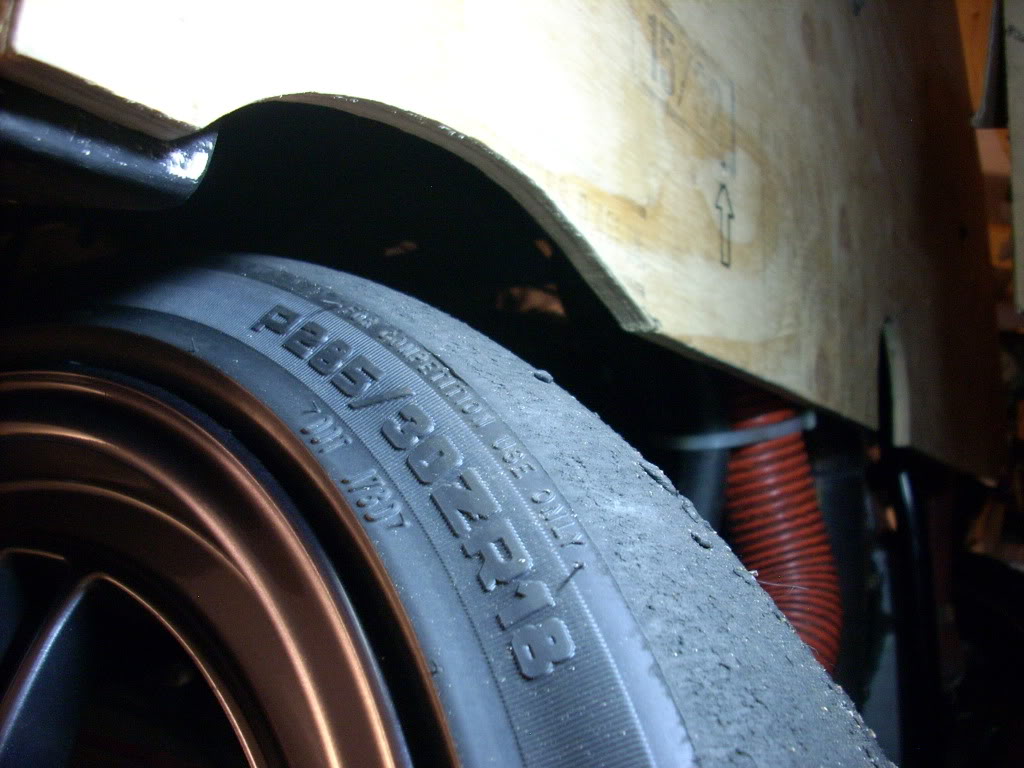
On to tire clearance. I used both my 275/35-18 Nitto NT01 track tires and my 285/30-18 Hoosier A6 autocross wheels to establish where (and how much) I need to carve out. It wasn't much; about 1" at the most, but the tires definitely could have contacted under actual driving conditions w/o making a little room:
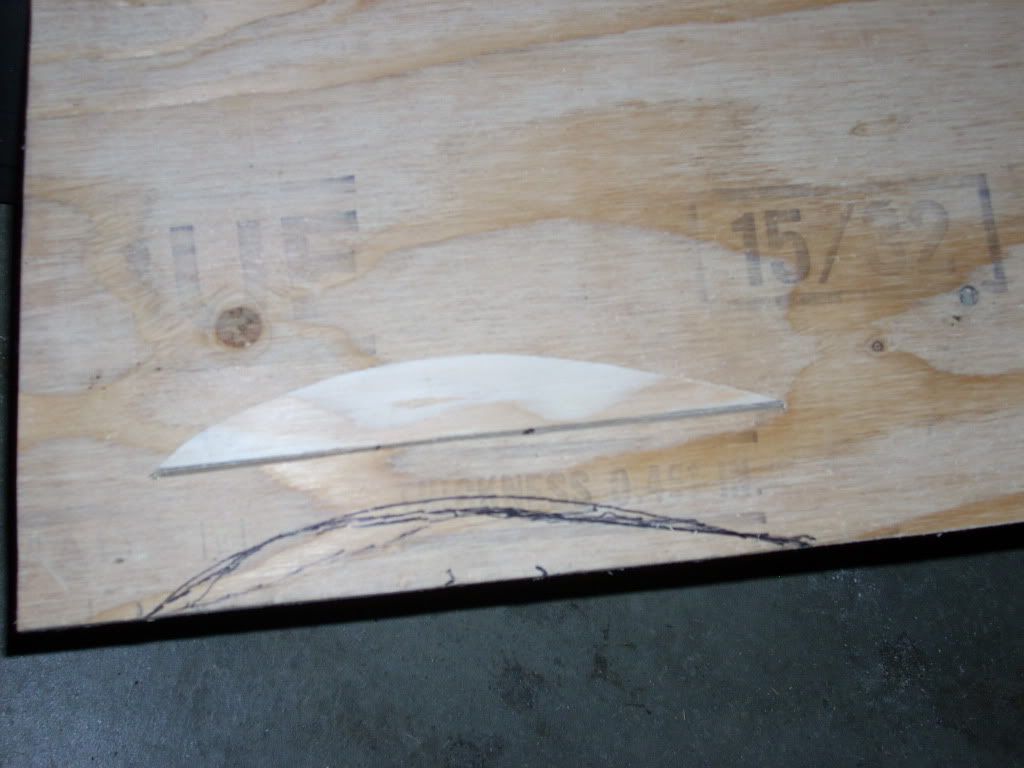
Using the first cutout section to trace the cut line for the other side:
Much better!
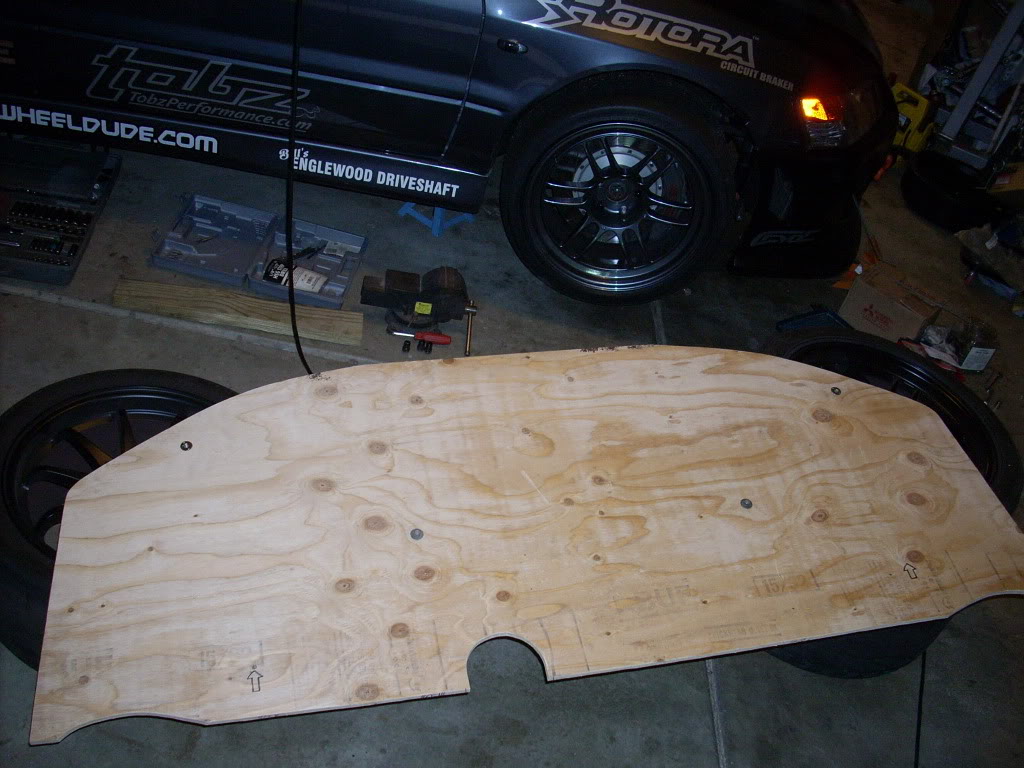
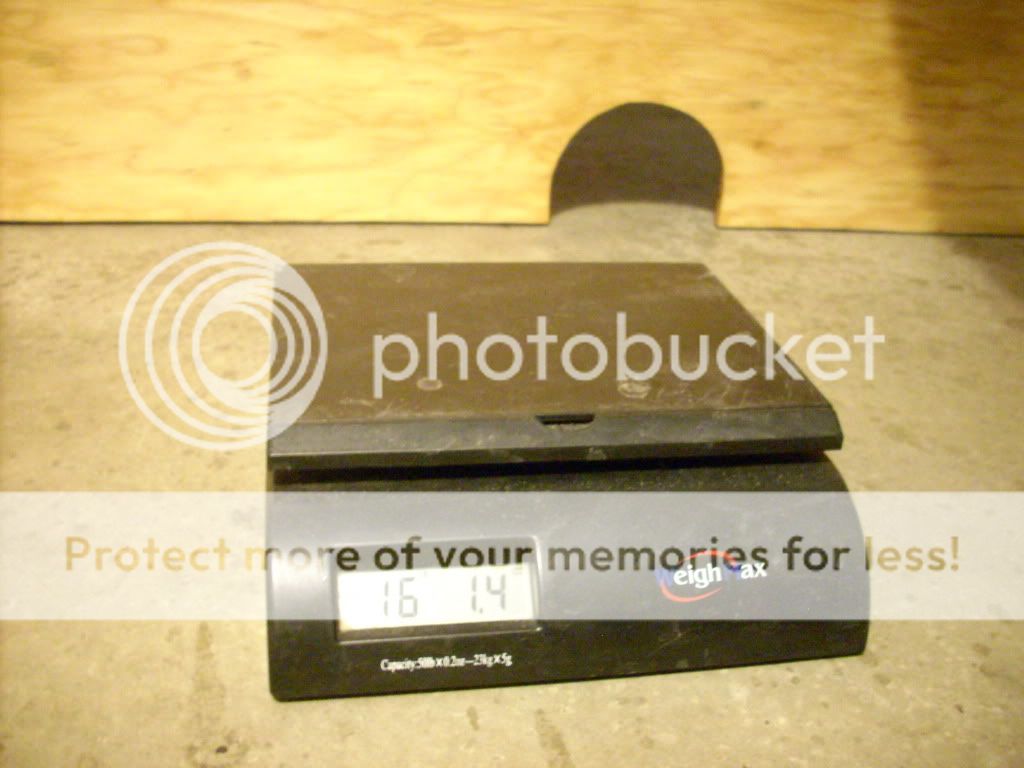
The splitter after cutting out the downpipe and tire clearance:
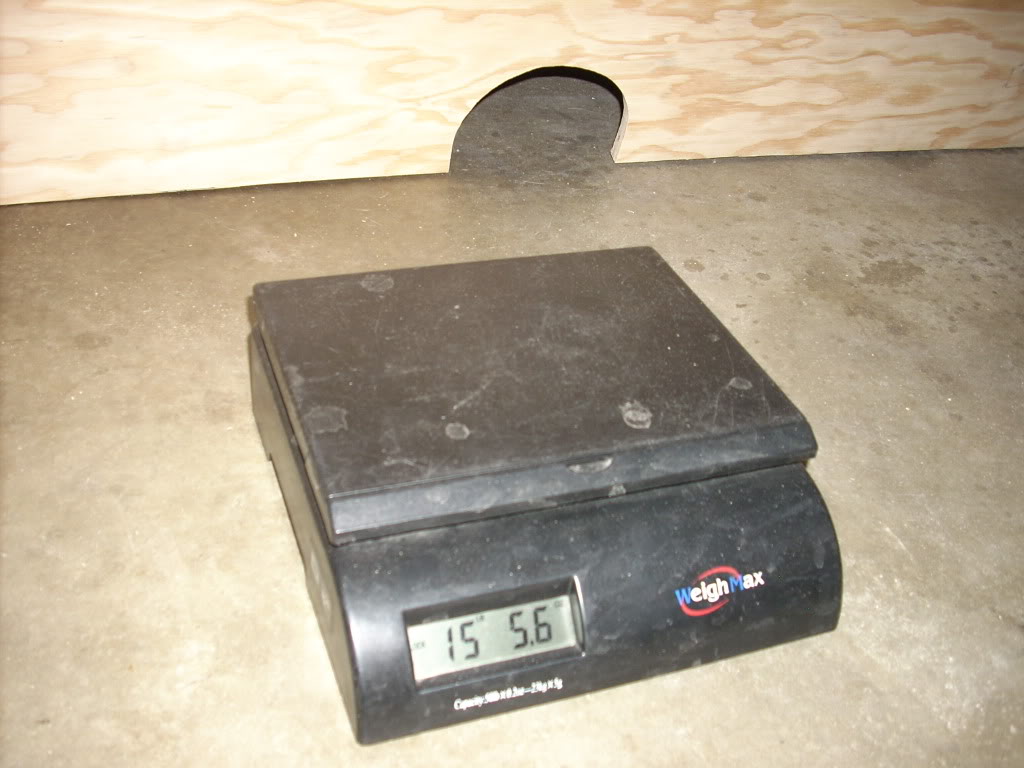
And how much it weighed, naked... 15.35 lb. (that lock/display hold feature on the Weighmax digital shipping scale is really handy for weighing stuff like this):
Next step: creating the front supports, which not only support the splitter surface against the airflow that will be attempting to flex it downwards, but also keep the splitter from vibrating or oscillating at speed, which will negatively affect the downforce.
Normally, people would use cool looking, application-specific threaded turnbuckles, such as these from APR:
http://aprperformance.com/index.php?...d=83&Itemid=44
Or these Longacre ones:
http://www.hrpworld.com/index.cfm?fo...action=product
But they're expensive, and they top out at 10.75" long... I definitely needed more length than that to reach up to the bottom of the bumper crash beam. The supports for the outer portions of the splitter would need to be even longer.
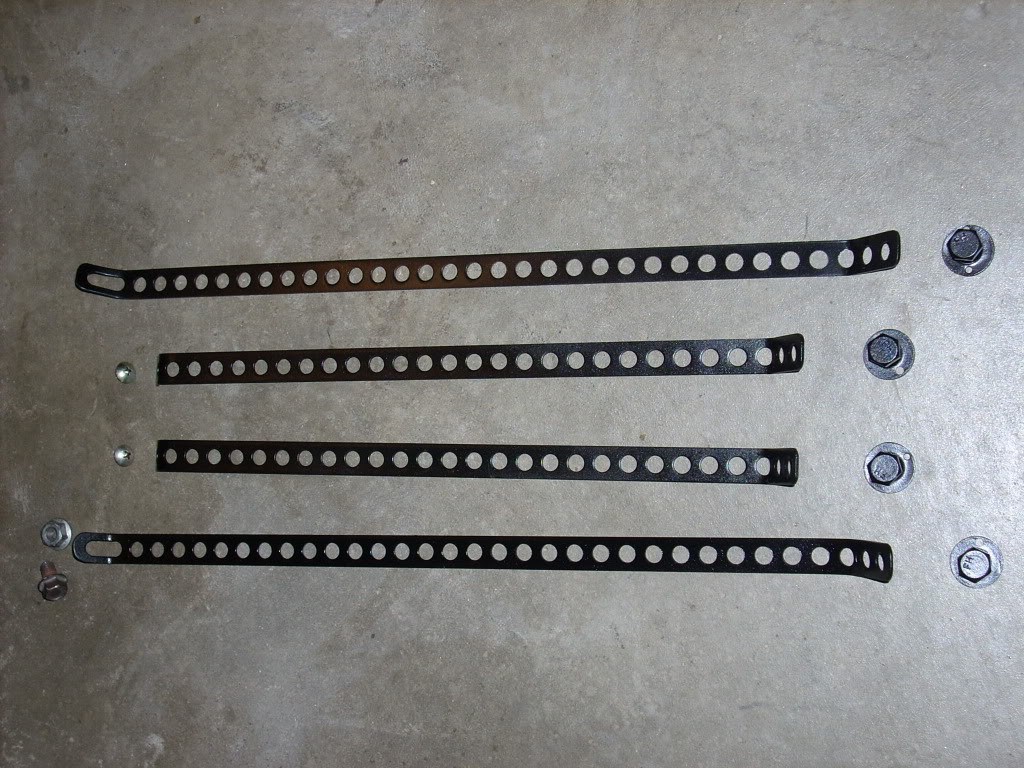
So I went with something that I've used hundreds of times before for other DIY projects: car audio backstrap. Yup, it looks kinda ghetto, and it's just carbon steel, so you have to paint it if you don't want it to immediately start rusting; but it's long enough (18"), it's easy to work with, it's more than strong enough for the application, and it's dirt cheap at about a dollar each:
http://www.dlcparts.com/metal-back-strap-p-708.html
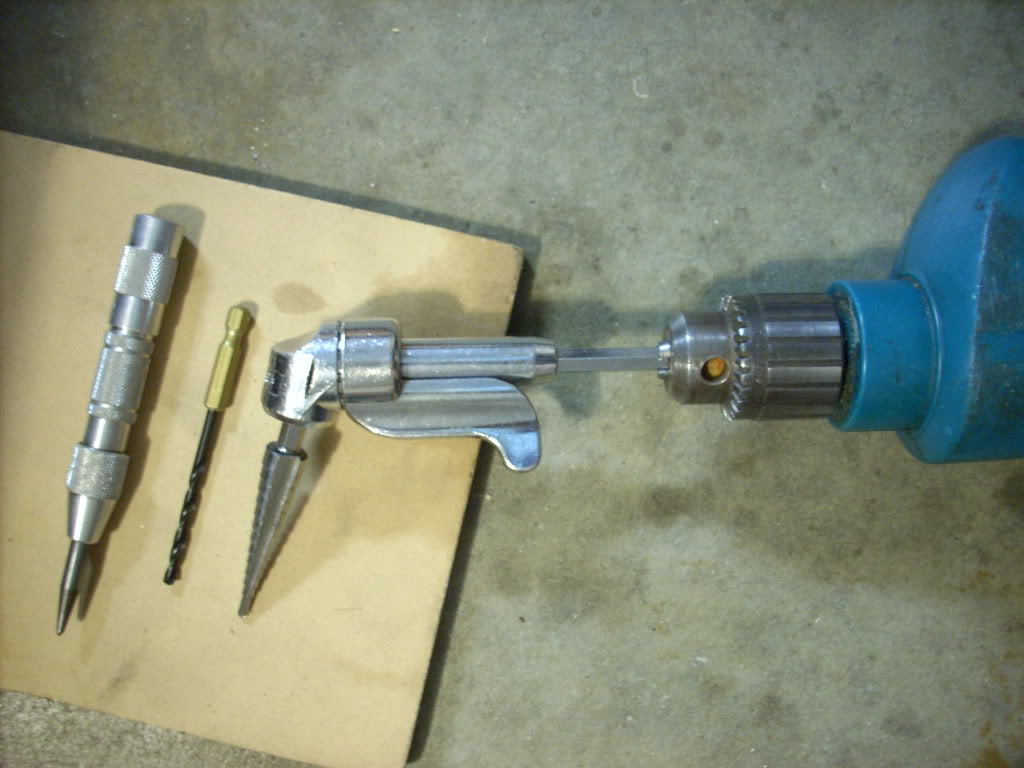
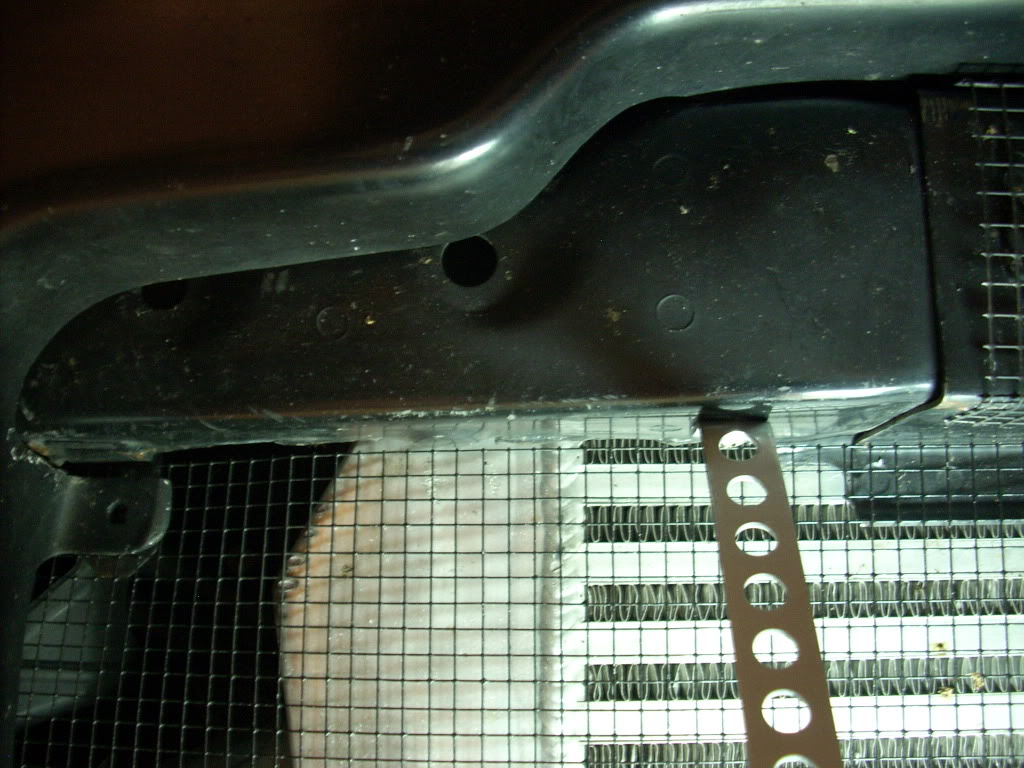
Here are the tools I used to drill the holes in the bottom of the bumper crash beam for the two center support straps (without removing it from the car):
Attachment point to the crash beam... just a beefy self-tapping Phillips head screw:
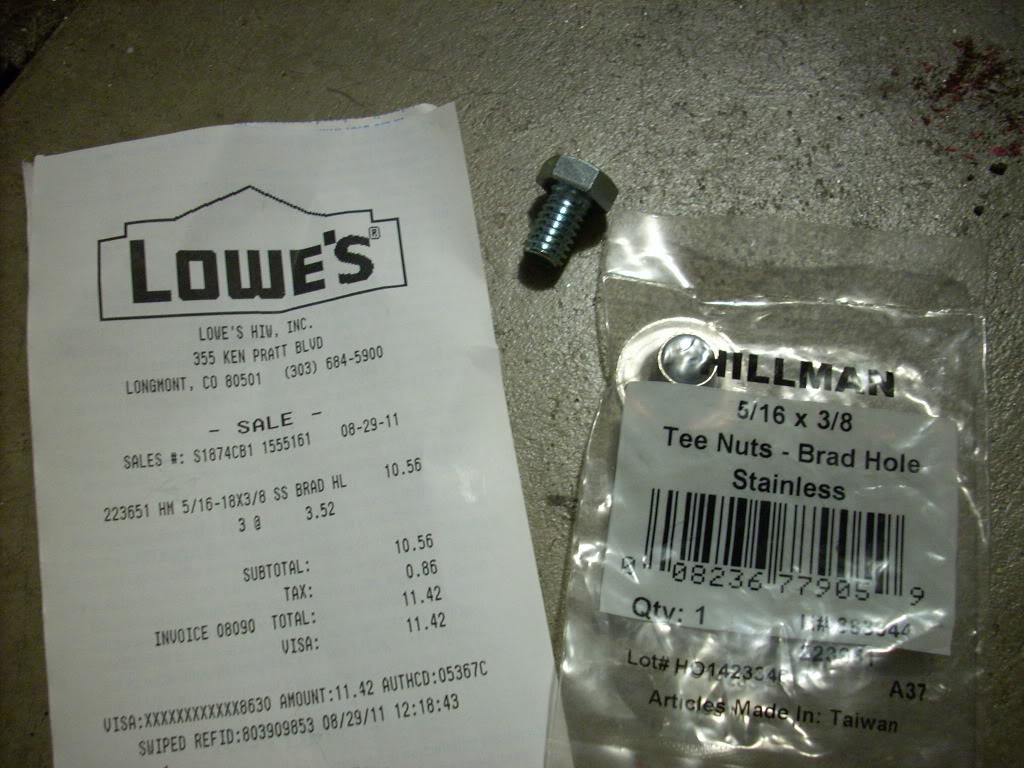
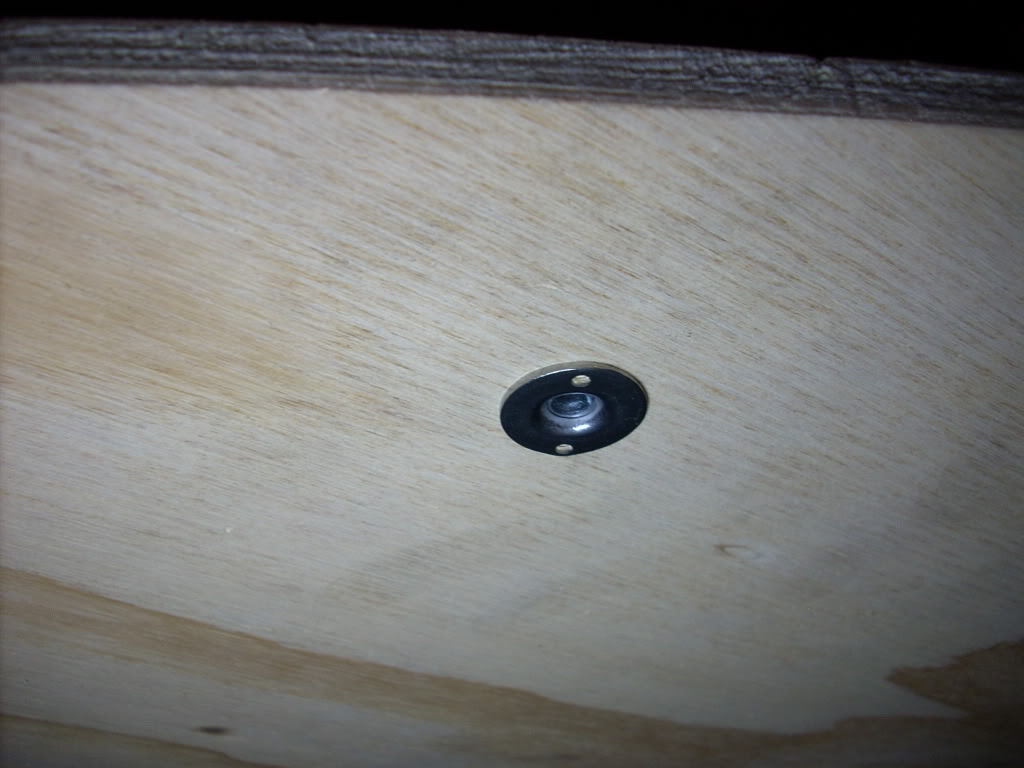
The "tee nuts" that the SAE, 1/2" long bolts thread into are pretty expensive at $3.52 a piece (in my town, only available at Lowes; Home Depot didn't have 'em):
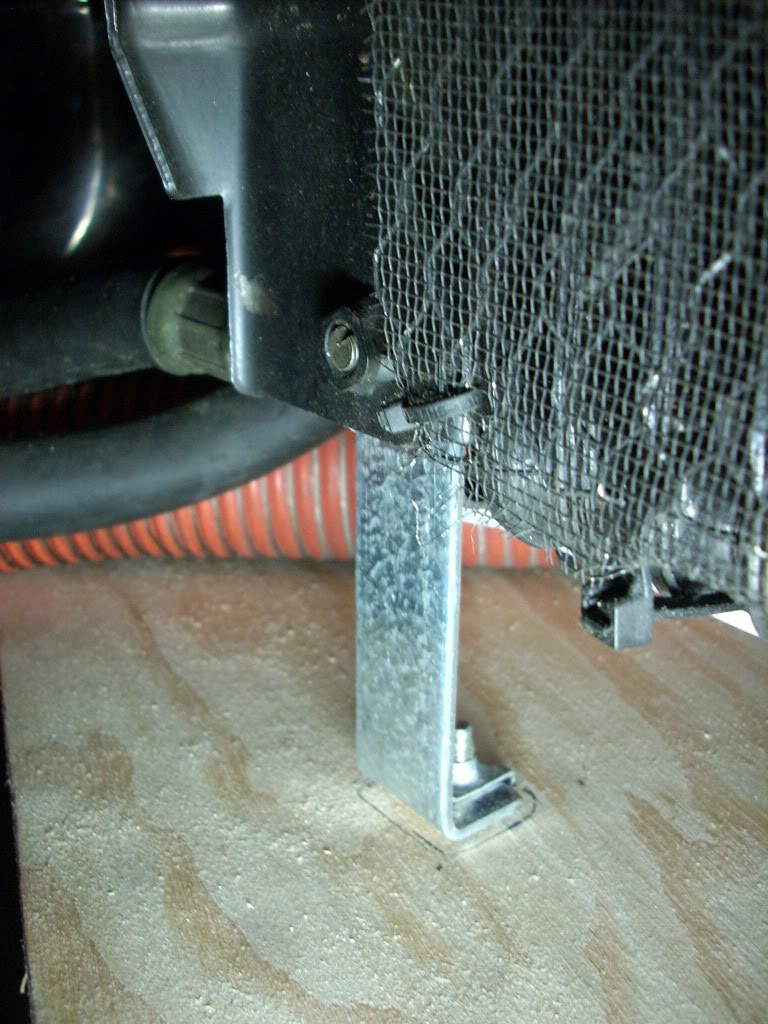
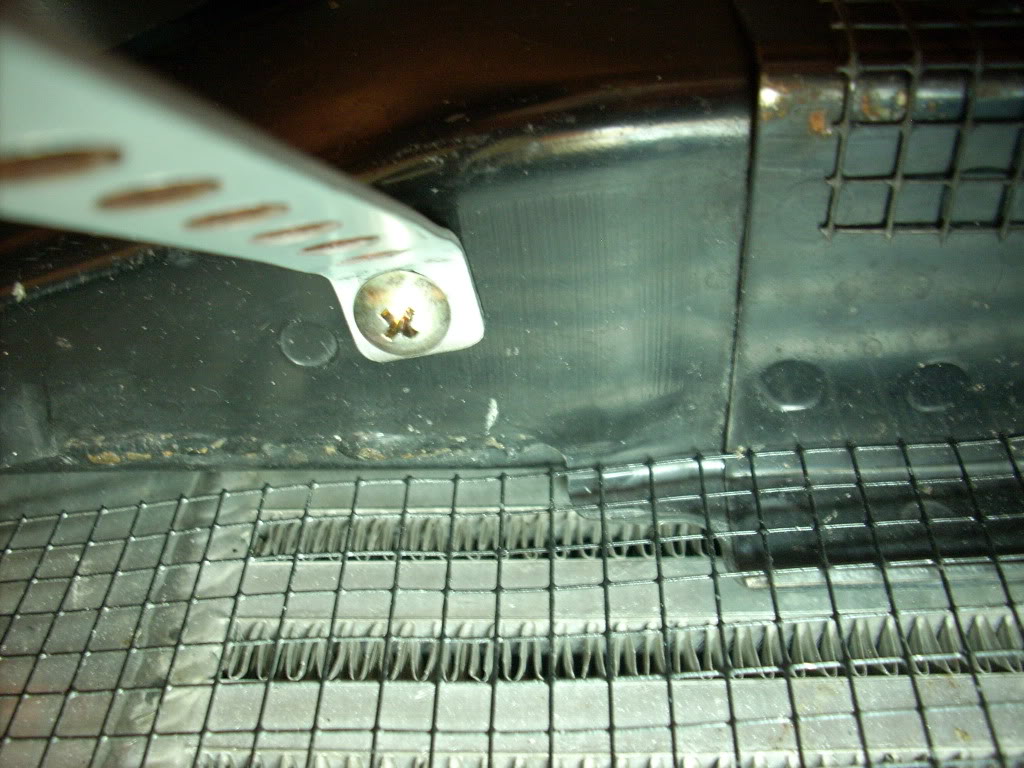
- but they're ideal for keeping any metal hardware protruding out of the bottom leading edge of the splitter to a bare minimum... up front is where it's most likely to scrape the ground.
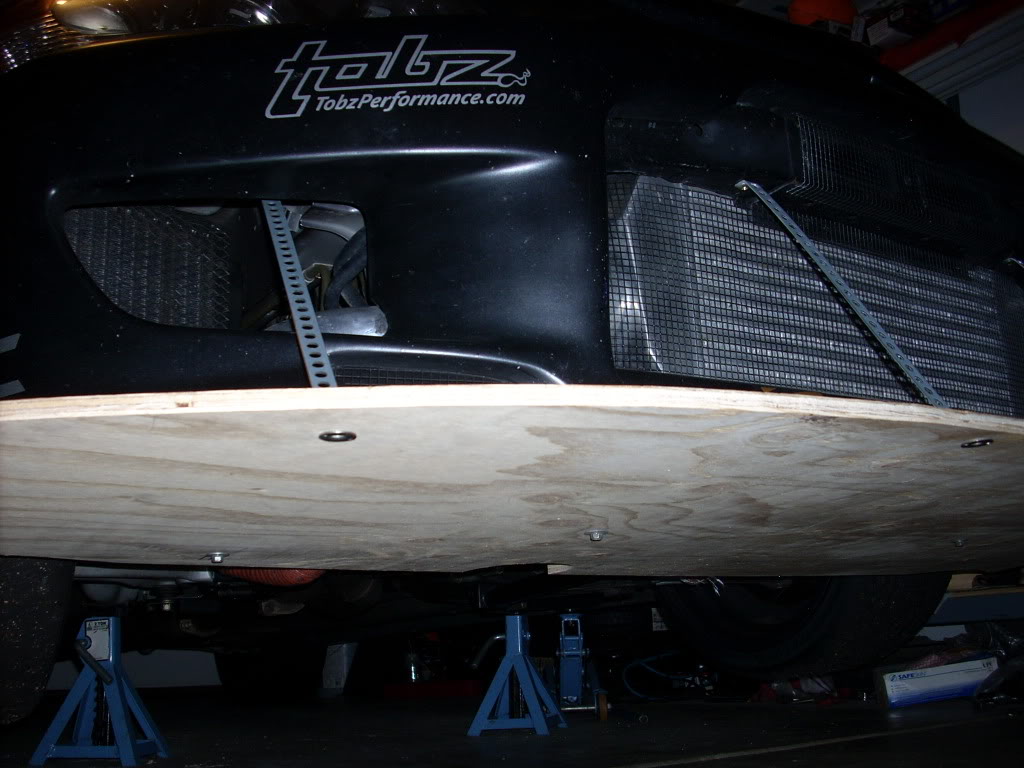
See, nearly flush (note the bolt heads in the back, which stick out substantially):
The mounting point on the passenger side (it's an unthreaded hole, so I put a short bolt/nut through it):
On the driver's side, I used the bolt that holds the OEM horn bracket (it's a 12mm head):
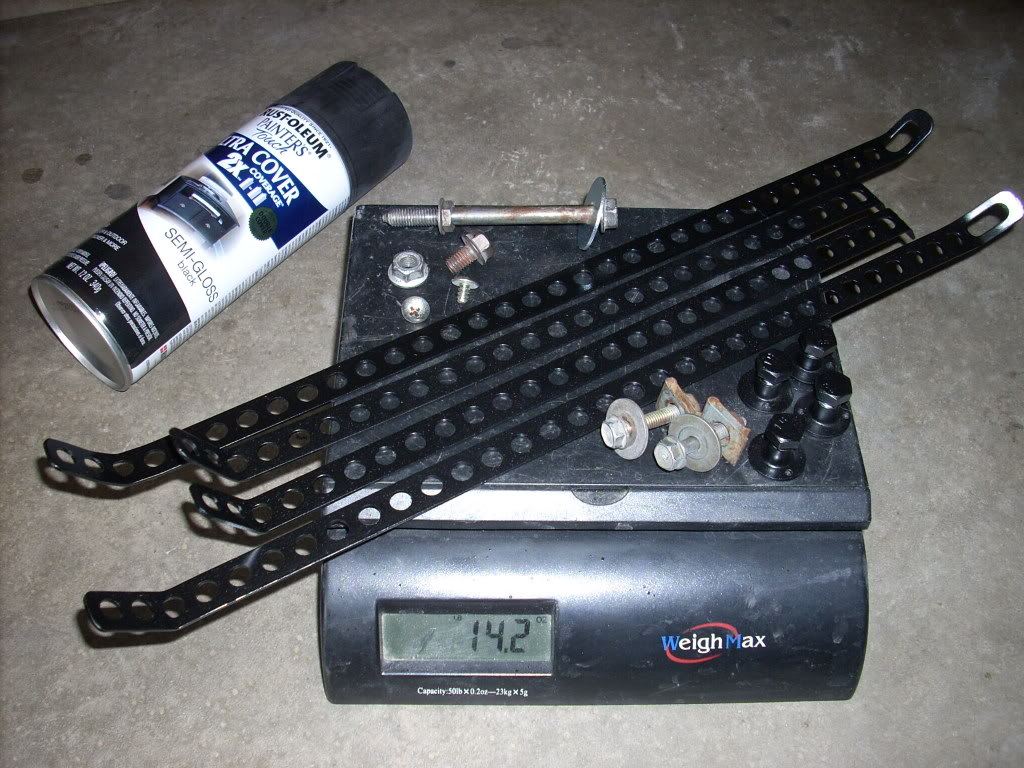
The support straps and tee-nuts/bolts, spraypainted black:
All that steel adds up fast in weight... close to a pound, and that's not even including the 3 steel brackets I'd already bolted to the car, and didn't feel like removing:
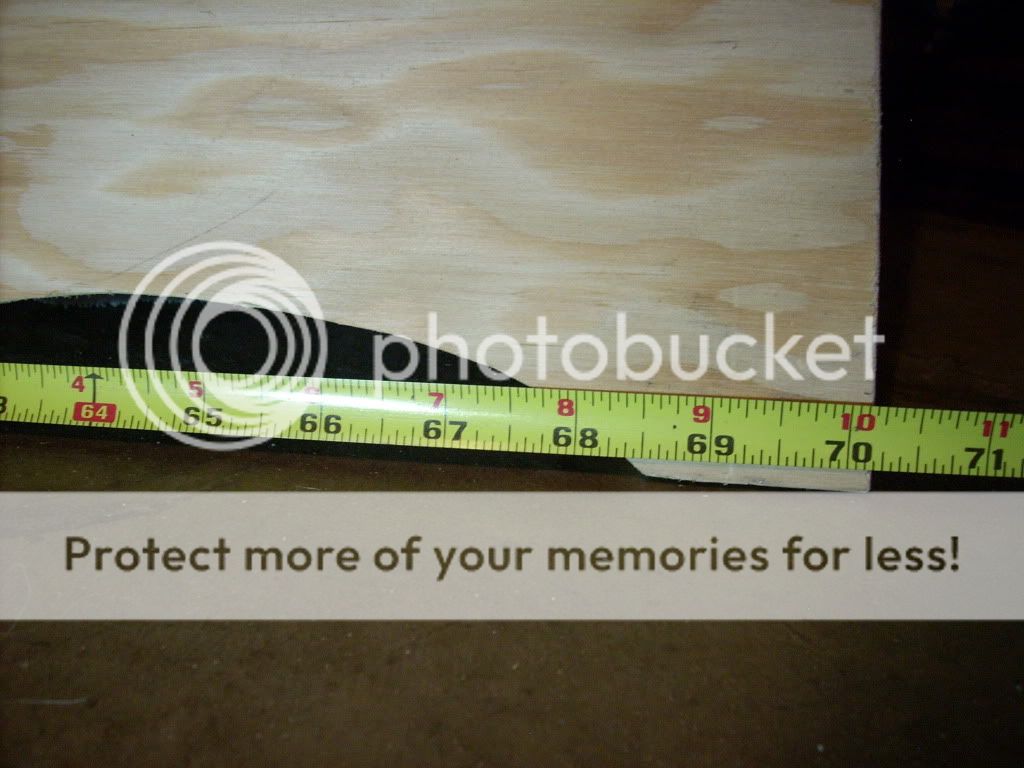
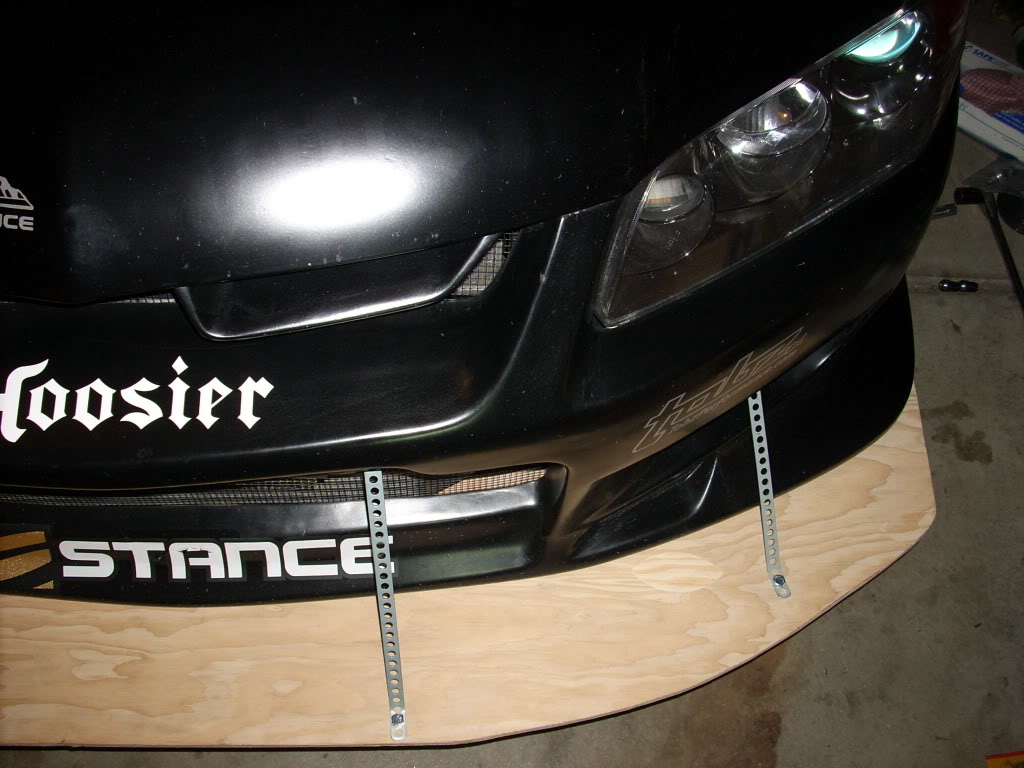
Here are the general dimensions... 70 1/4" wide by 27 3/4" deep... and the straight sections on both ends are approximately 18":

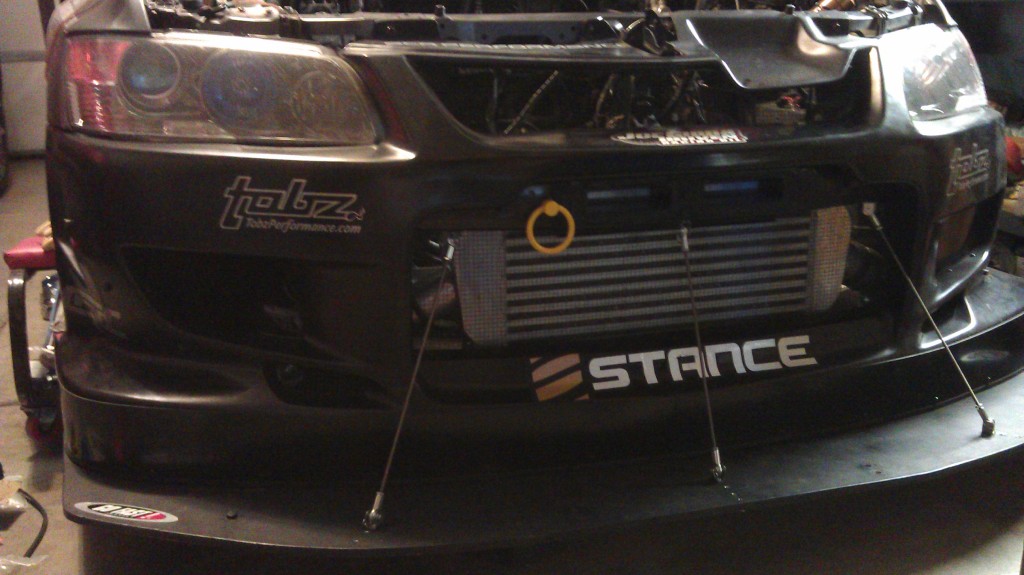
Okay, so here's how it looked mocked up:
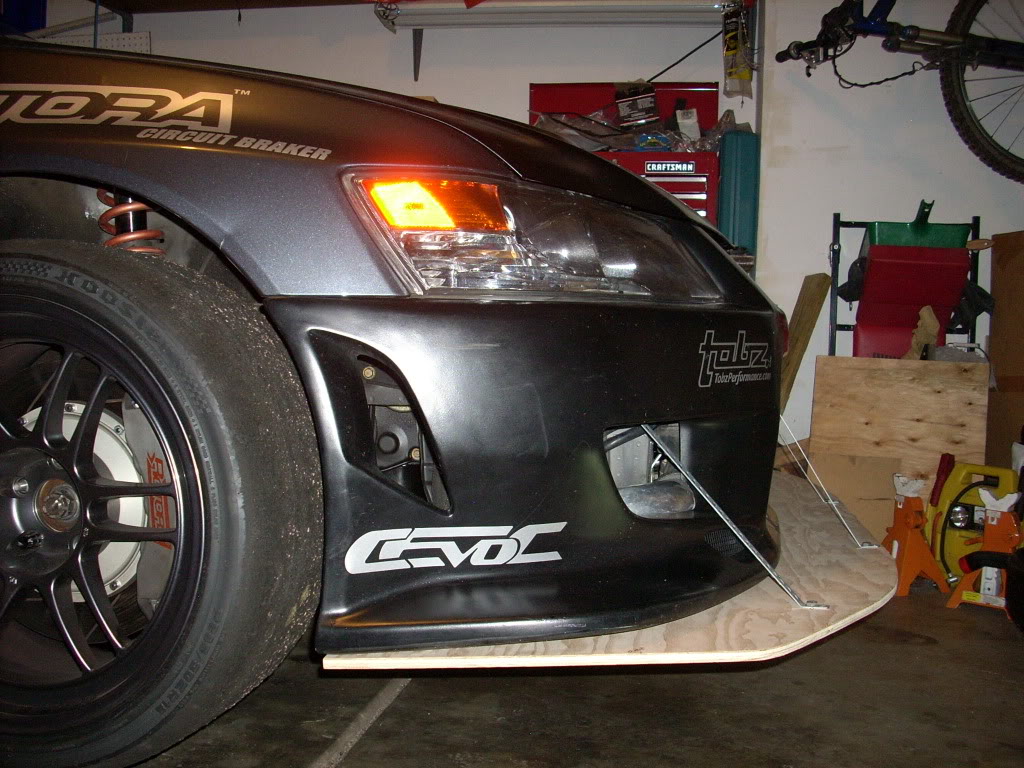
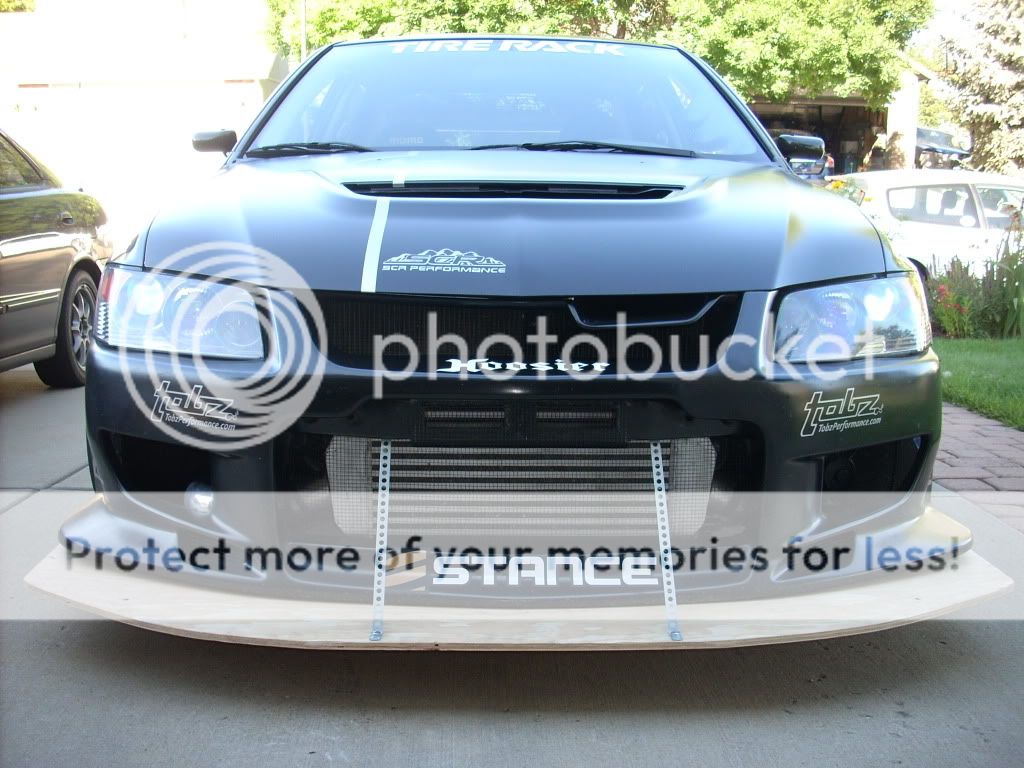
And outside (I didn't have the outer two support straps installed, since I was testing whether I could get out of my driveway with the splitter installed, and figured there'd be less damage with the outer two supports removed, if it did scrape... which it didn't):

TOOLS: jigsaw, drill, drill bits, 4'-long level or straightedge, tape measure, tin snips, bench grinder, Sharpie marker, basic hand tools
MATERIALS: V1: 15/32" 4-ply sanded fir plywood (4' x 8' sheet), 1" wide, 12-gauge steel plate, 18" 18-gauge car audio backstrap (4), Minwax Helmsman Spar Urethane (32 oz. can), black spray paint, assorted bolts, speed nuts, and hardware
V2: assorted hardware from McMaster-Carr, 4' x 8" sheet of 1/16" (.060") ABS plastic, #8 black oxide screws, #8 speed clips
$$$: V1: $75 or less; V2: $160–176
DOES IT WORK: yes (general explanation of how splitters work here)
So, for a long time I've been planning on adding some sort of front splitter to the Evo, in the hopes that it would help cut down lap times at the track, and balance out the downforce I'm assuming I'm getting from the APR GTC-300 rear wing. I finally got around to my DIY splitter project in late August.
Of course, I'd love to make one out of CF, or at least a lightweight aluminum/foam composite like what SCR Performance in Loveland, CO uses on their track cars, and I've talked extensively to a local plastics company about using a sheet of 1/2"-thick foamed ABS. But I figured it would be prudent to do a "Version 1.0" prototype out of plywood, just to get the shape/details worked out, and to see if it even seemed to have the desired effect out at the track.
It was my assumption that making a splitter out of plywood would be next to free, but of course it turned out to be much more expensive than anticipated. Still, total cost was around $75—pocket change compared to what a custom carbon-fiber splitter of the same size would have been.
The overall shape of this splitter is designed to be in compliance with SCCA's rules for SM autocross—no more than 6" outward from any part of the leading edge of the bumper cover (I checked this on both the OEM Evo9 bumper cover, and the fiberglass C-West replica bumper cover), and no wider than the bumper cover:
Street Modified Category, Allowed Modifications (16.1.M):
M. Front splitters are allowed and shall be installed parallel to the ground (within +/-3 degrees fore to aft) and may extend a maximum of 6 inches from the front bodywork/fascia as viewed from above. Splitters may not extend rearward past the centerline of the front wheels. No portion of the splitter may extend beyond the widest part of the front bumper/fascia as viewed from above.
Plus, it extends as far back as the rearward edges of the sides of the bumper cover. This is to help ensure maximum airflow through the intercooler and radiator.
A pic of the cardboard tracing, and the plywood, before I got jiggy with the jig-saw:
Speaking of the plywood: after some Googling (resulting in no definitive, authoritative info on the ideal material for building front splitters), I decided to go with 15/32" thick, 4-ply sanded fir plywood (model #577278) courtesy of the Home Depot, at the much-higher-than-anticipated cost of $31.22 per 4' x 8' sheet (and no, it's not possible to make more than one Evo splitter from that sheet of wood):
http://www.homedepot.com/h_d1/N-5yc1...1&ddkey=Search
I'd done a little basic research on plywood, and found out that "pressure-treated" plywood was relatively inexpensive, but the chemicals that it's injected with is to protect it against rotting in outdoor environments—by no means does "pressure treated" = "waterproof."
Marine-grade plywood was at least "water resistant," but it was significantly more expensive, plus Home Depot didn't carry it in the 15/32" or 1/2" thickness that I wanted, so I said "F**k it, I'll just use this nice-lookin' sanded fir stuff and waterproof it myself."
So, once I got the basic outer shape carved out, the next task was to figure out and create the mounting brackets. Aside from the aforementioned waterproofing, which I'll describe later, this was the most time-consuming part of the project.
I wanted to attach the splitter only to the Evo's structure—not the bumper cover—for two reasons: if/when the splitter got ripped off at speed, I wanted the greatest chance of the fiberglass bumper cover surviving the incident undamaged; and because attaching the splitter directly to metal would assumedly be stronger and better transmit any marginal downforce created by the splitter's actual surface (as opposed to the downforce created by the splitter diverting airflow up and over the entire front of the car, which is how the main aerodynamic benefit of a properly designed splitter is generated) into the chassis/suspension/tires, rather than just flexing the bodywork.
I decided to do this by using two existing threaded bolt holes in the radiator support beam across the bottom of the Evo, which are used for securing the ACD (Active Center Diff) fluid line. This beam is almost exactly 3 3/4" higher up than where the splitter would attach across the bottom plane of the bumper cover, though (determined with a 4' long Stanley level and a tape measure), so I needed to build some brackets to bring these to mounting points down.
Here's the OEM mounting point on the driver's side (I've smashed the locating tab on the ACD line bracket flat, a "mod" done for reasons unrelated to this project—it allows a little more clearance between the ACD line and my intercooler piping):
And the passenger side:
Here's the 1" wide, plate steel material I used to make the brackets, which I already had lying around the garage (available at both Lowes and Home Depot, IIRC); what the completed, double-ended 90-degree bend brackets look like; and the OEM-style, metric speed clip I used as the receptacle for the 6mm x 1.0 thread OEM mounting bolts that will go through the plywood splitter:
Amazingly, the flat, anvil portion of my Harbor Freight bench vise was EXACTLY the right size to bend the legs of the bracket over, resulting in two perfectly symmetrical brackets, in terms of their height, anyway:
The completed driver's side bracket bolted under the bumper beam:
To secure the outer edges of the splitter, towards the back edge, I opted to tie into the OEM brackets for the oil cooler (passenger side) and the ACD pump (driver's side). Not as strong as attaching to the unibody structure itself, but these are the lowest and easiest to work with attachment points out towards the sides of the car.
Here's the bracket for the oil cooler bracket... essentially the same as the middle two, same 6mm captured-washer OEM bolt and tinnerman clip, but with only a 90-degree bend towards the plywood:
I actually didn't take pictures of the driver's side mounting, but there's no bracket on that side... just a 4"-long 8mm diameter metric bolt that takes the place of the about 1"-long OEM outer bolt in the bottom of the ACD bracket, with a large washer to keep the bolthead from ripping through the plywood.
Once the holes were drilled in right places in the plywood to accommodate the mounting bolts (a difficult process that required repeated measuring, a Sharpie marker, and a bit of luck), and I successfully testfitted the splitter to the car with these four rear mounting points, I moved on to the next step: carving out openings in the rearmost edge of the splitter for the downpipe and the front tires.
I wanted to make sure there was plenty of airgap around the downpipe, even though I kinda doubt if any more than 3/8" was really necessary. After determining the center point of where the downpipe sat in relation to the splitter, I used a CD to trace a nice even circle:
Tons of room:
On to tire clearance. I used both my 275/35-18 Nitto NT01 track tires and my 285/30-18 Hoosier A6 autocross wheels to establish where (and how much) I need to carve out. It wasn't much; about 1" at the most, but the tires definitely could have contacted under actual driving conditions w/o making a little room:
Using the first cutout section to trace the cut line for the other side:
Much better!
The splitter after cutting out the downpipe and tire clearance:
And how much it weighed, naked... 15.35 lb. (that lock/display hold feature on the Weighmax digital shipping scale is really handy for weighing stuff like this):
Next step: creating the front supports, which not only support the splitter surface against the airflow that will be attempting to flex it downwards, but also keep the splitter from vibrating or oscillating at speed, which will negatively affect the downforce.
Normally, people would use cool looking, application-specific threaded turnbuckles, such as these from APR:
http://aprperformance.com/index.php?...d=83&Itemid=44
Or these Longacre ones:
http://www.hrpworld.com/index.cfm?fo...action=product
But they're expensive, and they top out at 10.75" long... I definitely needed more length than that to reach up to the bottom of the bumper crash beam. The supports for the outer portions of the splitter would need to be even longer.
So I went with something that I've used hundreds of times before for other DIY projects: car audio backstrap. Yup, it looks kinda ghetto, and it's just carbon steel, so you have to paint it if you don't want it to immediately start rusting; but it's long enough (18"), it's easy to work with, it's more than strong enough for the application, and it's dirt cheap at about a dollar each:
http://www.dlcparts.com/metal-back-strap-p-708.html
Here are the tools I used to drill the holes in the bottom of the bumper crash beam for the two center support straps (without removing it from the car):
Attachment point to the crash beam... just a beefy self-tapping Phillips head screw:
The "tee nuts" that the SAE, 1/2" long bolts thread into are pretty expensive at $3.52 a piece (in my town, only available at Lowes; Home Depot didn't have 'em):
- but they're ideal for keeping any metal hardware protruding out of the bottom leading edge of the splitter to a bare minimum... up front is where it's most likely to scrape the ground.
See, nearly flush (note the bolt heads in the back, which stick out substantially):
The mounting point on the passenger side (it's an unthreaded hole, so I put a short bolt/nut through it):
On the driver's side, I used the bolt that holds the OEM horn bracket (it's a 12mm head):
The support straps and tee-nuts/bolts, spraypainted black:
All that steel adds up fast in weight... close to a pound, and that's not even including the 3 steel brackets I'd already bolted to the car, and didn't feel like removing:
Here are the general dimensions... 70 1/4" wide by 27 3/4" deep... and the straight sections on both ends are approximately 18":
Okay, so here's how it looked mocked up:
And outside (I didn't have the outer two support straps installed, since I was testing whether I could get out of my driveway with the splitter installed, and figured there'd be less damage with the outer two supports removed, if it did scrape... which it didn't):
Last edited by EGbeater; Aug 2, 2012 at 08:48 PM.
 Sep 15, 2011, 09:35 AM
#2
On to part II: waterproofing the plywood, pics of the painted/completed splitter, and weight and cost info.
I had originally thought that just hitting the splitter with a couple coats of spraypaint would be enough to waterproof it, but the more effort/hours I put into this "prototype" splitter, I felt more compelled to make sure it wouldn't get destroyed the first time I got caught in a rainstorm with it on the car.
So, it seemed polyurethane was the way to go to give my splitter the best protection against "unintended wetness."
I first purchased and tried an aerosol can of Minwax polyurethane:
http://www.homedepot.com/h_d1/N-5yc1...atalogId=10053
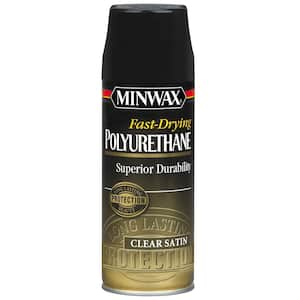
At $7.56, it wasn't cheap. But after going through about half the can, it was clear it wasn't going to do ANYTHING to properly coat the plywood. Maybe 10 or 15 cans. Plus the spray nozzle kept clogging. Garbage.
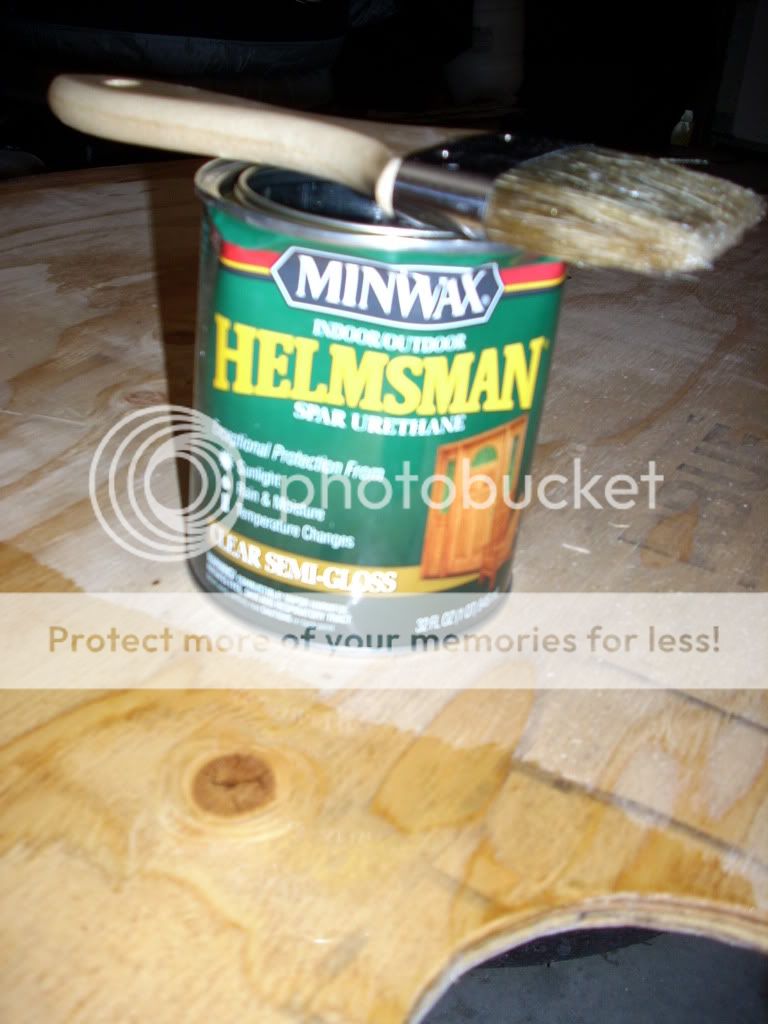
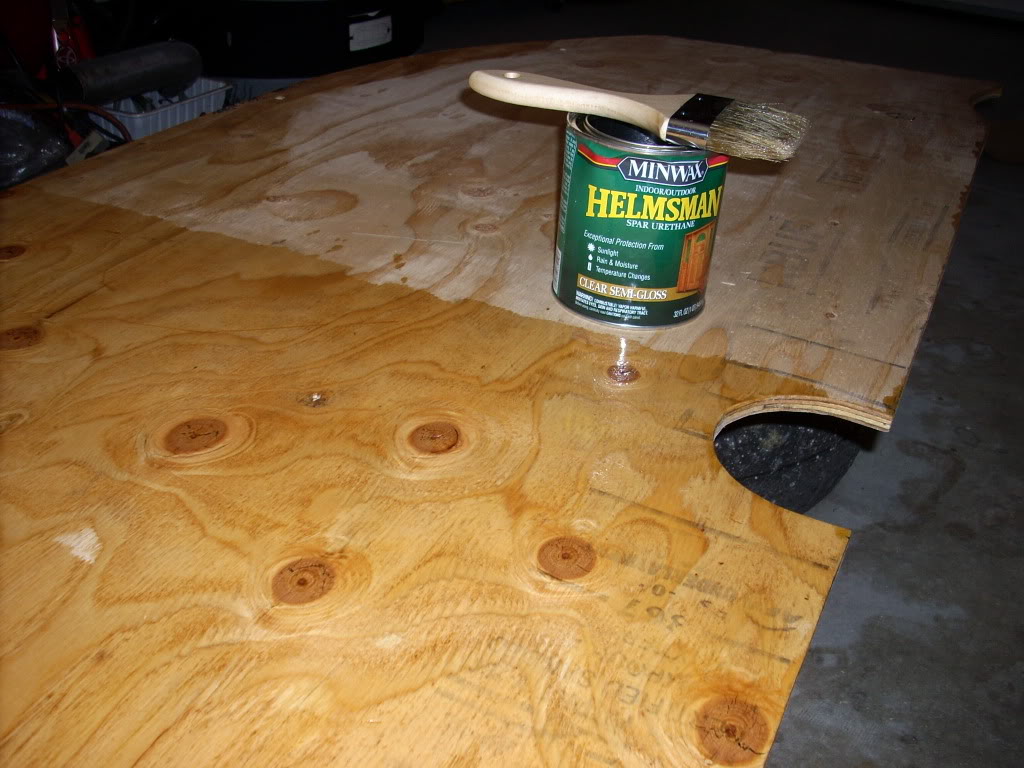
Back to Home Depot, and got a 32 oz. can of Minwax Helmsman Spar Urethane, which is actually described as appropriate for outdoor use + a cheap natural bristle brush for applying it. 15 bucks, but this did the trick.
You can see the dramatic difference between the coated and naked plywood, and these pictures are just of the first coat... I applied three coats on both sides, which is what is recommended for previously uncoated wood that will see outdoor use, and this pretty much emptied the can.
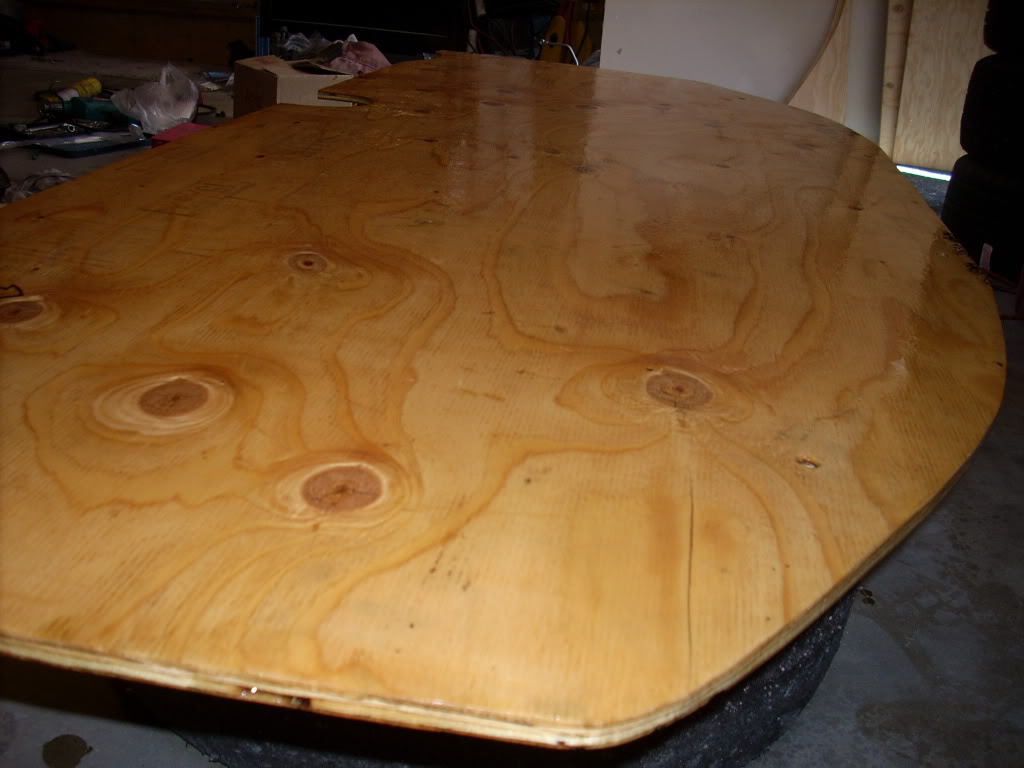
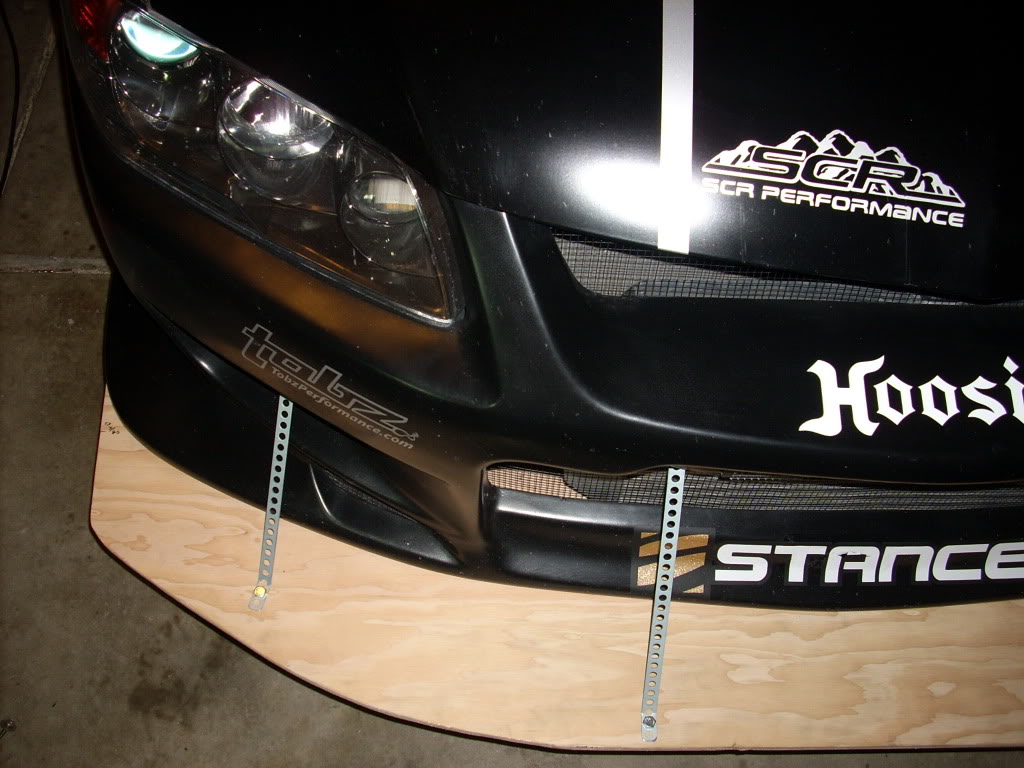
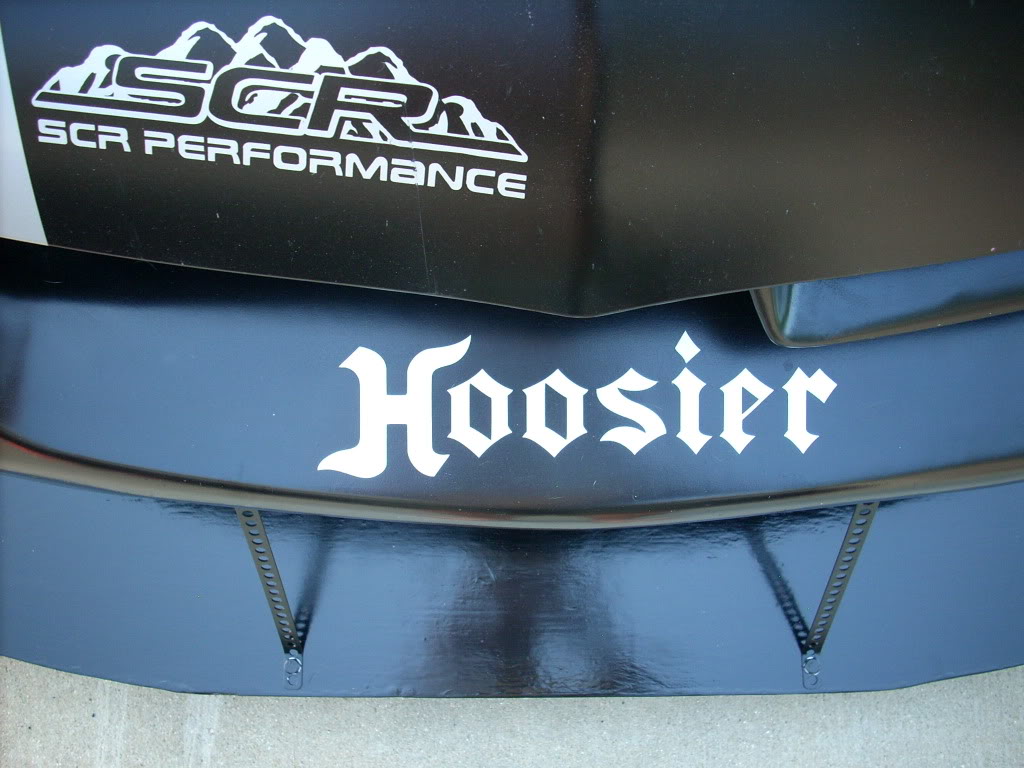
The leading edge of the plywood is especially important to try to soak polyurethane into:
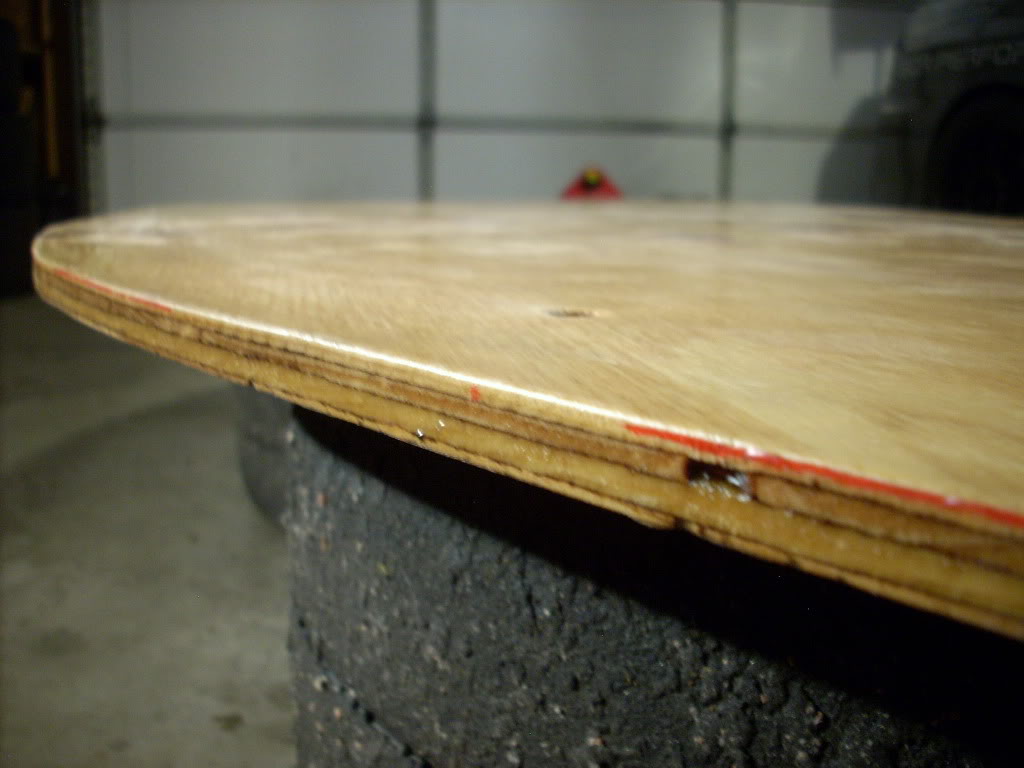
Polyurethane is kinda gummy, and it takes about 4 to 5 hours to fully cure. After each application/drying cycle, I sanded the surface lightly with 200 grit sandpaper to even it out a bit and give the surface some tooth for the next layer to bond to. The polyurethane coating process took a few days... much longer than I expected, having never worked with it before.
All that polyurethane added a significant amount of weight... .74 lb.!
Finally, I put a couple coats of semi-gloss black spraypaint on the top of the splitter.
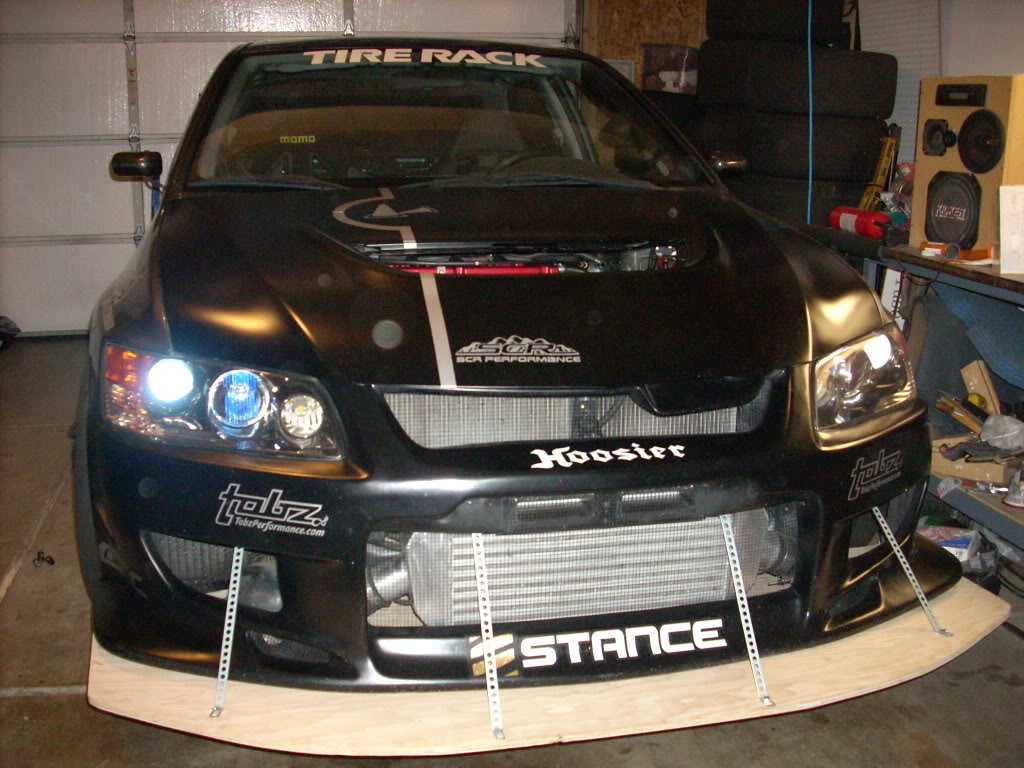
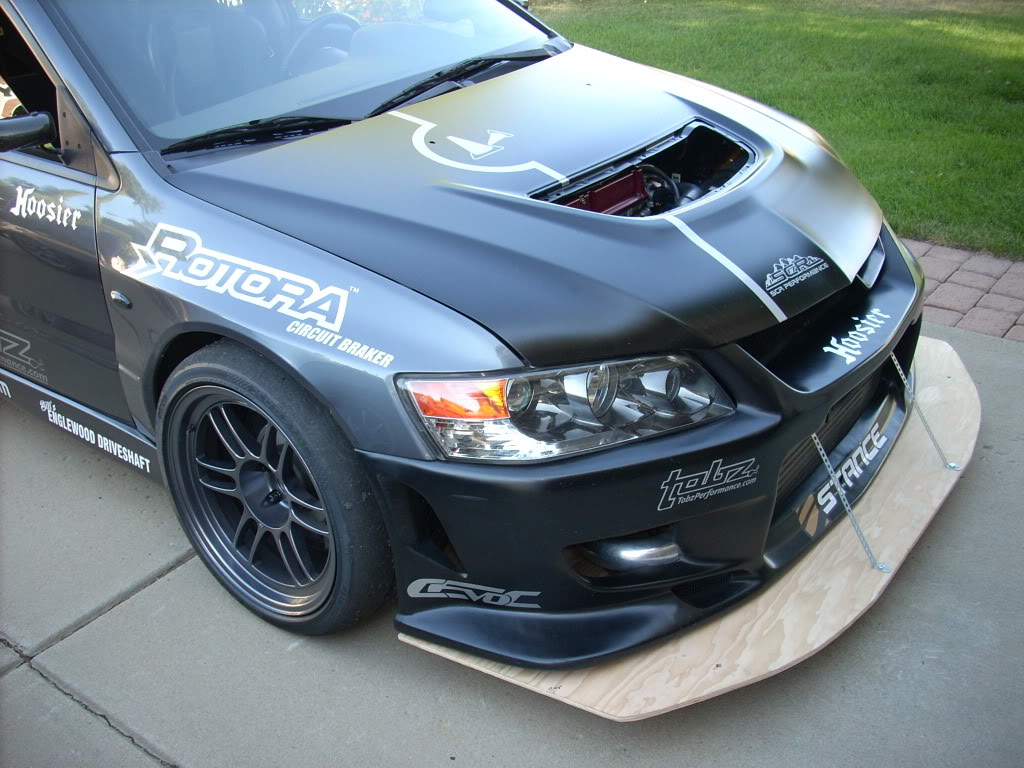
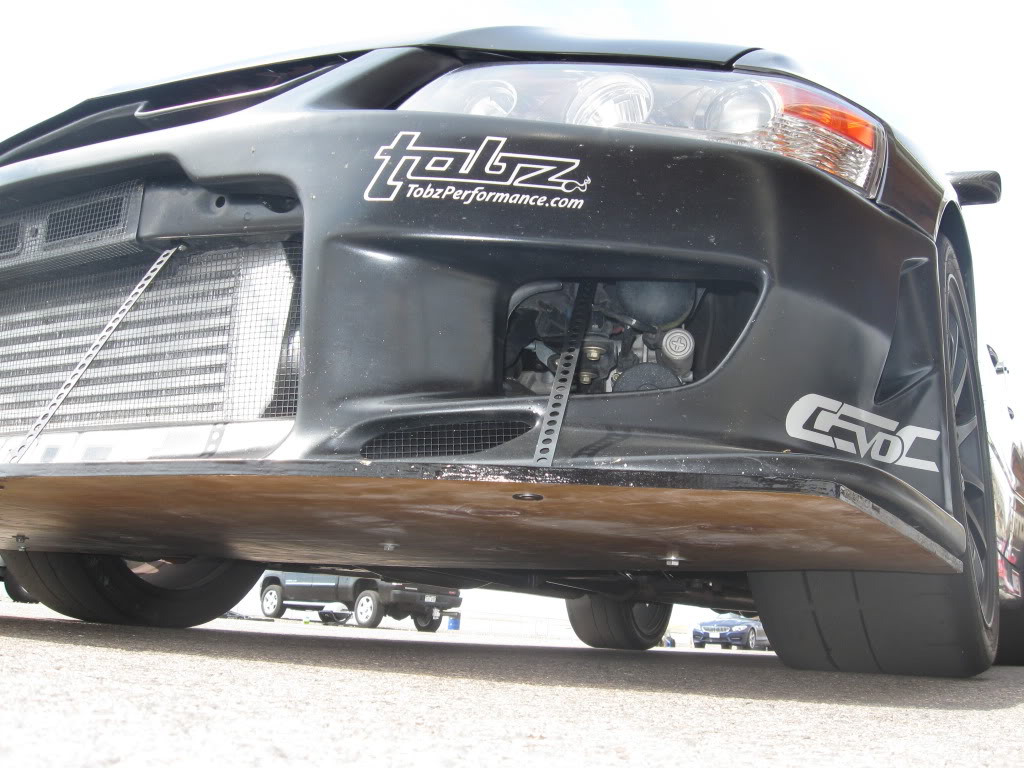
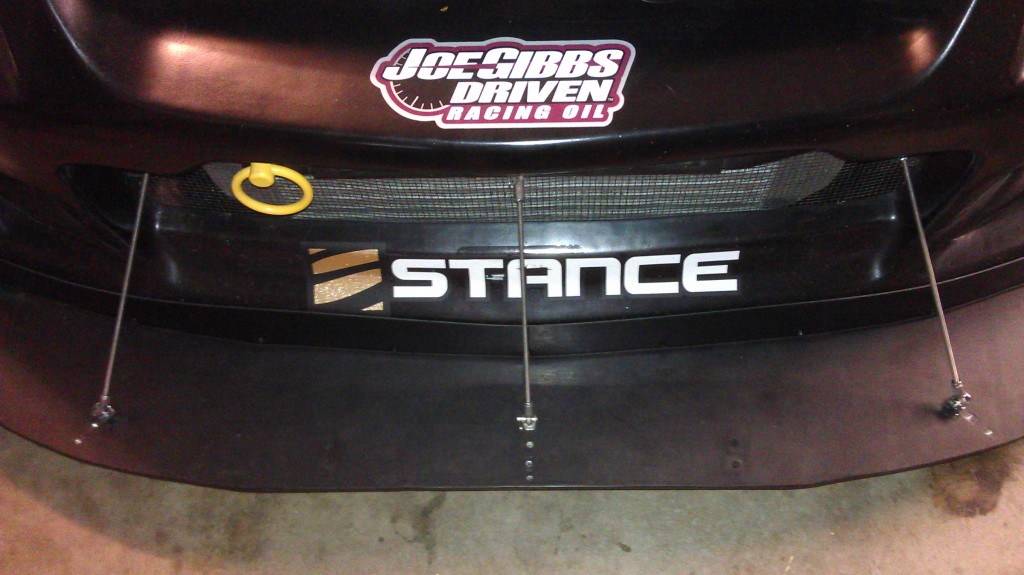
And here is the end product (finally):
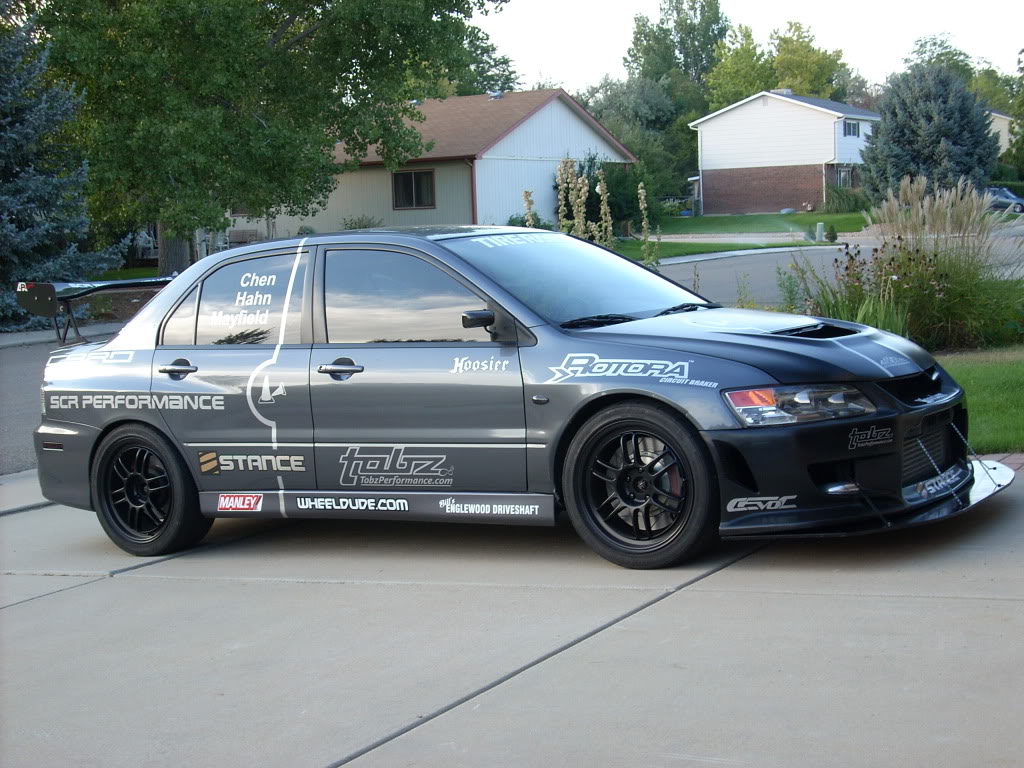
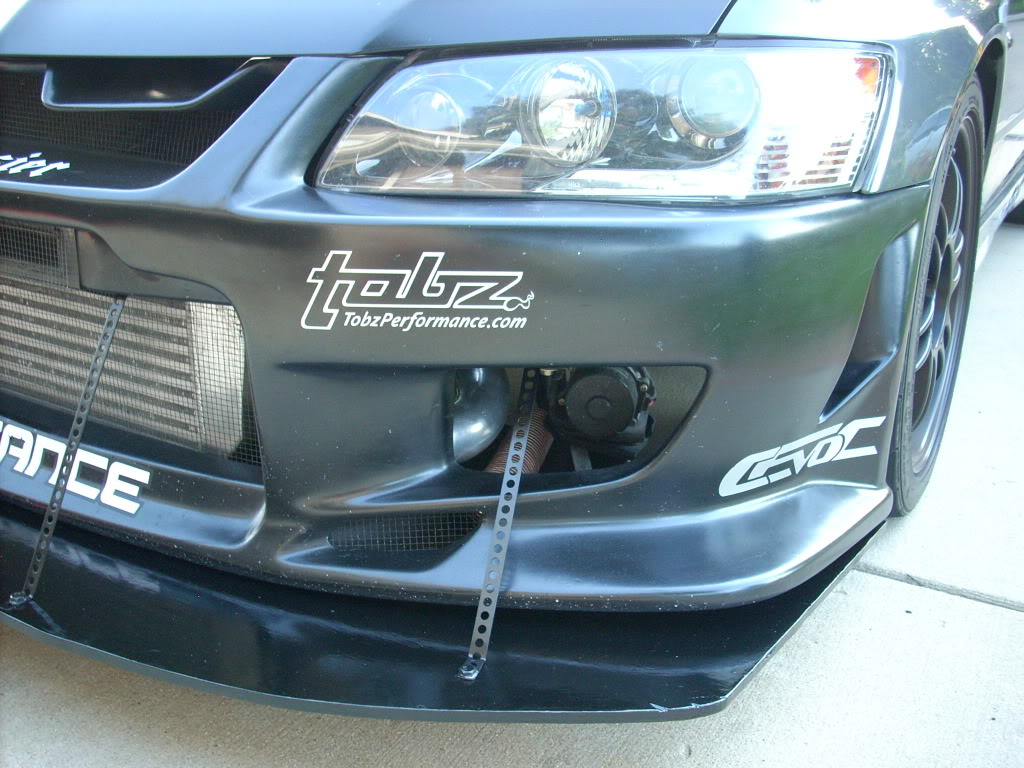
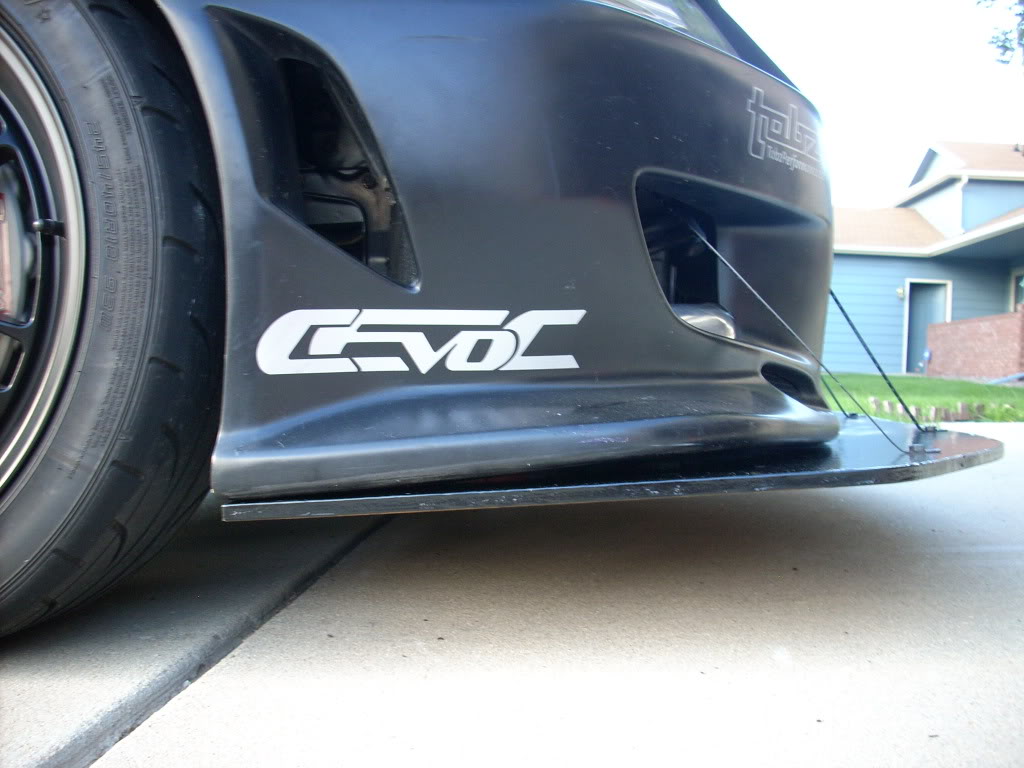
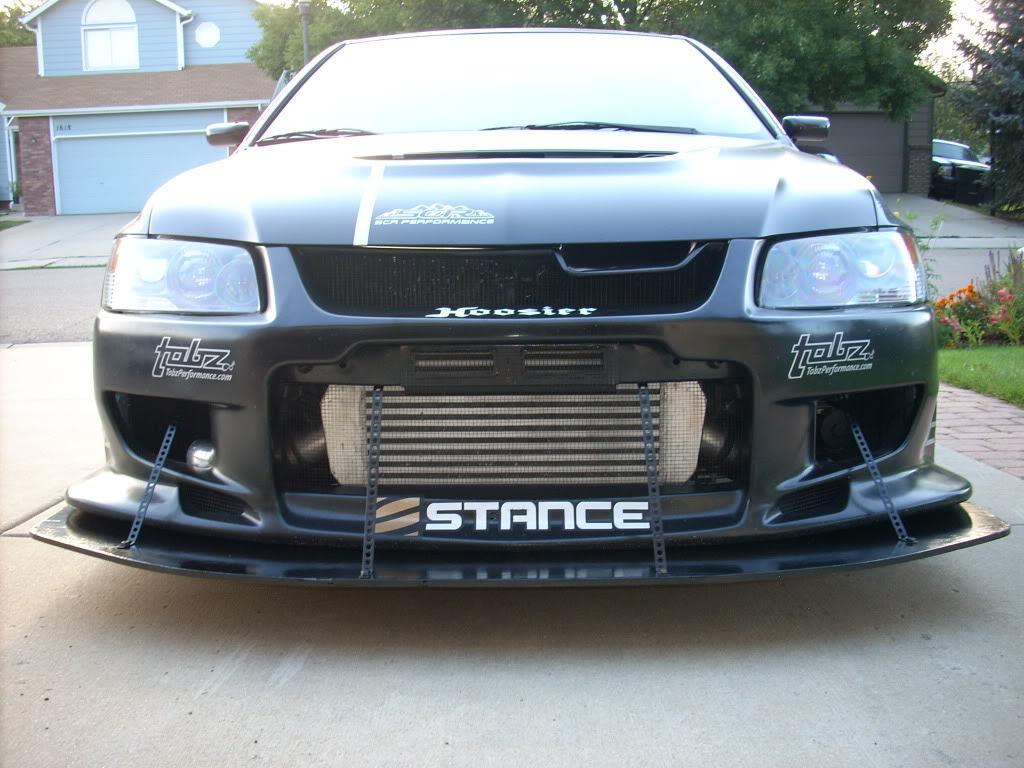
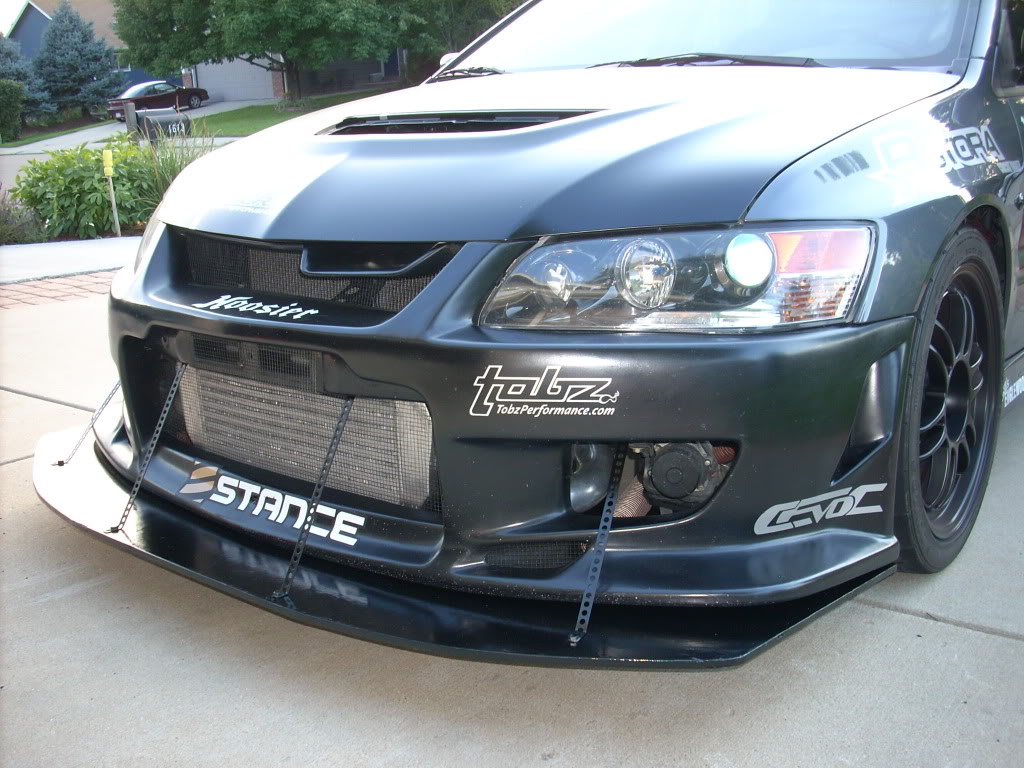
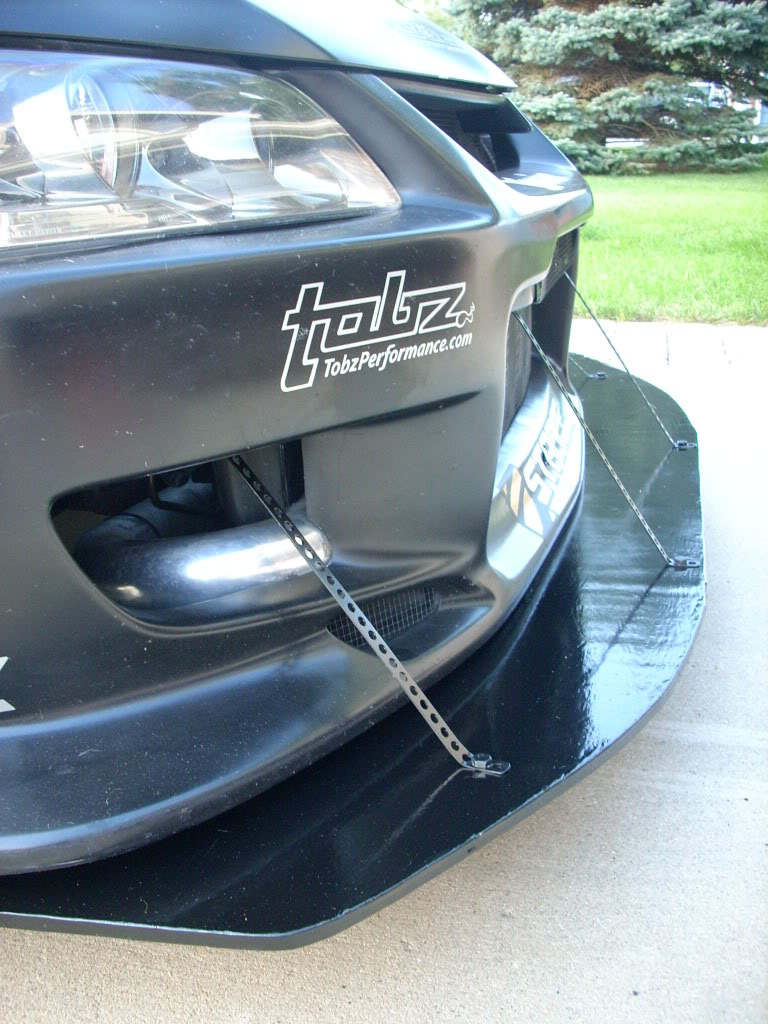
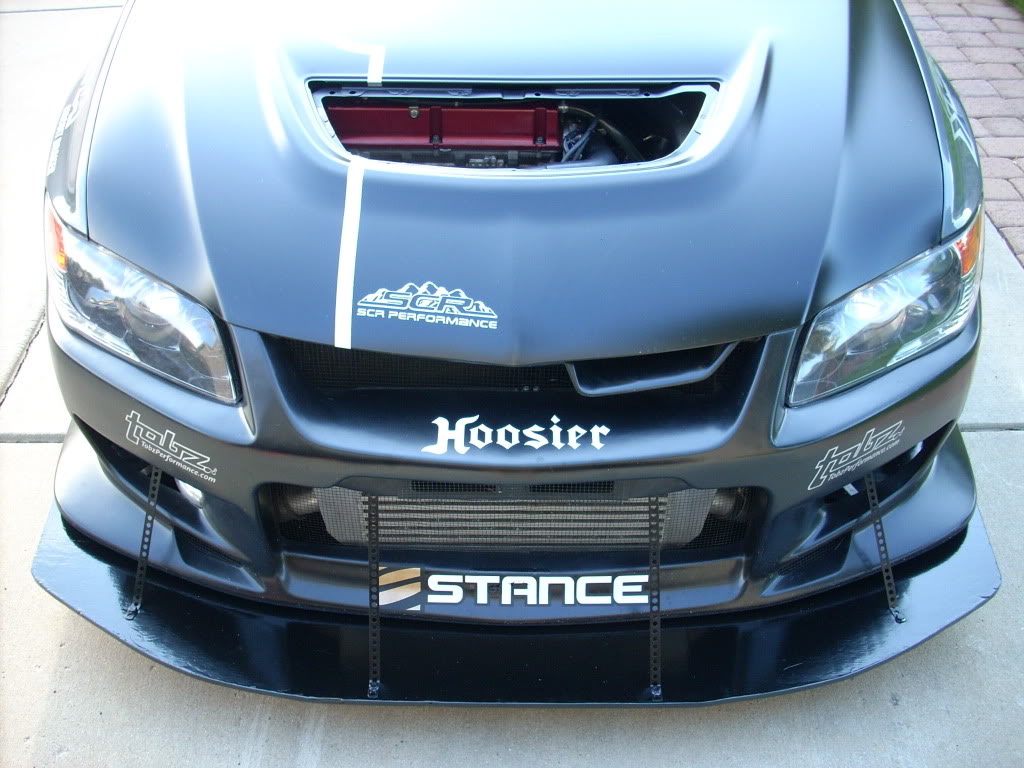
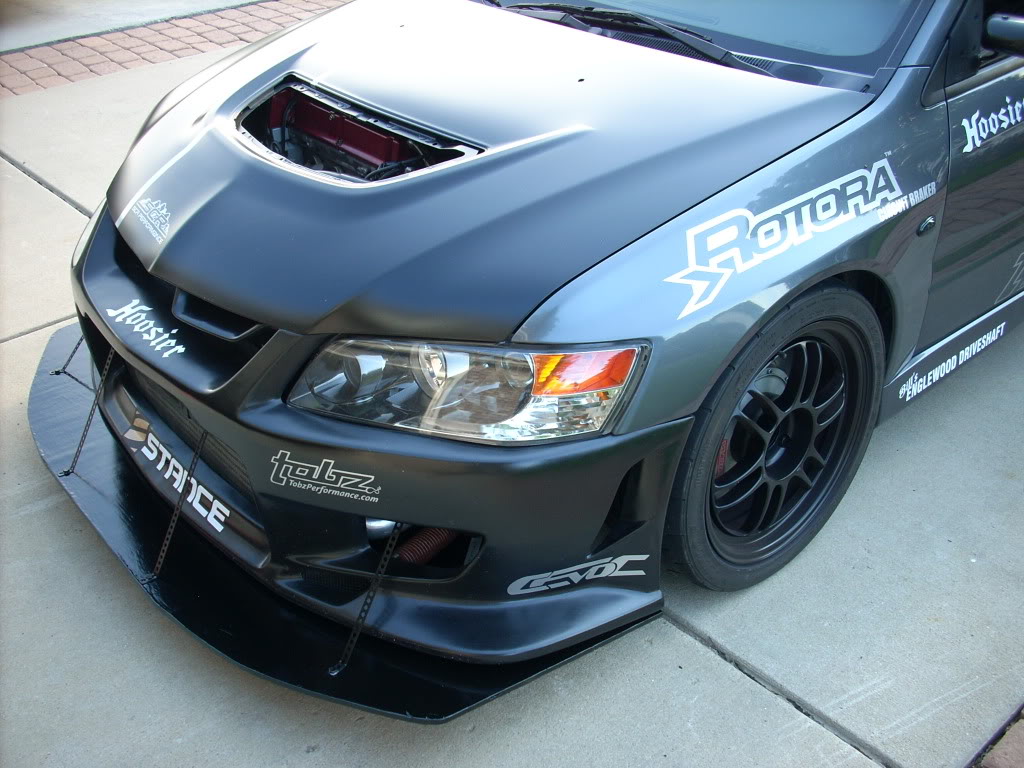
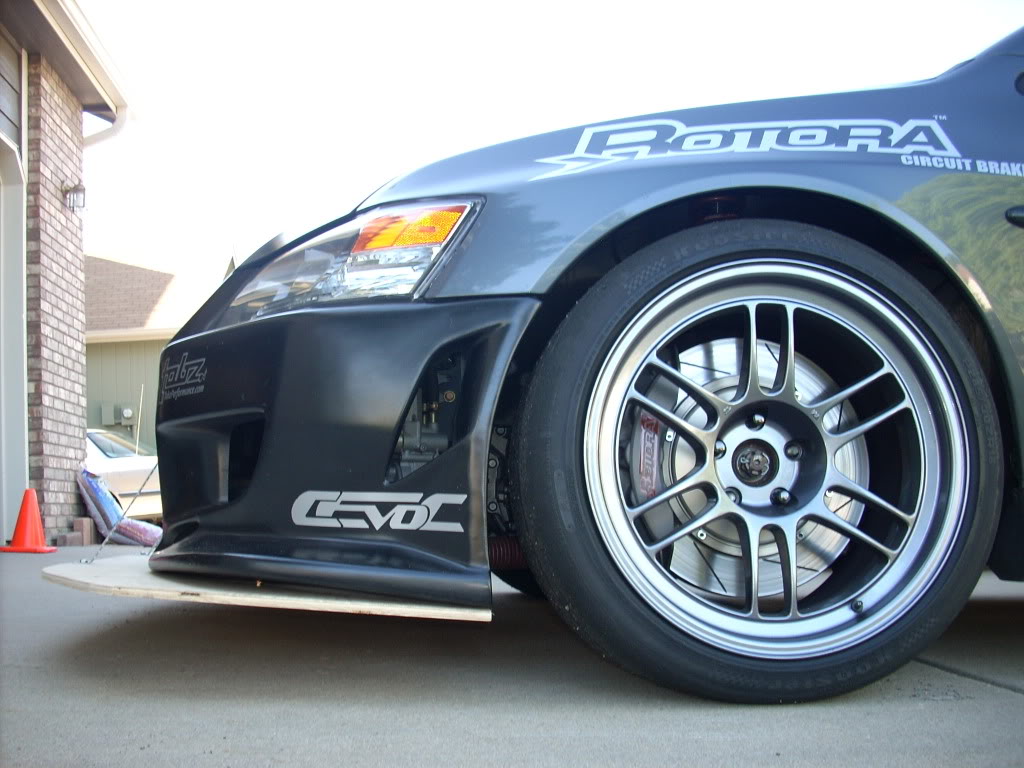
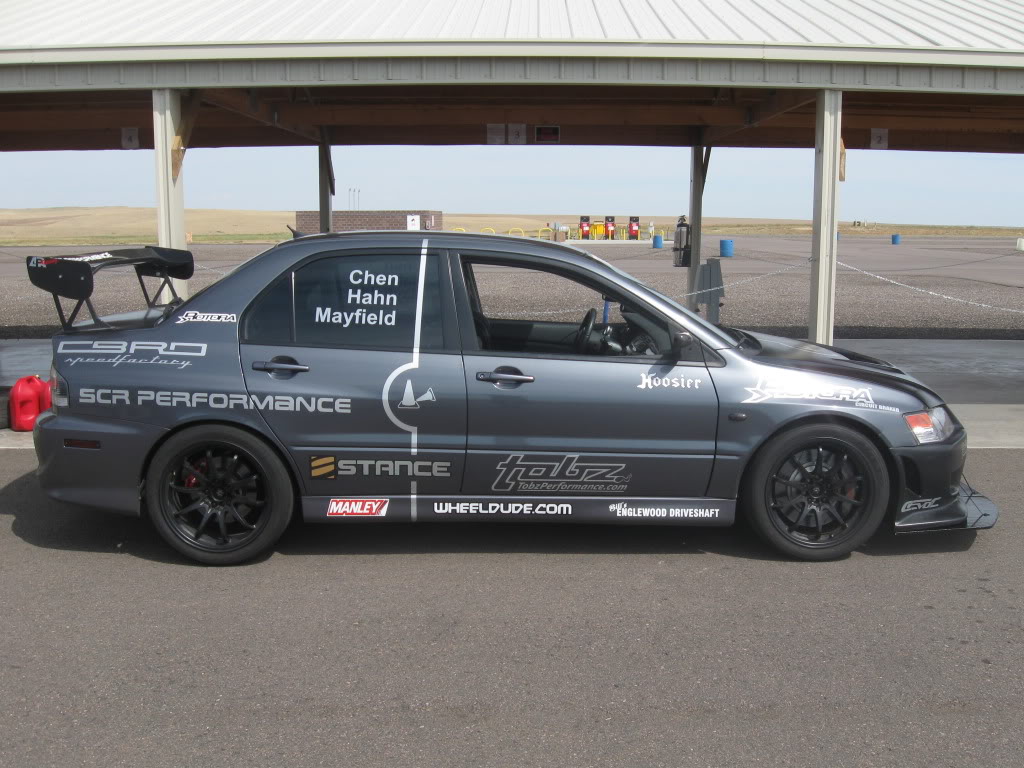
And just a few out at the track... to prove I didn't break it the very time out:

This is how to transport the splitter, if you don't want to drive with it on the car. It BARELY fits like this, with the splitter sticking out the rear windows about a foot and half:
DRIVING IMPRESSIONS:
Unfortunately, I didn't get a full track day in my first time out at the track with the splitter installed, so I can't quantify the benefit with before/after lap times, but subjectively, the car did feel like it was gripping better in the higher-speed corners. Sorry, that's all I can really say at this point. At my very smooth local track (High Plains Raceway, near Byers, CO) the splitter never scraped at all... nor did it contact the ground on my drive home. I was very careful to avoid any pavement that would have possibly presented an issue though.
WEIGHT:
So, total, in excess of 17 lb. on the very nose of the car. Hopefully, at the track, at speeds exceeding 75 mph, the downforce/grip it generates is well worth the weight. I'm assuming this could be about 6�7 lb. lighter if executed in carbon fiber or some other weight-optimized splitter material.
COST:
So, that's a total of roughly $73, plus tax. Like I said, a lot more than I anticipated, but still relatively cheap (APR CF splitter = $300 + shipping, and it only sticks out about 3", limiting its effectiveness)... especially if it nets a discernible improvement in lap times! (proof still pending)
Last thing: If you do this yourself, make sure to create a good paper or cardboard template of your finalized splitter�one that accurately marks where the holes for the mounting bolts need to be drilled�so that if you destroy your plywood splitter, it'll be a no-brainer to quickly fab up a replacement.
Happy DIYing!
*** UPDATE! ***
Jump to post #39 on page 3 for details on Version 2.0 splitter with adjustable height brackets, air dam, and threaded rod/rod end supports:
I had originally thought that just hitting the splitter with a couple coats of spraypaint would be enough to waterproof it, but the more effort/hours I put into this "prototype" splitter, I felt more compelled to make sure it wouldn't get destroyed the first time I got caught in a rainstorm with it on the car.
So, it seemed polyurethane was the way to go to give my splitter the best protection against "unintended wetness."
I first purchased and tried an aerosol can of Minwax polyurethane:
http://www.homedepot.com/h_d1/N-5yc1...atalogId=10053
At $7.56, it wasn't cheap. But after going through about half the can, it was clear it wasn't going to do ANYTHING to properly coat the plywood. Maybe 10 or 15 cans. Plus the spray nozzle kept clogging. Garbage.
Back to Home Depot, and got a 32 oz. can of Minwax Helmsman Spar Urethane, which is actually described as appropriate for outdoor use + a cheap natural bristle brush for applying it. 15 bucks, but this did the trick.
You can see the dramatic difference between the coated and naked plywood, and these pictures are just of the first coat... I applied three coats on both sides, which is what is recommended for previously uncoated wood that will see outdoor use, and this pretty much emptied the can.
The leading edge of the plywood is especially important to try to soak polyurethane into:
Polyurethane is kinda gummy, and it takes about 4 to 5 hours to fully cure. After each application/drying cycle, I sanded the surface lightly with 200 grit sandpaper to even it out a bit and give the surface some tooth for the next layer to bond to. The polyurethane coating process took a few days... much longer than I expected, having never worked with it before.
All that polyurethane added a significant amount of weight... .74 lb.!
Finally, I put a couple coats of semi-gloss black spraypaint on the top of the splitter.
And here is the end product (finally):
And just a few out at the track... to prove I didn't break it the very time out:
This is how to transport the splitter, if you don't want to drive with it on the car. It BARELY fits like this, with the splitter sticking out the rear windows about a foot and half:
DRIVING IMPRESSIONS:
Unfortunately, I didn't get a full track day in my first time out at the track with the splitter installed, so I can't quantify the benefit with before/after lap times, but subjectively, the car did feel like it was gripping better in the higher-speed corners. Sorry, that's all I can really say at this point. At my very smooth local track (High Plains Raceway, near Byers, CO) the splitter never scraped at all... nor did it contact the ground on my drive home. I was very careful to avoid any pavement that would have possibly presented an issue though.
WEIGHT:
- 15/32" thick 4-ply sanded fir plywood splitter, 70 3/4" wide by 27 3/4" deep, 3 coats of polyurethane per side, plus spraypaint, top only: 16.1 lb.
- Mounting hardware: est. 1.0 lb.
So, total, in excess of 17 lb. on the very nose of the car. Hopefully, at the track, at speeds exceeding 75 mph, the downforce/grip it generates is well worth the weight. I'm assuming this could be about 6�7 lb. lighter if executed in carbon fiber or some other weight-optimized splitter material.
COST:
- 4' x 8' 15/32" thick 4-ply sanded fir plywood: $31.22
- Minwax Helmsman Spar Urethane, 32 fluid oz. can: $14.97
- 18" car audio 18-gauge (.048") back strap: $1.00 each (X 4)
- Steelworks 1" x 36" 12-gauge plate steel: $4
- Hillman 5/16" x 3/8" stainless tee nuts: $3.52 each (x 4)
- assorted 6mm x 1.0 metric bolts, speed nuts, 4"-long 8mm metric bolt, washers, etc: ??? est. $5
So, that's a total of roughly $73, plus tax. Like I said, a lot more than I anticipated, but still relatively cheap (APR CF splitter = $300 + shipping, and it only sticks out about 3", limiting its effectiveness)... especially if it nets a discernible improvement in lap times! (proof still pending)
Last thing: If you do this yourself, make sure to create a good paper or cardboard template of your finalized splitter�one that accurately marks where the holes for the mounting bolts need to be drilled�so that if you destroy your plywood splitter, it'll be a no-brainer to quickly fab up a replacement.
Happy DIYing!
*** UPDATE! ***
Jump to post #39 on page 3 for details on Version 2.0 splitter with adjustable height brackets, air dam, and threaded rod/rod end supports:
Last edited by EGbeater; Aug 2, 2012 at 09:31 PM.
 Sep 15, 2011, 11:43 AM
#4
Evolved Member
Great write up. I've been research DIY splitters for a while now and the one observation I have to make is the angle of the splitter looks to point up instead of being parallel to the ground, or even slightly tipped downward for a sharper angle of attack. The problem lies in the stock evo's front bumper. In my own testing the under bumper isn't parallel to the ground. Rather it ramps upward slightly. Your design allows for compensation however an air gap would then be present between the top of the splitter and the bottom of the bumper. Could be solved with a simple adjustable air dam made of plastic from Home Depot. I will post pictures when I finally get off my butt and build it lol. Thanks for lighting a fire under me and getting me motivated to build my own. Looks good!
Craig
Craig
Sep 15, 2011, 11:51 AM
#5
Major DIY lol. Awesome job, you should have stained it black instead to show off the wood grain u should watch the top gear episode where they made a wood splitter lol
I really can't wait to see the results. I might be inspired to do something like this
u should watch the top gear episode where they made a wood splitter lolI really can't wait to see the results. I might be inspired to do something like this
Trending Topics
Sep 15, 2011, 01:34 PM
#8
Great write up. I've been research DIY splitters for a while now and the one observation I have to make is the angle of the splitter looks to point up instead of being parallel to the ground, or even slightly tipped downward for a sharper angle of attack. The problem lies in the stock evo's front bumper. In my own testing the under bumper isn't parallel to the ground. Rather it ramps upward slightly.
Craig
Craig
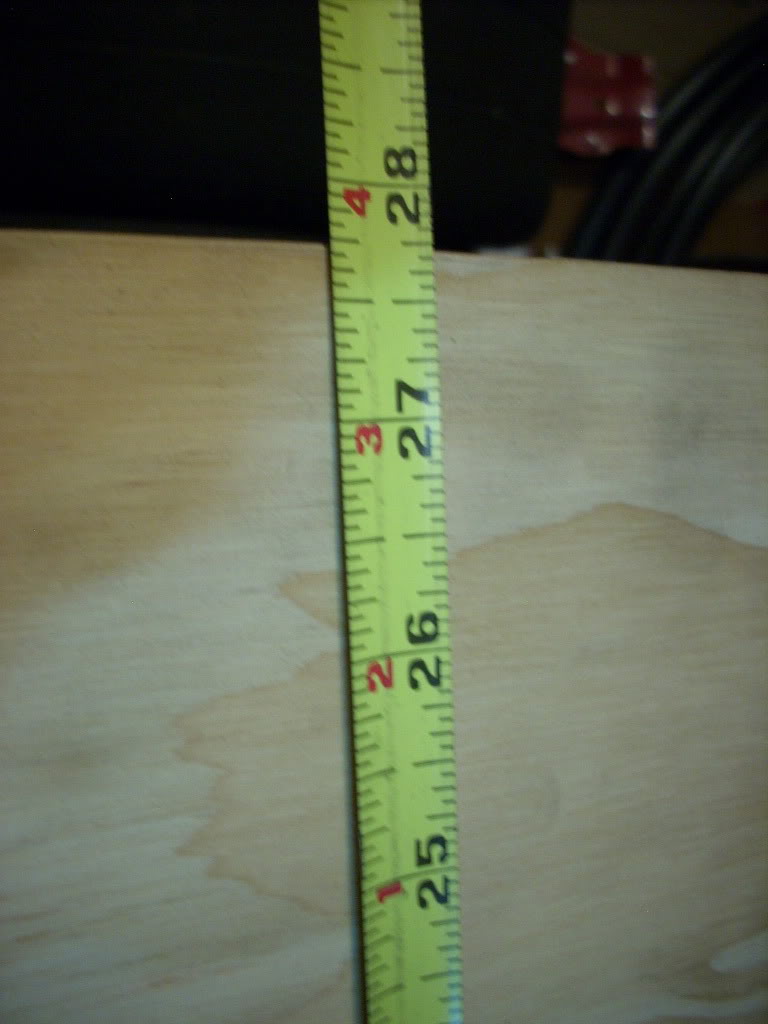
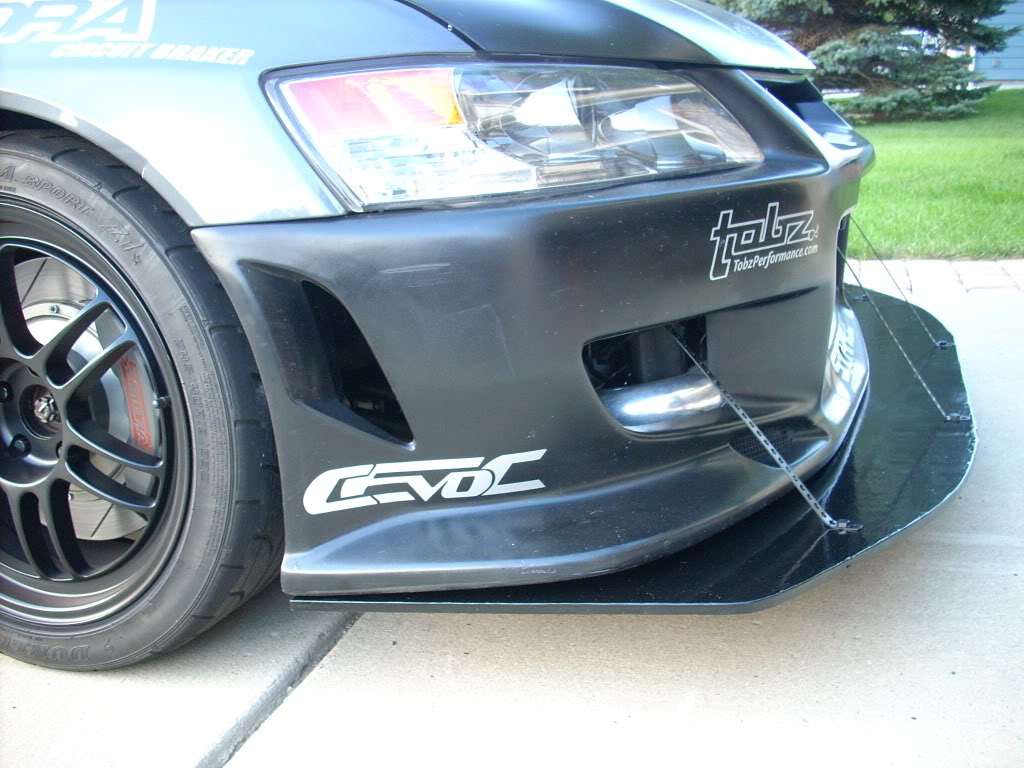
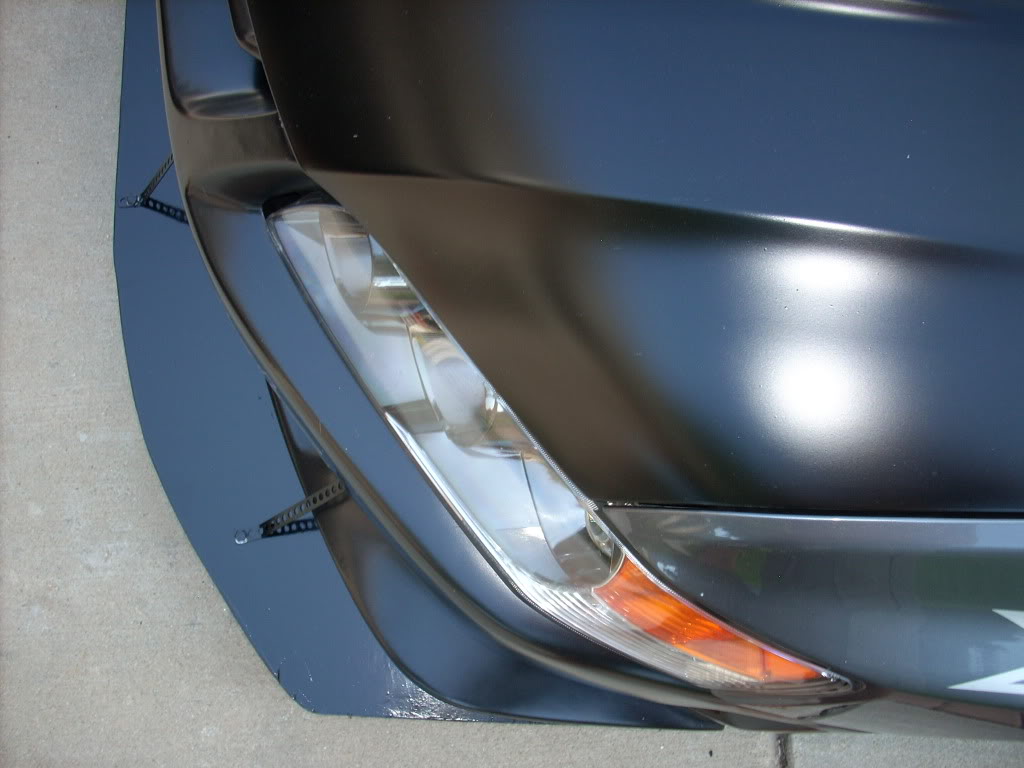
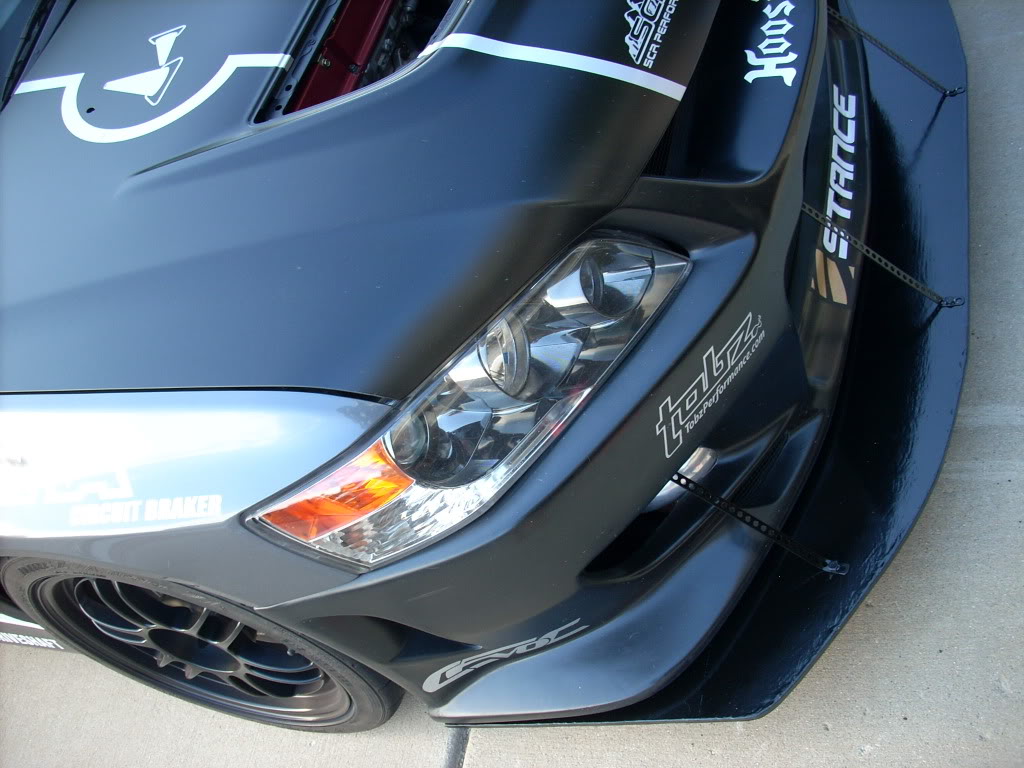
Actually, the splitter isn't as tilted upwards in the front as much as you might think... it's only 1/2" higher in the front than in the rear, by the front tires. By my calculations, over the 15" distance between my two height measurement points, that's only an inclination of 1.91 degrees.
The upwards inclination of the bottom of the OEM bumper cover is likely intentional, as it serves to improve ground clearance where it matters most (the very front of the car). And it's for this same reason that I elected not to try to flatten out my splitter perfectly... I'm lazy enough that I'd rather give up a few precious tenths of a second at the track, if that extra 1/2" at the leading edge of the splitter makes the difference between accidentally ripping it off the car, or not.
But yes, you're right, I could adjust the angle of it by sandwiching a strip of fairly dense foam between the splitter and the leading edge of the bumper cover, and then adjust the support backstraps accordingly.
In the picture below, the car is parked on a driveway with a slope of 5 to 6 degrees... perhaps that's why it looks that way.
 Sep 16, 2011, 03:09 PM
#11
Good question. Without the crash beam, you'd probably have to attach the central support straps or turnbuckles to the bumper cover itself. Nothing else really back there besides the intercooler, and you obviously wouldn't want to drill into that, nor is the IC that solidly mounted to the car.


 Oct 6, 2011, 01:53 PM
#15
WEIGHT:
So, total, in excess of 17 lb. on the very nose of the car. Hopefully, at the track, at speeds exceeding 75 mph, the downforce/grip it generates is well worth the weight. I'm assuming this could be about 6–7 lb. lighter if executed in carbon fiber or some other weight-optimized splitter material.
- 15/32" thick 4-ply sanded fir plywood splitter, 70 3/4" wide by 27 3/4" deep, 3 coats of polyurethane per side, plus spraypaint, top only: 16.1 lb.
- Mounting hardware: est. 1.0 lb.
So, total, in excess of 17 lb. on the very nose of the car. Hopefully, at the track, at speeds exceeding 75 mph, the downforce/grip it generates is well worth the weight. I'm assuming this could be about 6–7 lb. lighter if executed in carbon fiber or some other weight-optimized splitter material.
You could substitute 6 or 10mm thick alumilite for plywood, as some others have suggested, but it's considerably more expensive (I called a local sign shop and was quoted over $200 for a 4' x 8' sheet of 10mm alumilite).
Also, if the weight quoted at the following site is accurate (22 lb. for a 4' x 8' sheet, not sure which thickness they're referring to), the alumilite splitter in the dimensions of my design (roughly 70" x 28", or 43% of the area of a 4' x 8' sheet) would still be about 9 1/2 pounds:
http://www.rhino-graphics.com/signs/alumilite.html