Hella Supertones Install
 May 20, 2013, 10:56 PM
#16
Evolving Member
Join Date: Oct 2003
Location: So. Cali.
Posts: 228
Likes: 0
Received 0 Likes
on
0 Posts
well hello hella fans. seems like our car is even better suited for a pair of these horns, more so than the Subarcrap
If this was any easier, it would have came with its own Easy button from Staples (not taking the bumper off as part of this project)
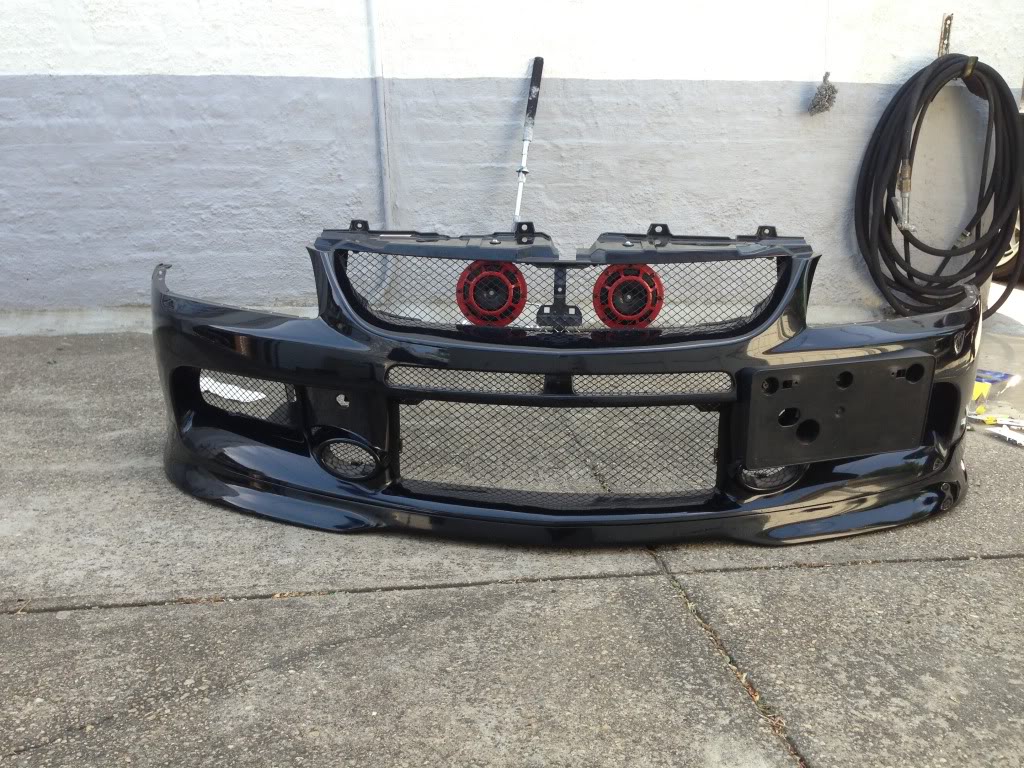
I decided to make a pair of aluminum brackets but you can easily use anything similar from the hardware store. The screws mount to the OEM holes that connect to the metal bumper brace and simply replaced the plastic inserts.
I extended each positive line to the respective horns on each side and for the negative, I picked up from the screw of the OEM horn in the middle and ran it first to one horn then to the other.
If this was any easier, it would have came with its own Easy button from Staples (not taking the bumper off as part of this project)
I decided to make a pair of aluminum brackets but you can easily use anything similar from the hardware store. The screws mount to the OEM holes that connect to the metal bumper brace and simply replaced the plastic inserts.
I extended each positive line to the respective horns on each side and for the negative, I picked up from the screw of the OEM horn in the middle and ran it first to one horn then to the other.
Last edited by artinist; May 20, 2013 at 11:03 PM.
 May 20, 2013, 10:59 PM
#17
Evolving Member
Join Date: Oct 2003
Location: So. Cali.
Posts: 228
Likes: 0
Received 0 Likes
on
0 Posts
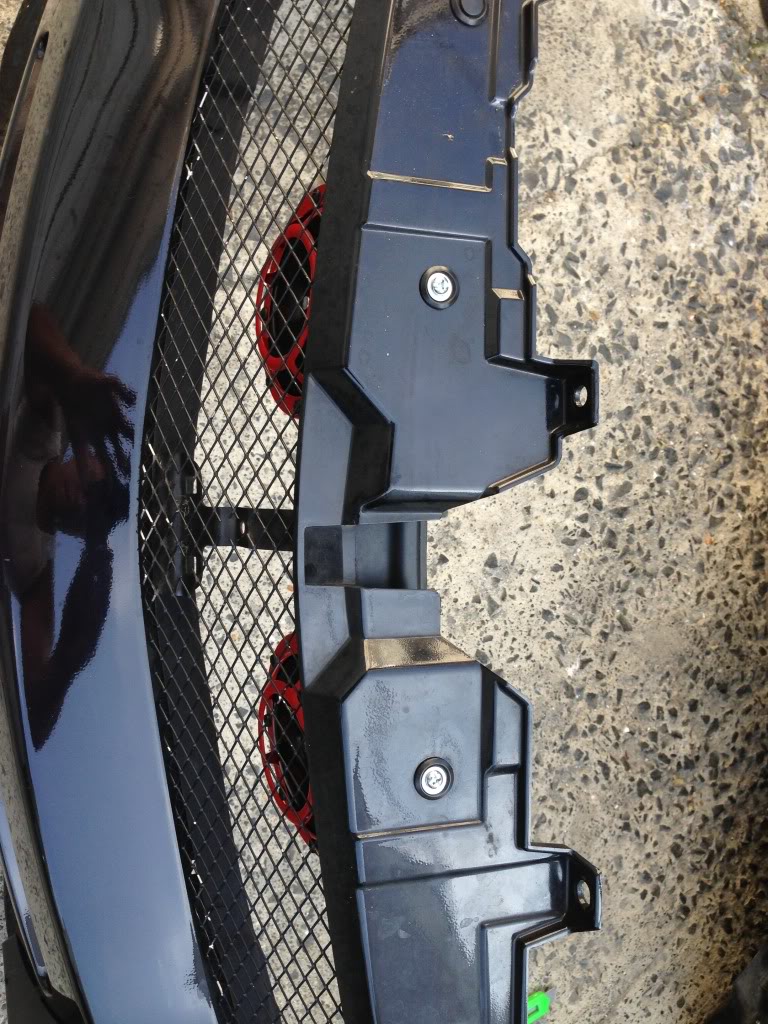
and there is plenty of clearance with the AC fan and the larger intercooler. you can mount them closer to the center or space them wider apart. its easily adjustable. I will replace the two visible screws but I just used something I had for now..
Enjoy
Enjoy
May 20, 2013, 11:07 PM
#19
Evolving Member
Join Date: Oct 2003
Location: So. Cali.
Posts: 228
Likes: 0
Received 0 Likes
on
0 Posts
you have to get to the original horn wiring anyway so the bumper has to come off. honestly this was the 2nd time removing my front bumper and the screw in the wheel are came off very easily. without the bottom plastic engine tray, the bumper came off in 2 minutes.


 Jun 9, 2013, 08:23 PM
#23
So thanks again for the idea artinist. I did the install this weekend and I think it turned out great. I used the two center existing holes, I may decide to try the the ones farther apart at a later date.
As a reference, I am running the stock front bumper reinforcement and cbrd fmic with 3.8 garret core and clearance was spot on!
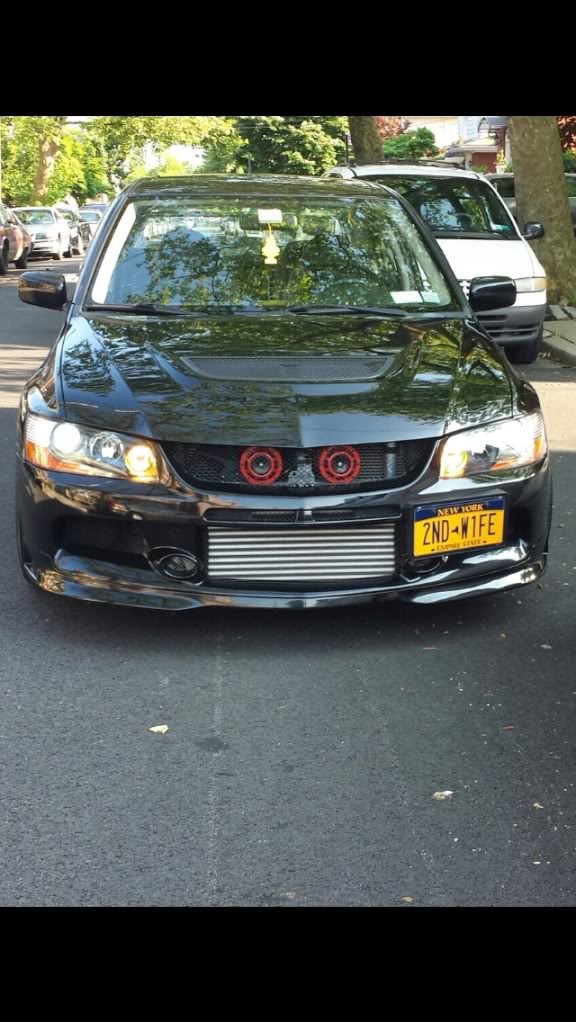
As a reference, I am running the stock front bumper reinforcement and cbrd fmic with 3.8 garret core and clearance was spot on!
Last edited by bKevO; Jun 9, 2013 at 08:27 PM.
Jun 10, 2013, 07:38 PM
#24
Haha, I love the plate ^^
I have hella horns as well, I mounted one in the stock location under the drivers side headlamp, and the other using the FMIC bolt.
I like the symmetry of mounting them both together. Has anyone done this with an EVO 8 front bumper?
I have hella horns as well, I mounted one in the stock location under the drivers side headlamp, and the other using the FMIC bolt.
I like the symmetry of mounting them both together. Has anyone done this with an EVO 8 front bumper?
 Jul 17, 2013, 10:54 AM
#26

from memory with clearances, it seems like we will have to drill our own holes in the top to get the same look. Not sure when i will get to mounting them, but when i do i will post pictures.
Jul 18, 2013, 10:13 PM
#27
Newbie
iTrader: (1)

Join Date: Aug 2008
Location: California
Posts: 13
Likes: 0
Received 0 Likes
on
0 Posts
I have mine mounted the same way as your right now, it was almost 100*F at like 11AM when i was installing these with no shade, so i wasnt going to attempt making any brackets or anything.
from memory with clearances, it seems like we will have to drill our own holes in the top to get the same look. Not sure when i will get to mounting them, but when i do i will post pictures.
from memory with clearances, it seems like we will have to drill our own holes in the top to get the same look. Not sure when i will get to mounting them, but when i do i will post pictures.
 Jul 29, 2013, 10:46 AM
#28
Unfortunately, the Evo 8 bumper doesnt seem to have the same nice clearance as the 9 does. My test fitment/ghetto install is done, removed them to clean up wiring and maybe modify the bracket a little bit. I had a coworker make me some stainless brackets that hung almost perfect between my big turboxs front mount and under the bumper. when i got home, phone was at 3% battery, so no pictures yet besides this one in the rain:

 Aug 1, 2013, 06:34 PM
#29
here is mine. they are both on the drivers side of the car. it looks better off center IMO. i can get better pictures if anyone needs them. i just used one of the metal pieces from the stock horn and bolted it onto the car where the top horn is attached. very easy.