My 2.4 build and what im doing to make it work.
 Dec 19, 2013, 04:01 PM
#1
update on second post with pics
There are a few issues in doing this build. The reason for the issue is because the block is somewhere like 10MM taller than the 4g63 so this causes issues for the timing and then that expands to other things. So I will go from my experience in putting this build together for myself as a helping to others who have thought about doing this also.
Stuff you don't need to worry about with this build
Oil pump
Oil filer housing
Alternator tensioner
Passenger side bracket for motor mount
and all pulleys and plastic covering.
All of these things fit from the 4g63 motor and don't need anything special to bolt up.
I will do my best and I am in fact not a professional at all when it comes to building motors and cars so don’t be too harsh if you see that I did something wrong. Constructive criticism is welcome and I will fix any mistakes I have made in my post. I’d appreciate if anybody has more info to include in this to comment it and ill add it in.
The first issue that comes up with this build is the timing belt option and there are 2 options out there that I know of. First being the stock evo belt and also the 4g64 belt that comes off of a bunch of mid 90’s cars that had the motor. The difference between the two belts is the length, the evo belt has 153 teeth and the 4g64 belt has 154 teeth. The belt is longer to compensate for the block being taller.
The 2.0 belt can be found here and many other locations but this site has good info on it and it has 153 teeth. Part # T167RB
http://www.gatespowerpro.com/Comerge...TOKEN=12606238
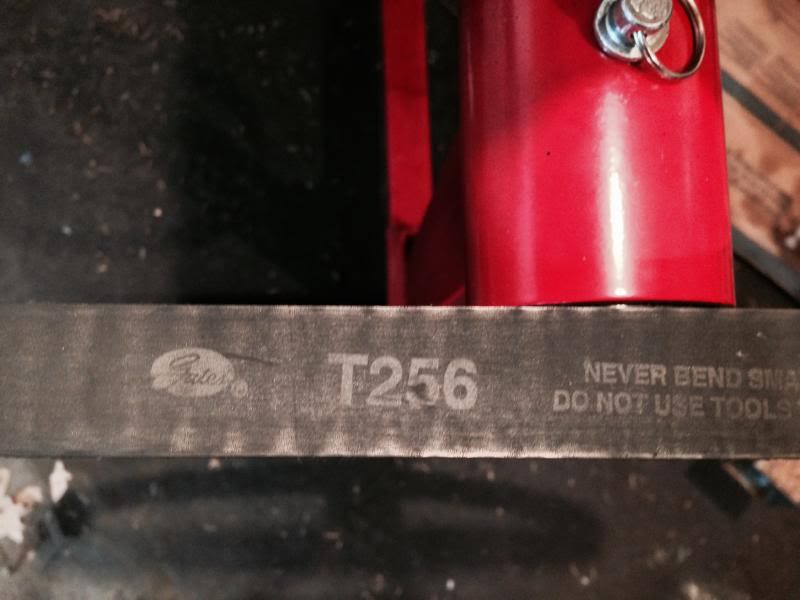
The 2.4 belt can be found here and has 154 teeth. Part # T256
http://www.gatespowerpro.com/Comerge...TOKEN=12606238
This is the 2.4 belt im using ans the part number on it.
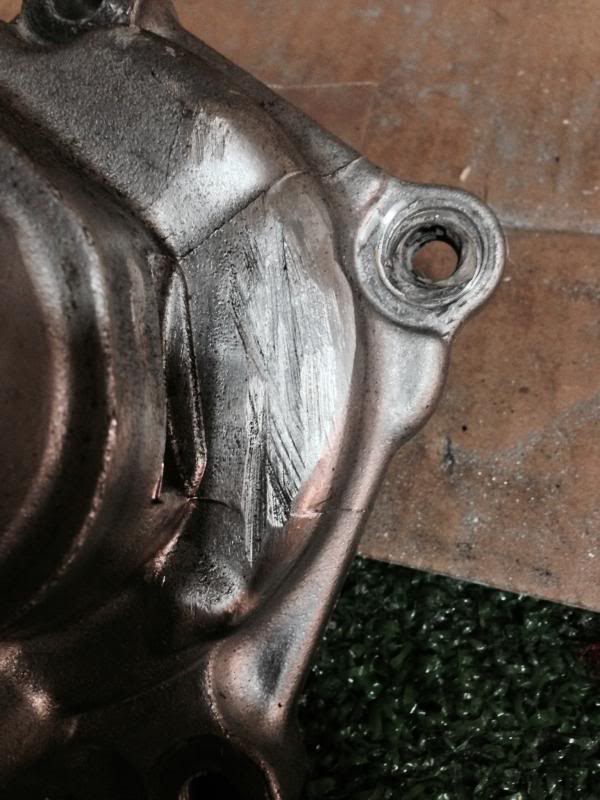
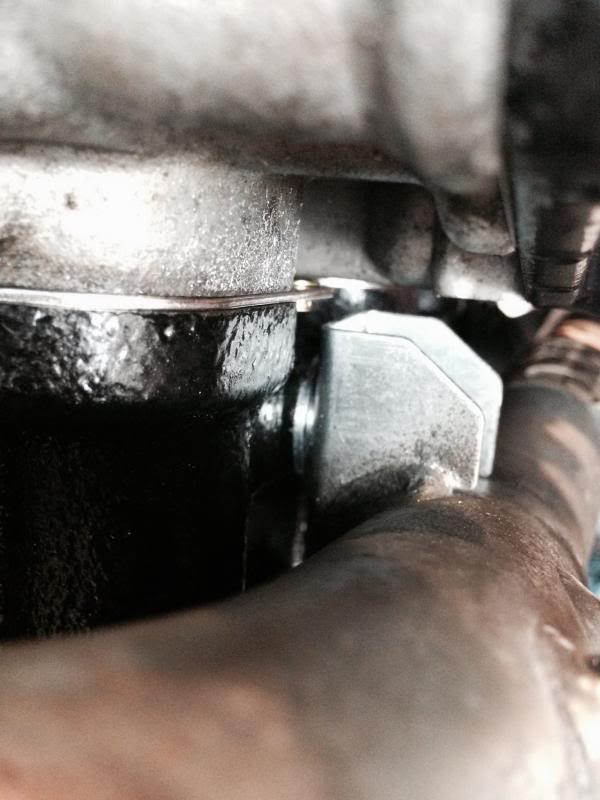
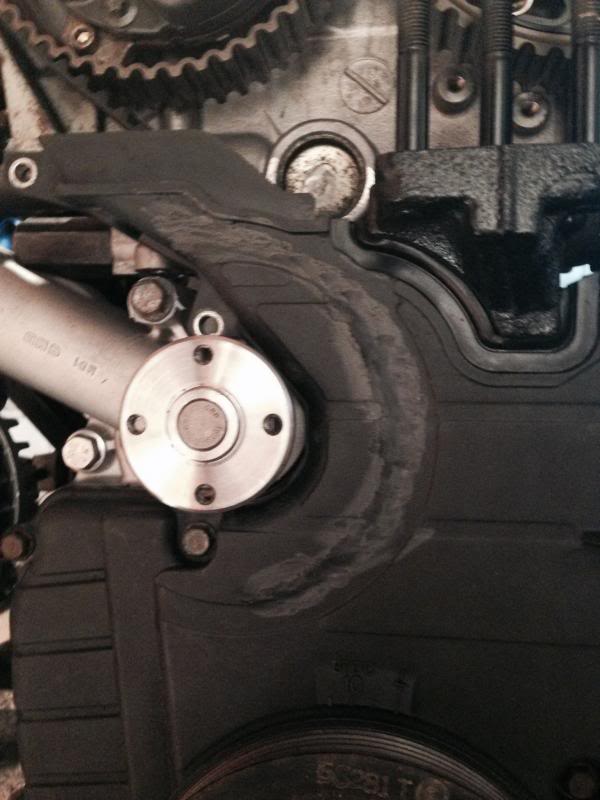
Now depending on whether you want to go with the 4g63 belt or the 4g64 belt you may have to get either a stock evo water pump or a 03 Mitsubishi lander water pump. From my experience of trying to get the smaller 4g63 belt to work with the stock evo water pump with the spacer, is that it was too tight to fit. It was too tight because the belt has 1 teeth less so the tensioner has to be push further to the left and with the stock evo water pump you need a space so that causes the pump to stick out further off the side of the block and that cause the back of the pulley to hit the water pump housing. so i had to grind down the back of the water pump so the pulley wouldn't rub against it as shown in this pic.
So I had to use the 4g64 timing belt. So if you use the 4g63 timing belt I would suggest using the 03 outlander water pump as you don’t need a water pump spacer and you will have the clearance for the tensioner pulley.
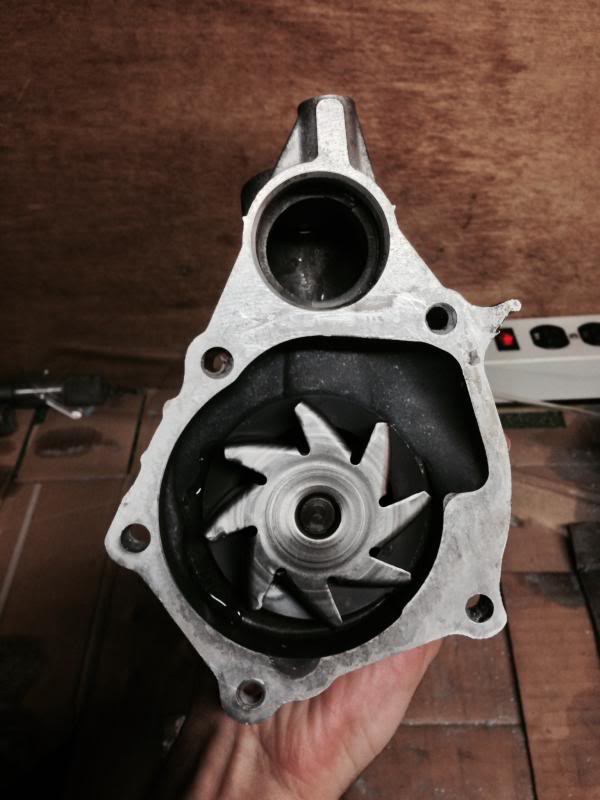
I am using the outlander water pump and its a direct bolt up.
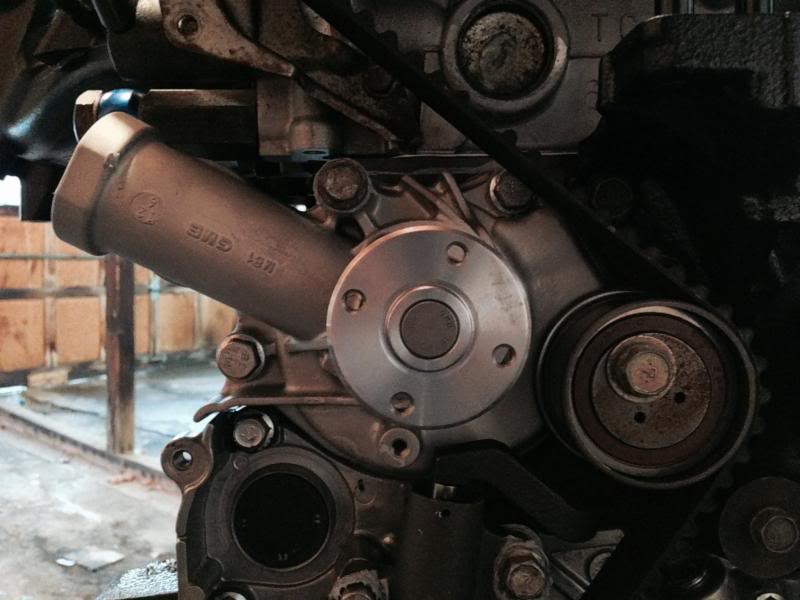
This is how it looks on the other side. the evo water pumps hole is closer to the block.
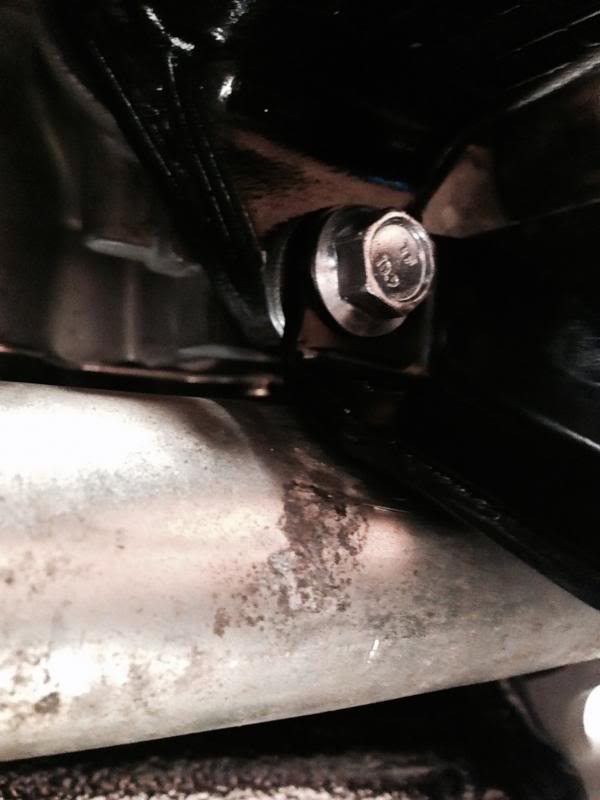
The other thing about the outlander pump is that you wont be able bolt it to the block on the back because the neck causes the pipe to push out a little bit further then the stock water pump.
You can see it sits off the back of the block by about a 1/2''

To fix the alignment problem for the water pump support, i marked how much of the bracket i needed to cut out and then cut it untill it was larger enough to match up with the hole in the block. As seen here
Now with it cut and ready to bolt up the pipe will still stick off the block a 1/2'' so i got some 3/8'' washers to take up that space and got the bolt into to.
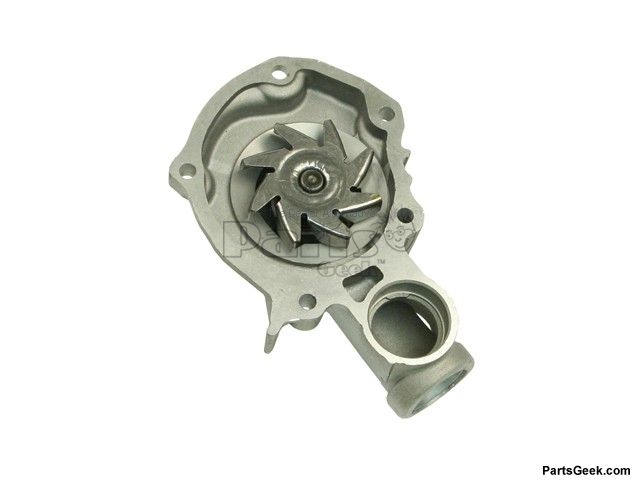
The length of the neck between to two water pumps can be seen here. the outlander pump has a longer neck by about a half inch and will cause issues with the bracket for the alternator. when i get it bolted up i will post pics of what i did to make it work.
The water pump can be the stock evo water pump which can be found here.
http://www.streettunedmotorsports.co...water_pump.htm
But you will need a spacer because the hole in the block for the water to come out of is to larger on the 4G64 block which you can find here.
http://www.maperformance.com/maperfo...p-10-1073.html
I originally used this but you need to gasket both sides along with on the side that faces the block you need to put some gasket maker on it because the gasket itself won’t cover the hole properly and coolant will poor out. I found out the hard way :-/.
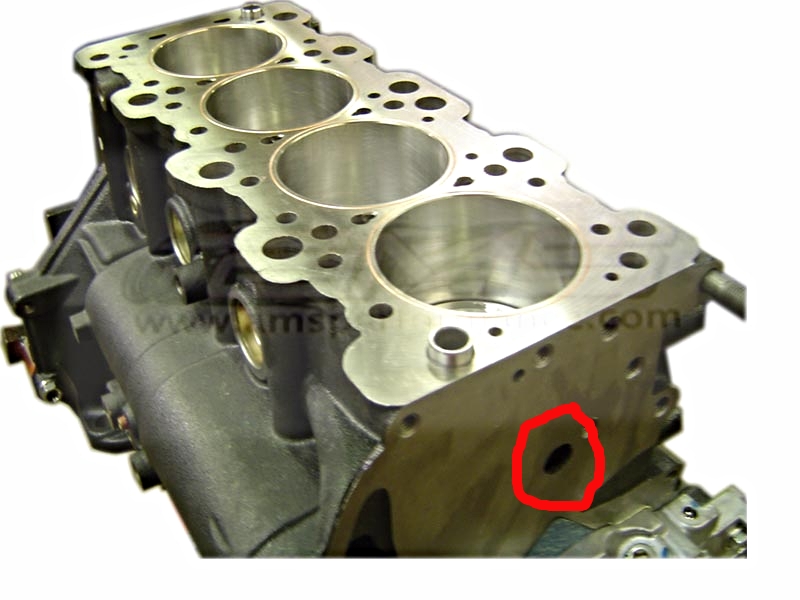
The water pump hole in the block for the 4g64 looks like this.
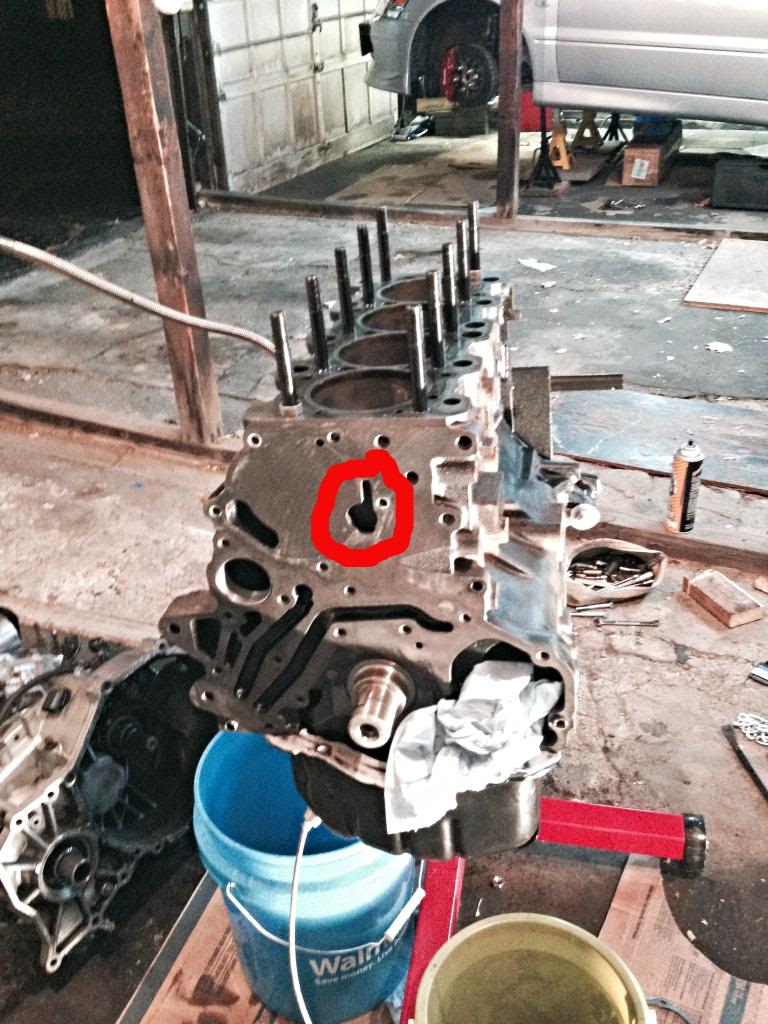
And the hole for the 4g63 looks like this.
Or you could just use the 03 Mitsubishi outlander water pump and not have to use any spacers at all and that can be found here. I went with the gates kit.
http://www.partsgeek.com/catalog/200...ater_pump.html
To break it all down.
Using the 4g63 timing belt go with the 03 outlander water pump
Using the 4g64 timing belt you can use either the 03 outlander water pump or the stock evo water pump.
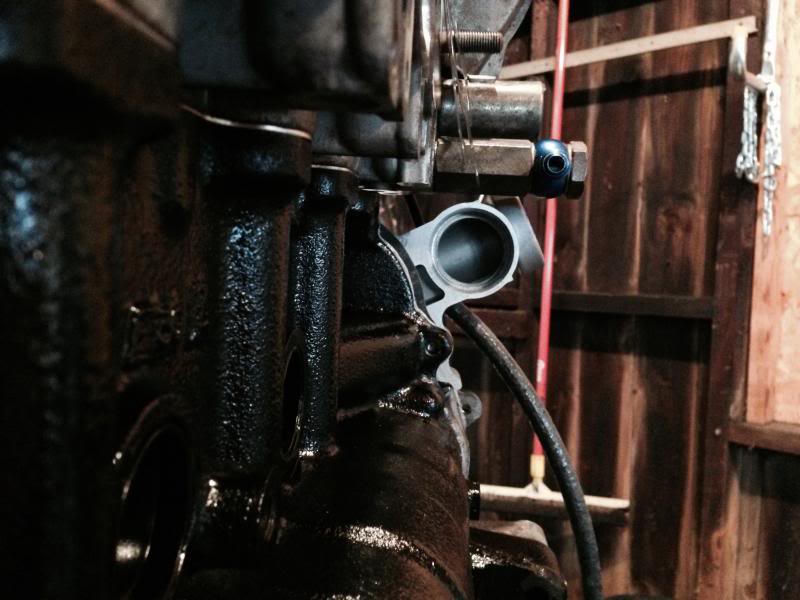
Another part of building a 4g64 on an evo 9 is the mivec oil line. Since the block for the 4g64 is a few MM taller than the 4g63 you will need a new oil line for mivec since the stock line is hard tubing. The part can be found here.
http://parts.maperformance.com/searc...%20feed%20line
In stalled on my motor here.
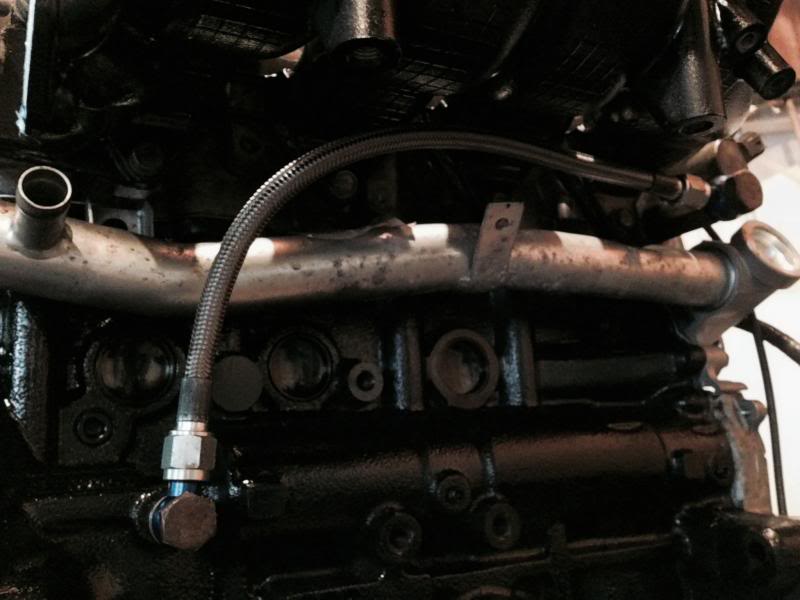
This is an easy fix for the stock hard line.
Another issue with putting together this build is again the issue with the 4g64 block being taller so it makes an issue with getting the timing right for the timing belt. So to help correct this you will need an adjustable cam gear. If you have mivec you will need to get an adjustable exhaust camgear. Which can be found here.
http://www.streettunedmotorsports.co...s_4g63_evo.htm
To set the timing right depends on which timing belt you go with and a few other factors. I used the 4g64 timing belt and I have an adjustable exhaust cam gear and to get the timing right with this set up I had to advance the gear by 3.75 degrees to obtain TDC at all points.
This is my exhaust gear adjusted to make my timing work
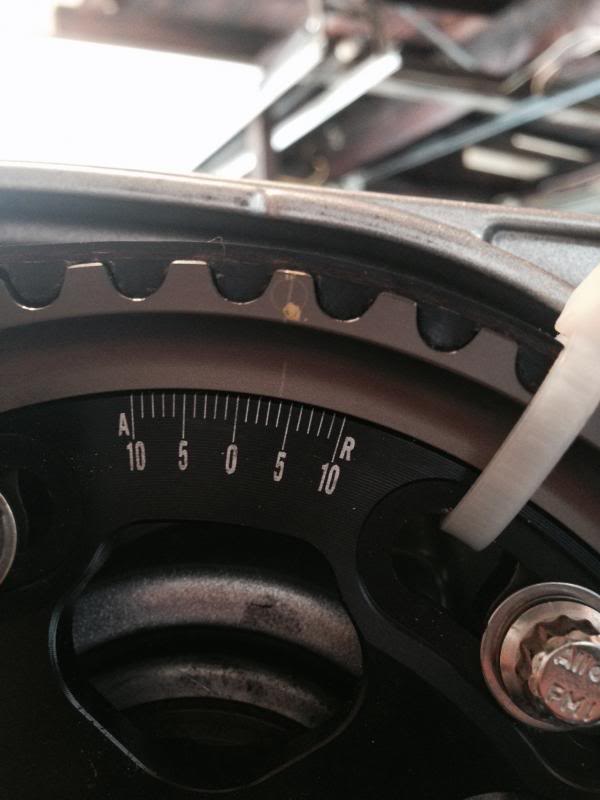
With my exhaust adjusted it allowed for my other points to be at TDC also.
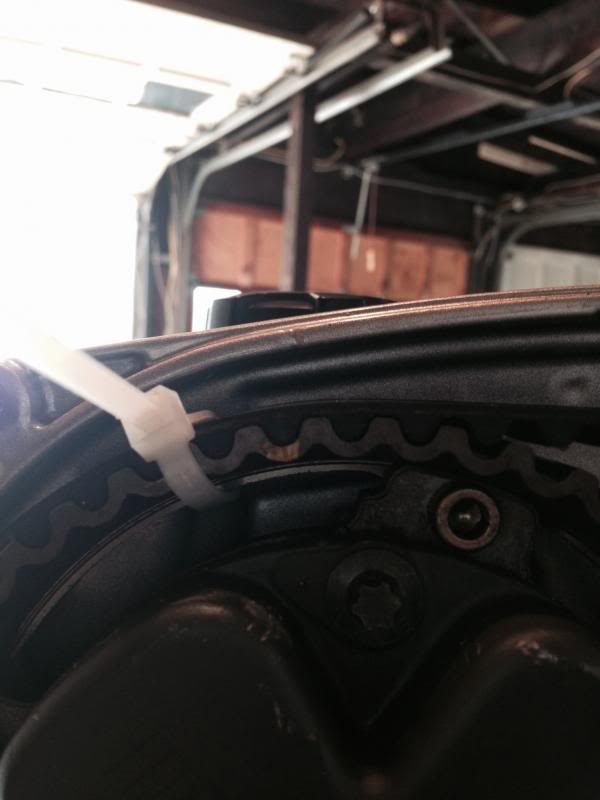

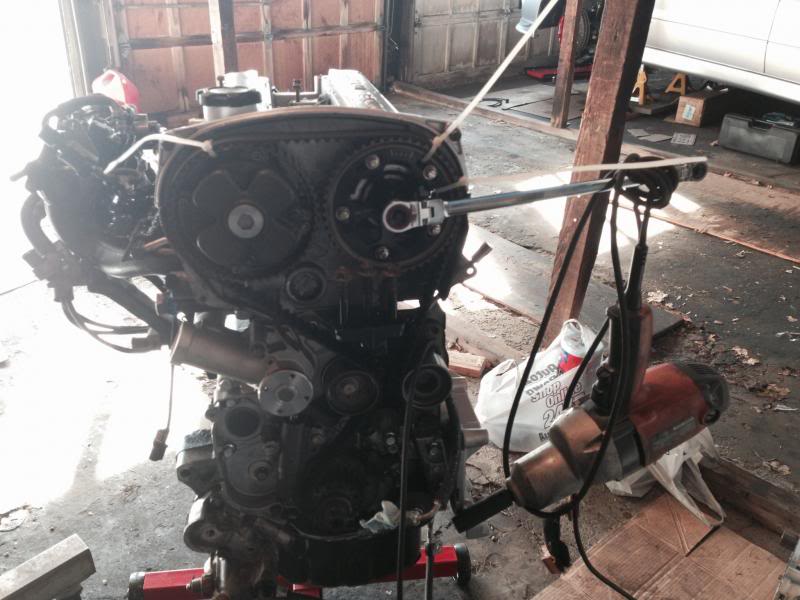
And because i didn't have any help with my timing belt i had to do what i could to get it on as seen here hahaha.
I am still in the process of putting it all together so i will update this as i go. I know iv missed or skipped things but i will try to organize things better as i go also. i just wanted to get this started for now.
There are a few issues in doing this build. The reason for the issue is because the block is somewhere like 10MM taller than the 4g63 so this causes issues for the timing and then that expands to other things. So I will go from my experience in putting this build together for myself as a helping to others who have thought about doing this also.
Stuff you don't need to worry about with this build
Oil pump
Oil filer housing
Alternator tensioner
Passenger side bracket for motor mount
and all pulleys and plastic covering.
All of these things fit from the 4g63 motor and don't need anything special to bolt up.
I will do my best and I am in fact not a professional at all when it comes to building motors and cars so don’t be too harsh if you see that I did something wrong. Constructive criticism is welcome and I will fix any mistakes I have made in my post. I’d appreciate if anybody has more info to include in this to comment it and ill add it in.
The first issue that comes up with this build is the timing belt option and there are 2 options out there that I know of. First being the stock evo belt and also the 4g64 belt that comes off of a bunch of mid 90’s cars that had the motor. The difference between the two belts is the length, the evo belt has 153 teeth and the 4g64 belt has 154 teeth. The belt is longer to compensate for the block being taller.
The 2.0 belt can be found here and many other locations but this site has good info on it and it has 153 teeth. Part # T167RB
http://www.gatespowerpro.com/Comerge...TOKEN=12606238
The 2.4 belt can be found here and has 154 teeth. Part # T256
http://www.gatespowerpro.com/Comerge...TOKEN=12606238
This is the 2.4 belt im using ans the part number on it.

Now depending on whether you want to go with the 4g63 belt or the 4g64 belt you may have to get either a stock evo water pump or a 03 Mitsubishi lander water pump. From my experience of trying to get the smaller 4g63 belt to work with the stock evo water pump with the spacer, is that it was too tight to fit. It was too tight because the belt has 1 teeth less so the tensioner has to be push further to the left and with the stock evo water pump you need a space so that causes the pump to stick out further off the side of the block and that cause the back of the pulley to hit the water pump housing. so i had to grind down the back of the water pump so the pulley wouldn't rub against it as shown in this pic.

So I had to use the 4g64 timing belt. So if you use the 4g63 timing belt I would suggest using the 03 outlander water pump as you don’t need a water pump spacer and you will have the clearance for the tensioner pulley.
I am using the outlander water pump and its a direct bolt up.

This is how it looks on the other side. the evo water pumps hole is closer to the block.

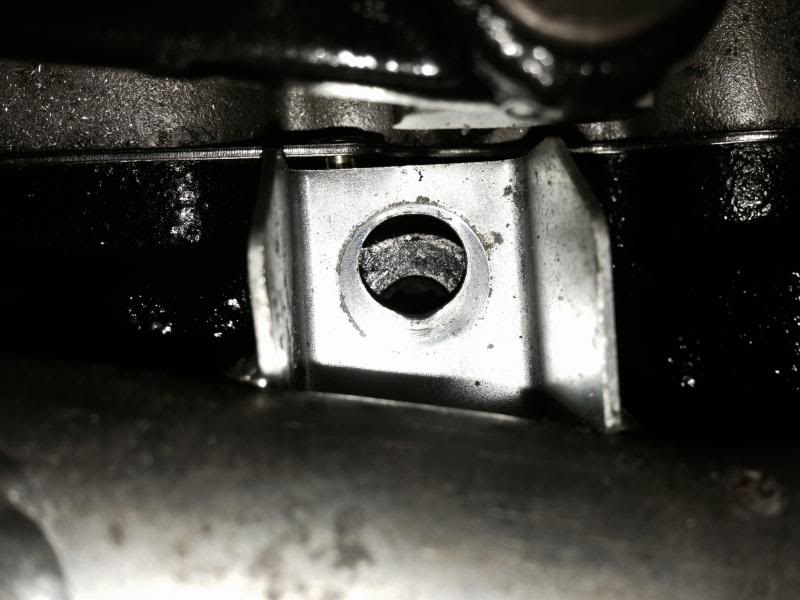
The other thing about the outlander pump is that you wont be able bolt it to the block on the back because the neck causes the pipe to push out a little bit further then the stock water pump.

You can see it sits off the back of the block by about a 1/2''

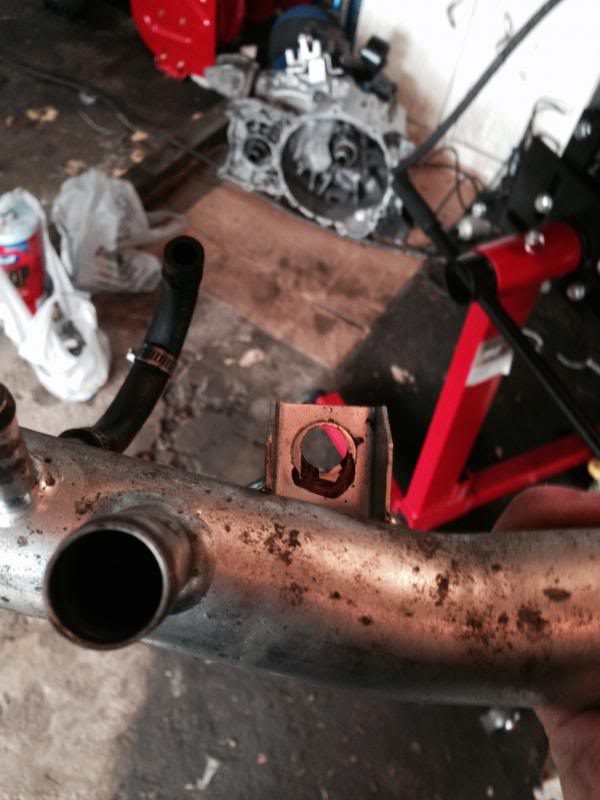
To fix the alignment problem for the water pump support, i marked how much of the bracket i needed to cut out and then cut it untill it was larger enough to match up with the hole in the block. As seen here

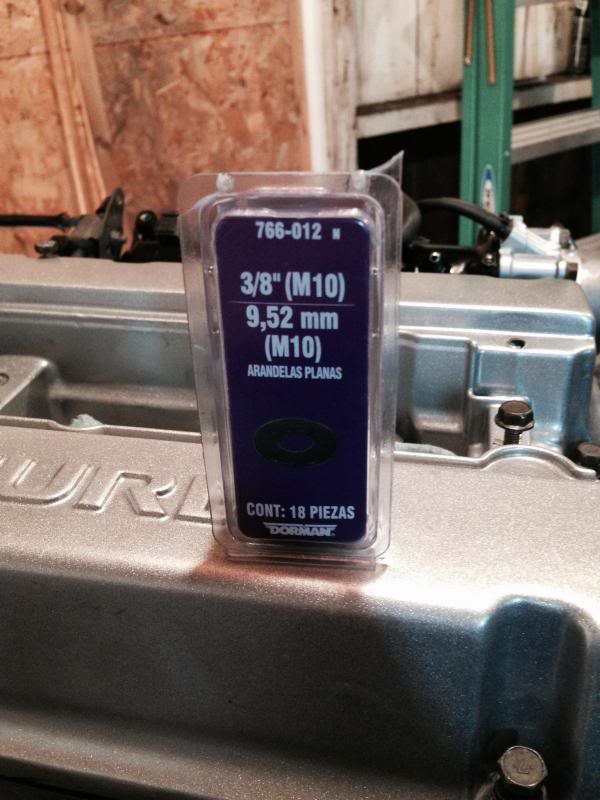
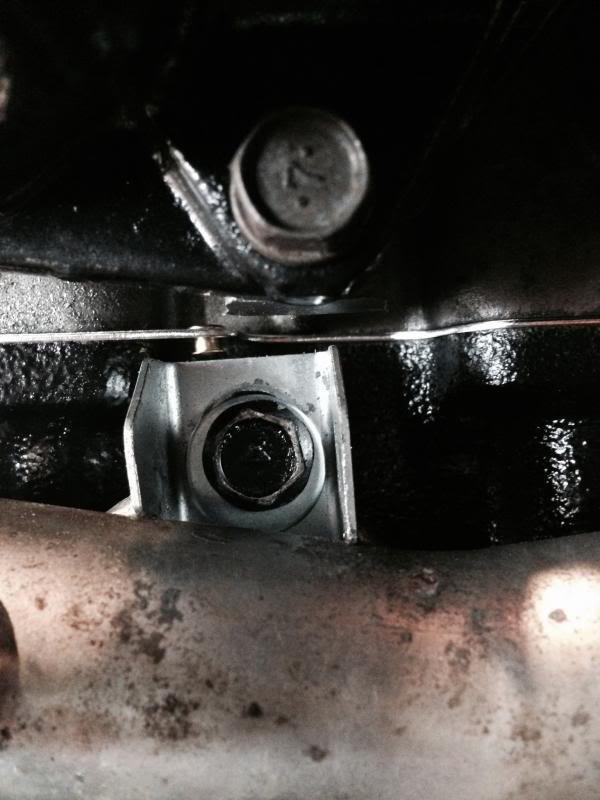
Now with it cut and ready to bolt up the pipe will still stick off the block a 1/2'' so i got some 3/8'' washers to take up that space and got the bolt into to.


The length of the neck between to two water pumps can be seen here. the outlander pump has a longer neck by about a half inch and will cause issues with the bracket for the alternator. when i get it bolted up i will post pics of what i did to make it work.


The water pump can be the stock evo water pump which can be found here.
http://www.streettunedmotorsports.co...water_pump.htm
But you will need a spacer because the hole in the block for the water to come out of is to larger on the 4G64 block which you can find here.
http://www.maperformance.com/maperfo...p-10-1073.html
I originally used this but you need to gasket both sides along with on the side that faces the block you need to put some gasket maker on it because the gasket itself won’t cover the hole properly and coolant will poor out. I found out the hard way :-/.
The water pump hole in the block for the 4g64 looks like this.

And the hole for the 4g63 looks like this.

Or you could just use the 03 Mitsubishi outlander water pump and not have to use any spacers at all and that can be found here. I went with the gates kit.
http://www.partsgeek.com/catalog/200...ater_pump.html
To break it all down.
Using the 4g63 timing belt go with the 03 outlander water pump
Using the 4g64 timing belt you can use either the 03 outlander water pump or the stock evo water pump.
Another part of building a 4g64 on an evo 9 is the mivec oil line. Since the block for the 4g64 is a few MM taller than the 4g63 you will need a new oil line for mivec since the stock line is hard tubing. The part can be found here.
http://parts.maperformance.com/searc...%20feed%20line
In stalled on my motor here.

This is an easy fix for the stock hard line.
Another issue with putting together this build is again the issue with the 4g64 block being taller so it makes an issue with getting the timing right for the timing belt. So to help correct this you will need an adjustable cam gear. If you have mivec you will need to get an adjustable exhaust camgear. Which can be found here.
http://www.streettunedmotorsports.co...s_4g63_evo.htm
To set the timing right depends on which timing belt you go with and a few other factors. I used the 4g64 timing belt and I have an adjustable exhaust cam gear and to get the timing right with this set up I had to advance the gear by 3.75 degrees to obtain TDC at all points.
This is my exhaust gear adjusted to make my timing work

With my exhaust adjusted it allowed for my other points to be at TDC also.


And because i didn't have any help with my timing belt i had to do what i could to get it on as seen here hahaha.

I am still in the process of putting it all together so i will update this as i go. I know iv missed or skipped things but i will try to organize things better as i go also. i just wanted to get this started for now.
Last edited by silver9mr; Mar 21, 2014 at 04:34 PM.
 Dec 19, 2013, 04:02 PM
#2
Last time i put my motor together i didnt prime the oil pump out of the car so to anybody putting together a motor its easier to do this when the motor is on a stand. I used an impact drill on the oil pump and connected as many oil lines so i could keep all the oil in the motor while priming it.
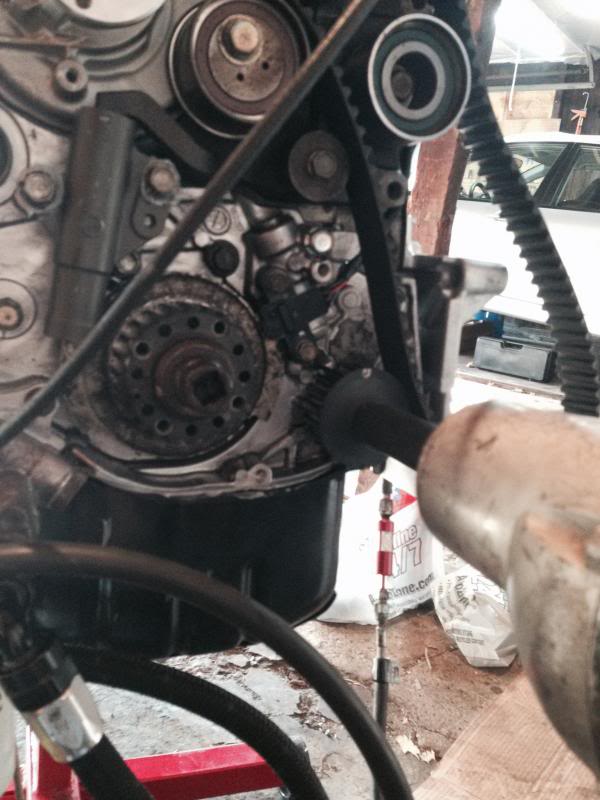
I only had to spin the pump for a few seconds before i had gotten pressure and then had oil come up to the head. Once that was all set i put the timing belt on.
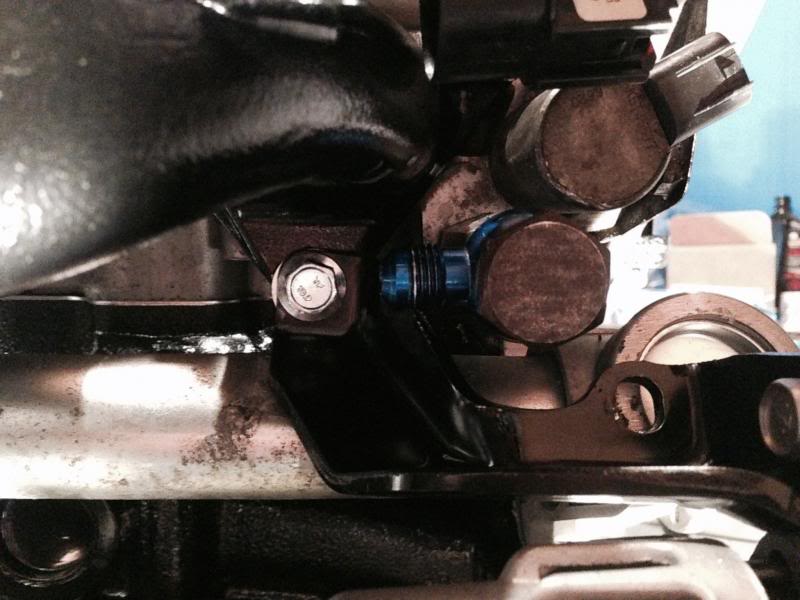
Another issue that comes up with the 03 outlander water pump is a problem with the Alternator bracket that attaches to the head above the water pipe. So the first thing i did was that i took some large channel locks and squeezed the pipe a tiny bit for clearance and then i used more 3/8'' washers so the bracket didn't hit the pipe any more. i also got a little bit longer bolt.
After putting the plastic cover for the front cover i noticed that the water pump pulley rubbed the plastic so i just sanded down the area and now no issues with it touching.
With all the issues for my build solved the motor now sits like this.
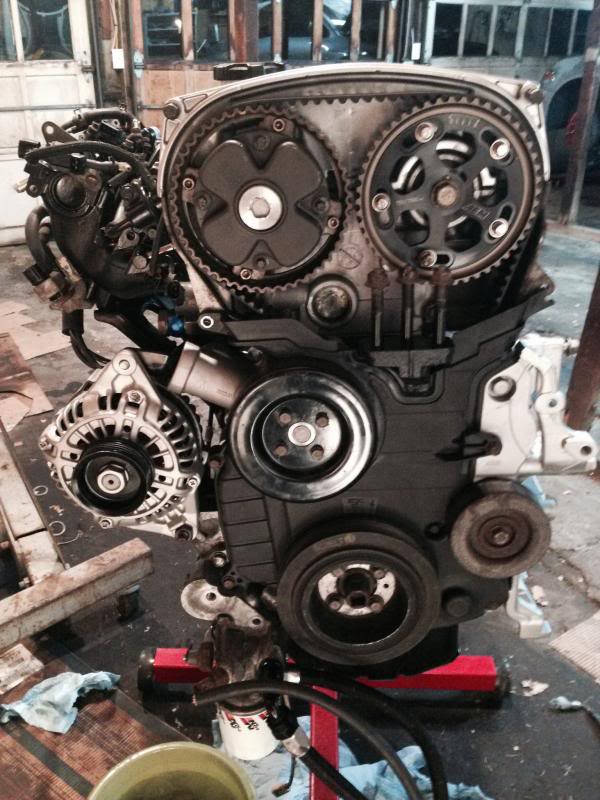


I only had to spin the pump for a few seconds before i had gotten pressure and then had oil come up to the head. Once that was all set i put the timing belt on.
Another issue that comes up with the 03 outlander water pump is a problem with the Alternator bracket that attaches to the head above the water pipe. So the first thing i did was that i took some large channel locks and squeezed the pipe a tiny bit for clearance and then i used more 3/8'' washers so the bracket didn't hit the pipe any more. i also got a little bit longer bolt.


After putting the plastic cover for the front cover i noticed that the water pump pulley rubbed the plastic so i just sanded down the area and now no issues with it touching.

With all the issues for my build solved the motor now sits like this.


Last edited by silver9mr; Dec 20, 2013 at 07:06 PM.
Dec 19, 2013, 04:21 PM
#3
Been busy with life and had a little time to get a few things done on this motor.
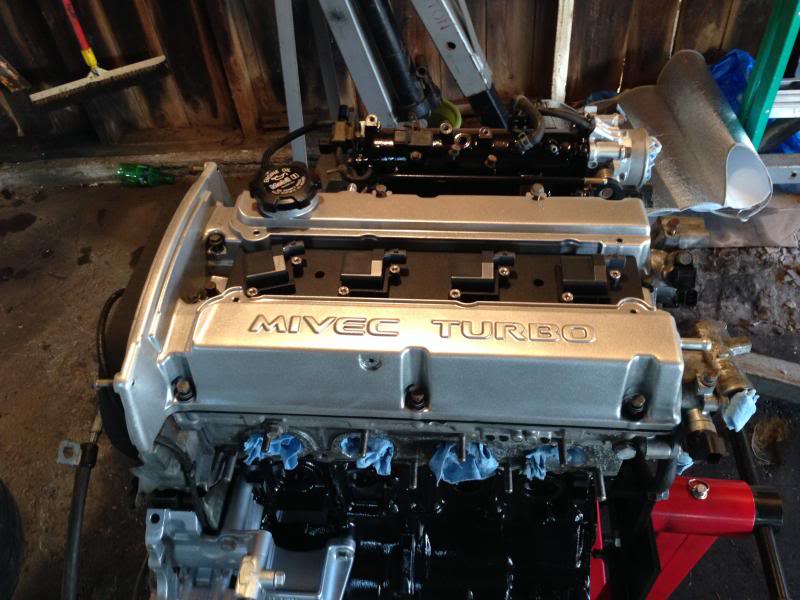
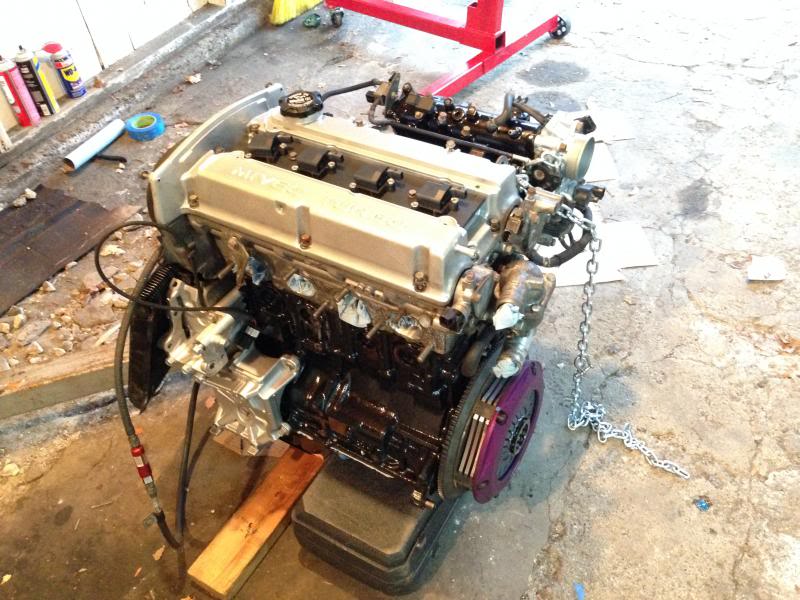
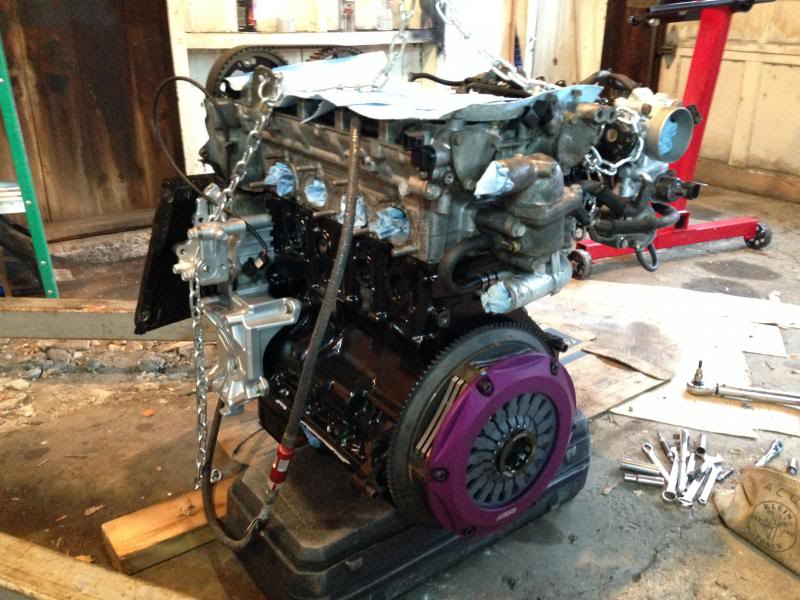
I assembled everything so far and just need to mate the motor and transmission together but I got my clutch on and tried out my new Spoolinup COP, how does it look so far?
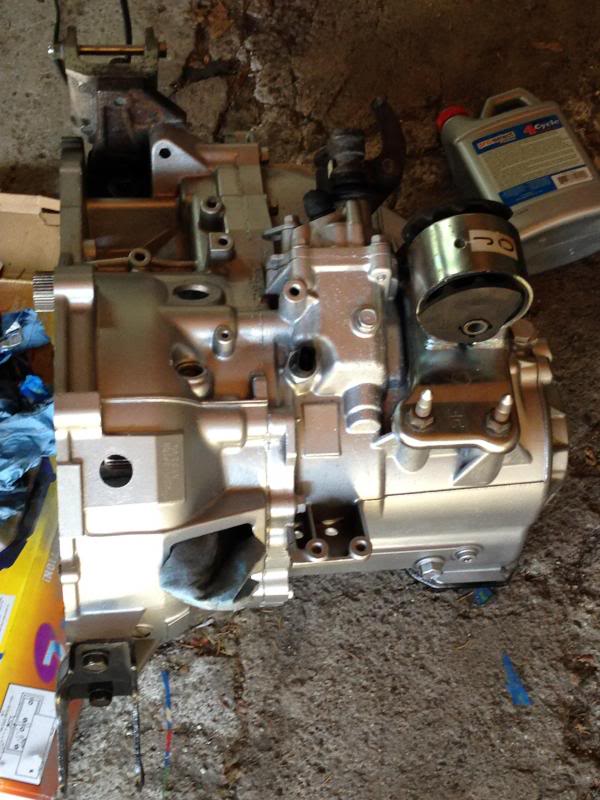
I just got my tranny back from the builder, had him look it over and its good to go back in but i noticed that the imput shaft seal is no good so im just waiting on that to come in before i can get the tranny and motor back together
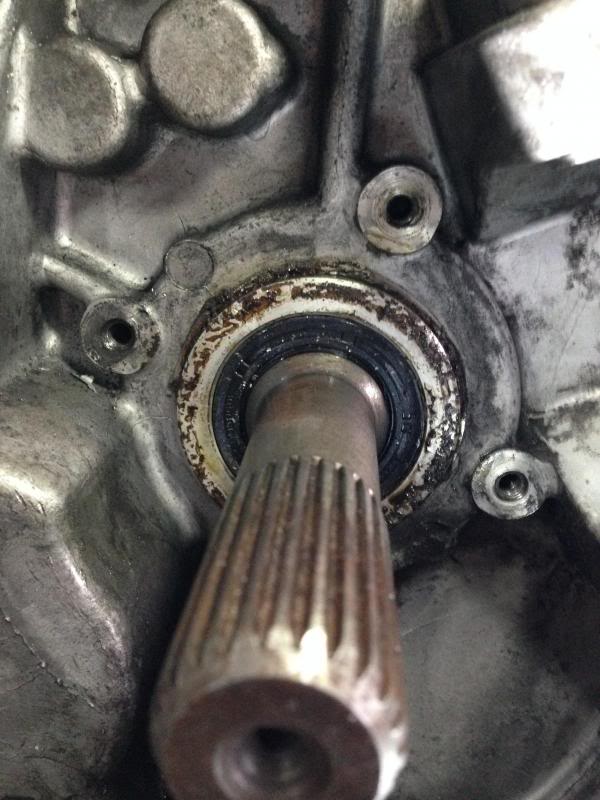
The inside of the tranny had a lot of oil in it and i removed the input shaft cover and noticed this, its pretty gunked up and this is the only place the oil could have come from so ill be replacing the seal once it comes it
I hope to have this done in the next few weeks but i have a new addition to the house and she needs a bit of attention! Say hello to my Rottweiler Sasha!

I assembled everything so far and just need to mate the motor and transmission together but I got my clutch on and tried out my new Spoolinup COP, how does it look so far?


I just got my tranny back from the builder, had him look it over and its good to go back in but i noticed that the imput shaft seal is no good so im just waiting on that to come in before i can get the tranny and motor back together

The inside of the tranny had a lot of oil in it and i removed the input shaft cover and noticed this, its pretty gunked up and this is the only place the oil could have come from so ill be replacing the seal once it comes it

I hope to have this done in the next few weeks but i have a new addition to the house and she needs a bit of attention! Say hello to my Rottweiler Sasha!

Last edited by silver9mr; Mar 21, 2014 at 04:33 PM.
Dec 19, 2013, 06:05 PM
#4
Evolved Member
iTrader: (14)
Join Date: Oct 2010
Location: Pittsburgh
Posts: 583
Likes: 0
Received 0 Likes
on
0 Posts
Great info, I'm currently building a 2.4, a possible solution for your coolant crossover tube sitting off the block is using a longer bolt and stack washers behind the crossover tube flange, tighten it down. Food for thought
Dec 19, 2013, 06:08 PM
#5
Evolved Member
iTrader: (14)
Join Date: Oct 2010
Location: Pittsburgh
Posts: 583
Likes: 0
Received 0 Likes
on
0 Posts
Another great solution for anyone who has a question about properly timing your cams with different length belts and deck heights, use a degree wheel, best way to dial in your cams exactly.
Dec 19, 2013, 07:42 PM
#7
Newbie

Join Date: Mar 2012
Location: Keyport, NJ
Posts: 24
Likes: 0
Received 0 Likes
on
0 Posts
On the Club3G forum there's a thread addressing the issues with getting a 4G63 head to work properly on a 4G64 block, including the timing belt issue (obv. not stuff like Mivec oil line lol). It doesn't go as in-depth as you have but I can find it if you'd like. 
Trending Topics
 Dec 20, 2013, 04:52 AM
#9
Evolved Member
iTrader: (14)
Join Date: Oct 2010
Location: Pittsburgh
Posts: 583
Likes: 0
Received 0 Likes
on
0 Posts
Do we know if the 64 and 63 belts are made of the same material? I heard that the evo belts are kevlar reinforced. Wouldn't want guys putting an inferior belt on their high he car only to break because it's not as strong.

The following users liked this post:
bvliz (Jun 3, 2017)