HOW TO: OEM Ralliart Diffuser SOLUTION! $20!
 Aug 11, 2014, 05:58 PM
#1
Newbie
Thread Starter

Join Date: Dec 2013
Location: Security
Posts: 51
Likes: 0
Received 0 Likes
on
0 Posts
HOW TO: OEM Ralliart Diffuser SOLUTION! $20!
Rather than spending hundreds on a diffuser or buying a new bumper, for $20 you can simply have the OEM look you want!
Things Needed:
3/8" or #10 Socket Wrench (if you've ever worked on your Ralliart it's the one bolt size you need).
Phillips Head (Short if possible)
Mini Socket wrench with phillips head (if you don't want to remove your wheels)
Tools for removing rear wheel (if removing rear wheels)
Jack stands/jack (if removing rear wheels)
Plasti-dip (BLACK) buy at home depot for about $3 - $5
GREEN FROG TAPE (if you want a really clean cut off. None of that normal beige masking tape or blue masking tape crap).
Before I start, there are two ways of doing this. You can remove the wheels (which is a good time to paint calipers or something), or do it with a mini socket wrench and phillips head. I am saying this because it will be hard to remove the screws holding the rear bumper in place.
There is a third option, you can do this without removing the rear bumper, but the fear of overspray is not worth it for a 10 minute removal, IMO.
LETS GET STARTED!
Head to Autozone, and get 1/2" ricer chrome molding located in the ricer aisle.
Should be $18.99 (ripoff I know).
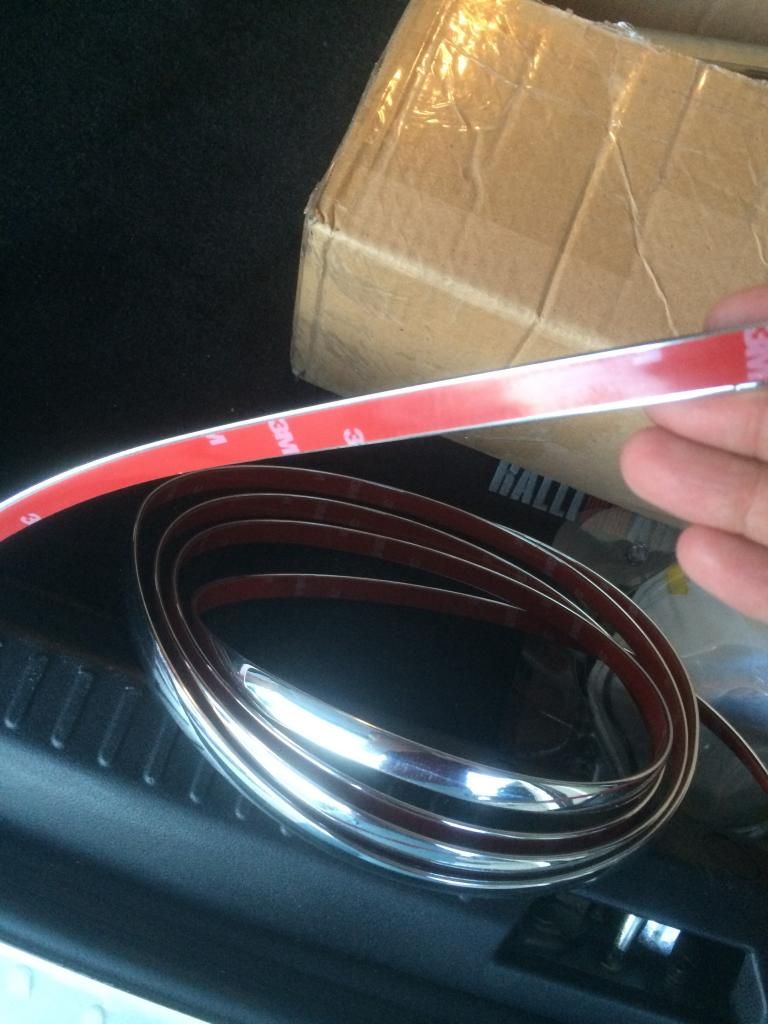

What's awesome is that it is flexible and has 3M tape on the back already.
Things Needed:
3/8" or #10 Socket Wrench (if you've ever worked on your Ralliart it's the one bolt size you need).
Phillips Head (Short if possible)
Mini Socket wrench with phillips head (if you don't want to remove your wheels)
Tools for removing rear wheel (if removing rear wheels)
Jack stands/jack (if removing rear wheels)
Plasti-dip (BLACK) buy at home depot for about $3 - $5
GREEN FROG TAPE (if you want a really clean cut off. None of that normal beige masking tape or blue masking tape crap).
Before I start, there are two ways of doing this. You can remove the wheels (which is a good time to paint calipers or something), or do it with a mini socket wrench and phillips head. I am saying this because it will be hard to remove the screws holding the rear bumper in place.
There is a third option, you can do this without removing the rear bumper, but the fear of overspray is not worth it for a 10 minute removal, IMO.
LETS GET STARTED!
Head to Autozone, and get 1/2" ricer chrome molding located in the ricer aisle.
Should be $18.99 (ripoff I know).
What's awesome is that it is flexible and has 3M tape on the back already.
Last edited by Albert Ngo; Aug 11, 2014 at 06:28 PM.
 Aug 11, 2014, 05:59 PM
#2
Newbie
Thread Starter
Join Date: Dec 2013
Location: Security
Posts: 51
Likes: 0
Received 0 Likes
on
0 Posts
Step 1:
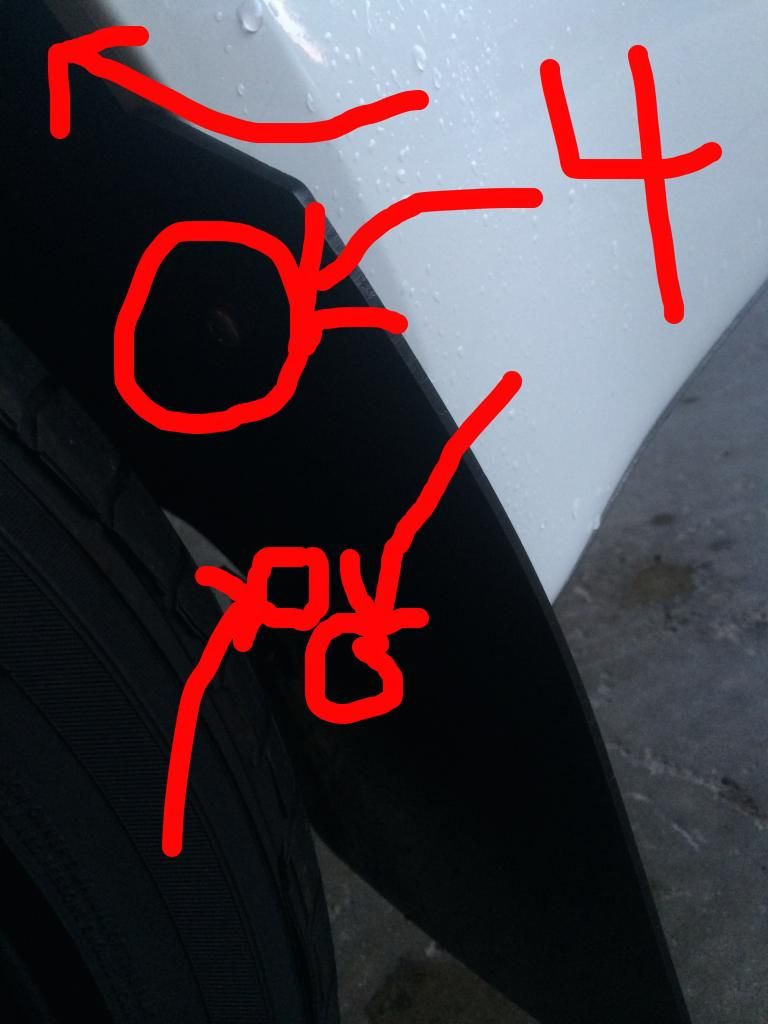
If you have mudflaps, follow this guide closely. If you don't, try to find all plastic clips/screws around the flap before moving on, then buy rallyarmor mudflaps.
There are actually 5 screws.
3 are attached to the mudflap in the wheel arches here, as you can see. This is where the mini socket wrench with the phillips head comes in, otherwise you can ghetto rig a phillips head and pliers and slowly remove it, or remove the wheel all together.
1 is attached near the top of the wheel well, you'll need either a phillips head or a #10 socket wrench for this. It is similar to the front bumper nut.
1 is a plastic one attached near the edge of the wheel well towards the rear bumper. Lightly twist it with a phillips head until it pops up, then take it out. These are tricky.
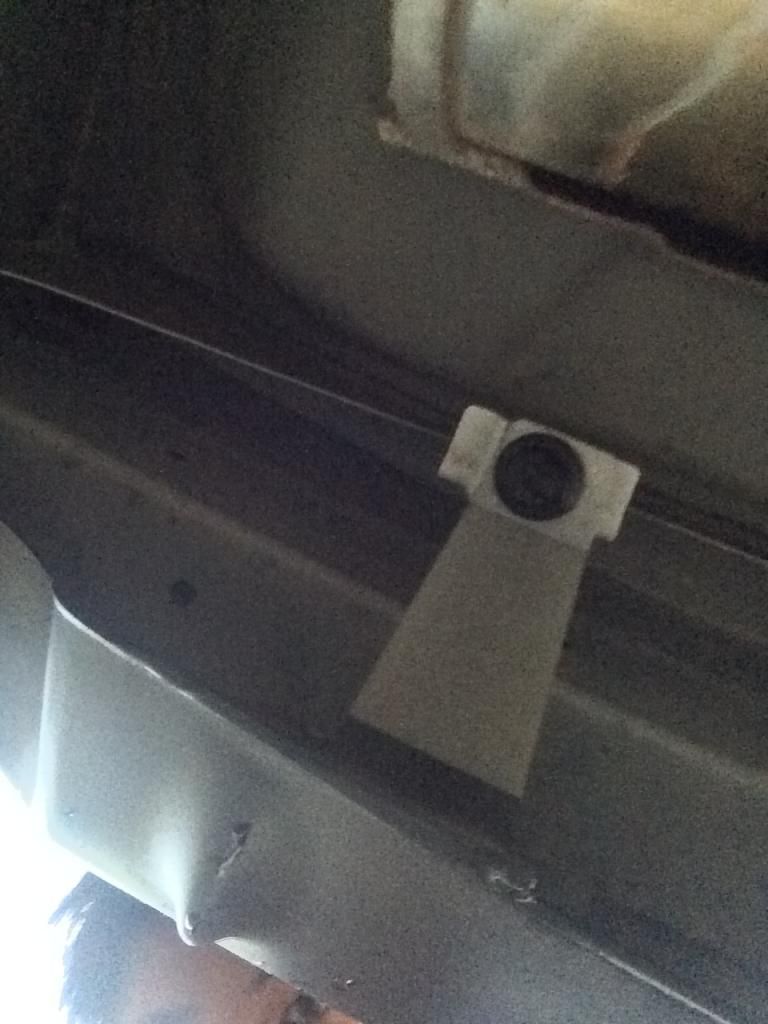
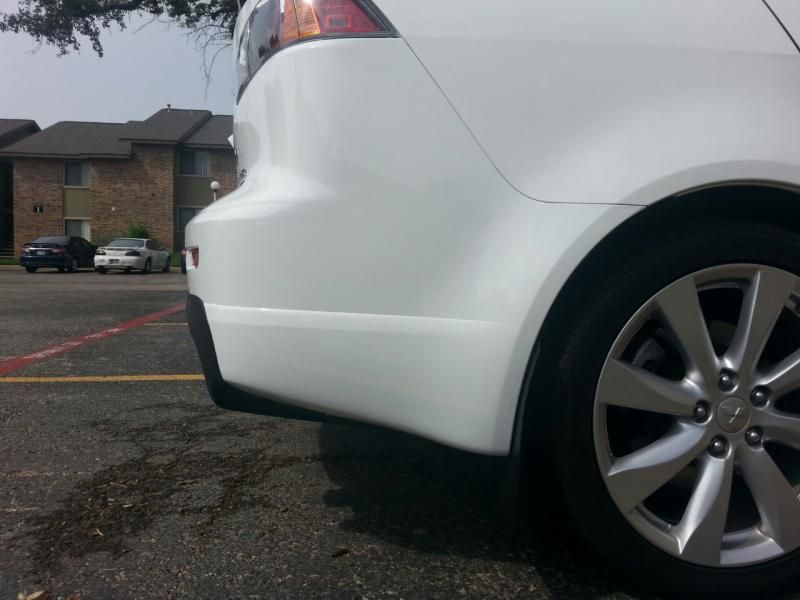
For mudflap owners, there is an additional screw below the bumper:
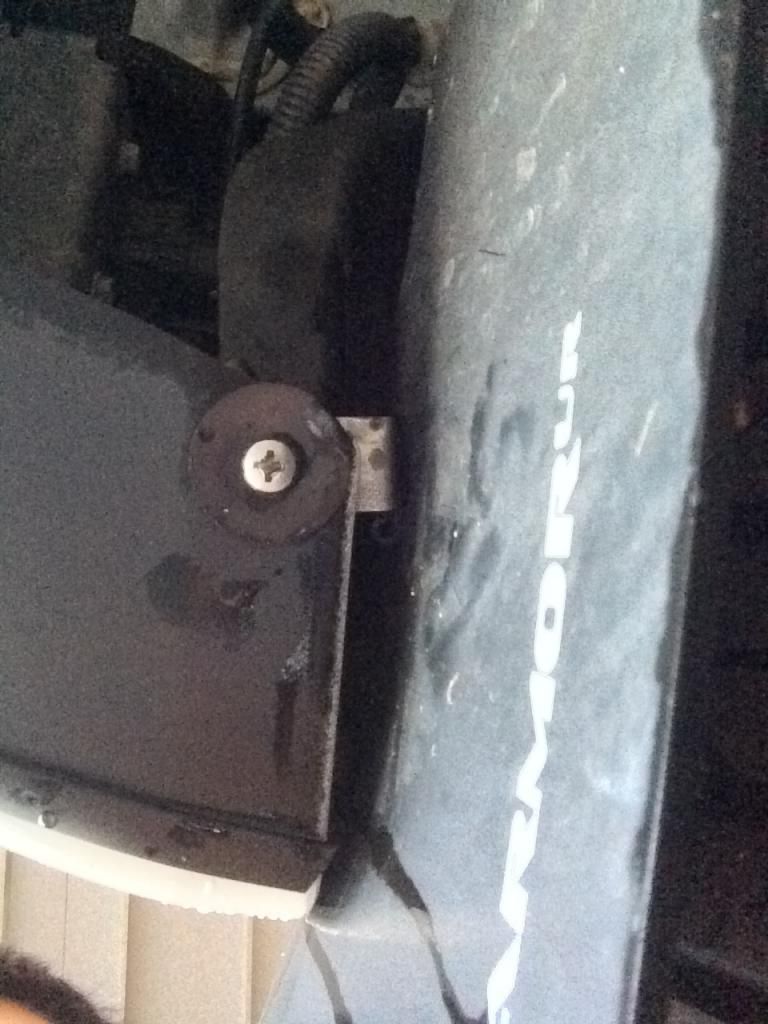
If you have mudflaps, follow this guide closely. If you don't, try to find all plastic clips/screws around the flap before moving on, then buy rallyarmor mudflaps.
There are actually 5 screws.
3 are attached to the mudflap in the wheel arches here, as you can see. This is where the mini socket wrench with the phillips head comes in, otherwise you can ghetto rig a phillips head and pliers and slowly remove it, or remove the wheel all together.
1 is attached near the top of the wheel well, you'll need either a phillips head or a #10 socket wrench for this. It is similar to the front bumper nut.
1 is a plastic one attached near the edge of the wheel well towards the rear bumper. Lightly twist it with a phillips head until it pops up, then take it out. These are tricky.
For mudflap owners, there is an additional screw below the bumper:
Last edited by Albert Ngo; Aug 11, 2014 at 06:08 PM.
Aug 11, 2014, 06:04 PM
#3
Newbie
Thread Starter
Join Date: Dec 2013
Location: Security
Posts: 51
Likes: 0
Received 0 Likes
on
0 Posts
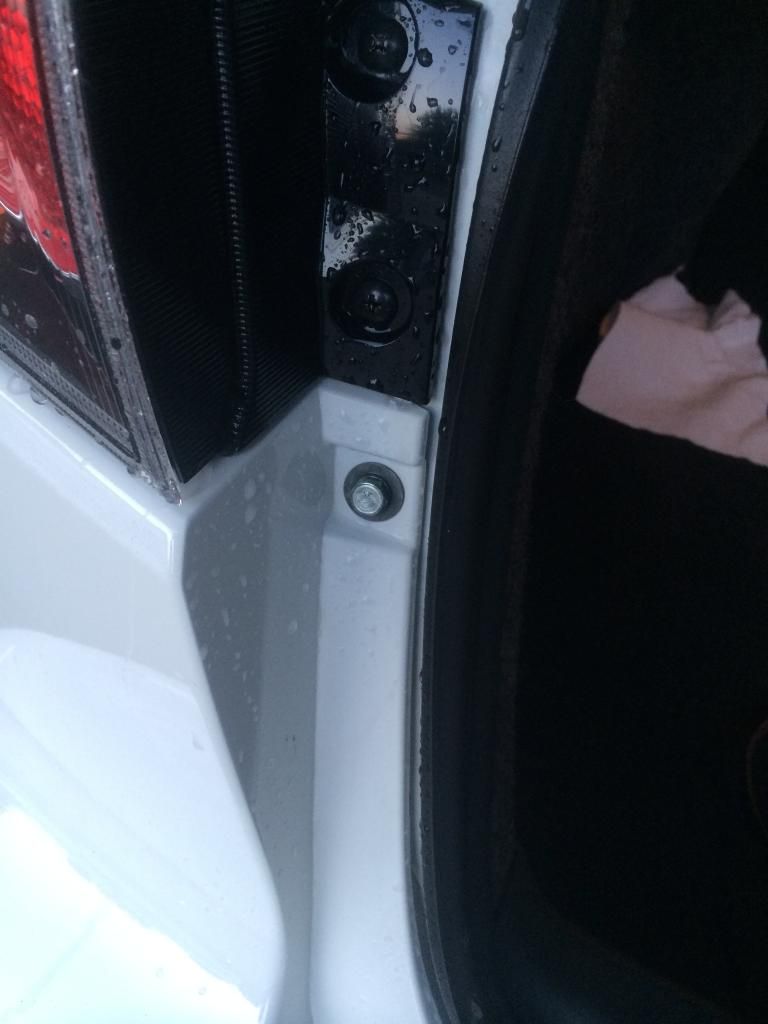
Step 3:
There is a nut near the tail light underneath the trunk.
Step 4:
Get under the bumper and look for a plastic clip (use a flathead to pop out the top and remove with your hand) underneath the bumper near the exhaust. There are two in total, one on each side near the tips.
Step 5: REPEAT FOR THE OTHER SIDE. IN TOTAL:
1 NUT NEAR EACH TAIL LIGHT
2 PLASTIC CLIPS UNDER BUMPER
2 Phillips heads with plastic washers (mudflap owners)
6 Phillips heads with plastic washers (mudflap owners)
2 Upside-down nuts near the top of each wheel well
2 Phillips heads plastic clips
With the rear bumper removed, the rest is simple.
Step 6: REMOVE LICENSE PLATE (forgot, sorry).
Last edited by Albert Ngo; Aug 11, 2014 at 06:20 PM.
Aug 11, 2014, 06:08 PM
#4
Newbie
Thread Starter
Join Date: Dec 2013
Location: Security
Posts: 51
Likes: 0
Received 0 Likes
on
0 Posts
Now the fun part.
Step 7:
Using the auto zone chrome trim, mold the trim around the area you want done. What I did was follow the arches of the bumper.
DO NOT RUSH THIS STEP. If you take your time and don't apply hard pressure on the tape, you can keep tearing it up and trying again. I probably re-did mine about 8 times before it was absolutely perfect. If you're a super perfectionist like me, use a protractor and tape measure for perfect symmetry on both sides.
Note: You can do your own design, but this is how I did mine:
I began the 75 degree bend at the end of the tip of the rear reflectors, seen here:
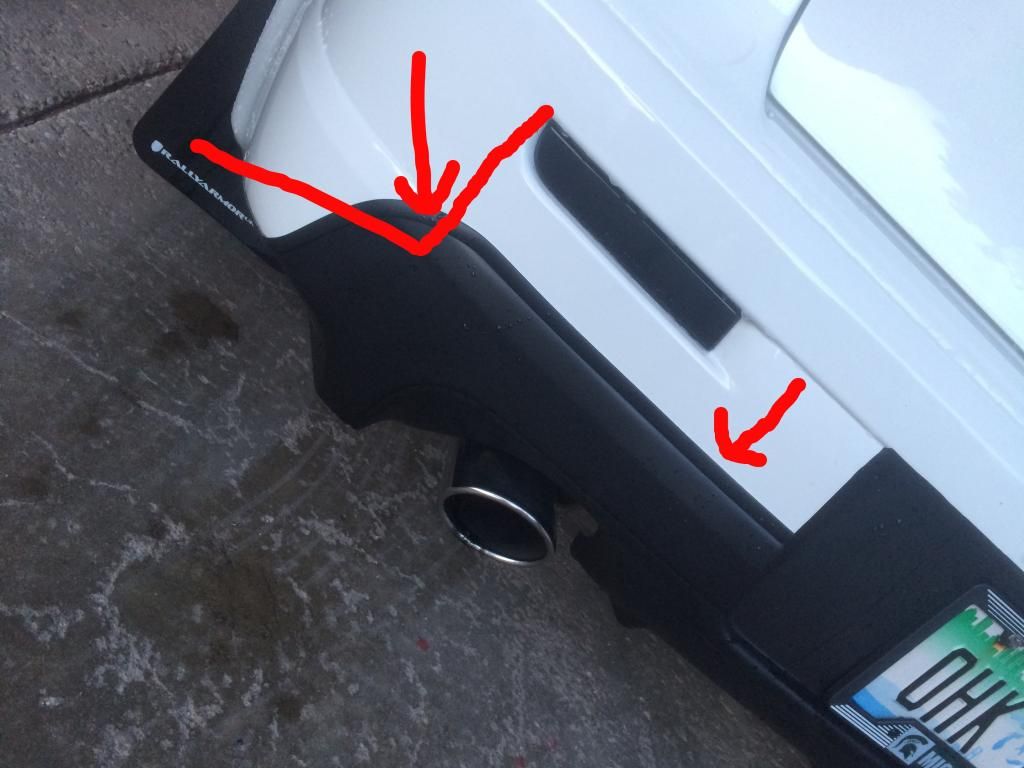
I then fed the chrome trim to follow the edge of the bumper, seen here:
Step 8: Mask off your ENTIRE BUMPER. Take your time with this. This took me about 40 minutes to apply FROG TAPE under the edges of the chrome trim (there will be a bit of overlap that you can slip the tape into, when you're doing this you'll see) and then proceed by adding another layer of frog tape over the trip accompanied with newspaper, magazine, plastic bag, etc. The entire bumper must be covered. Plasti-dip overspray is a no no.
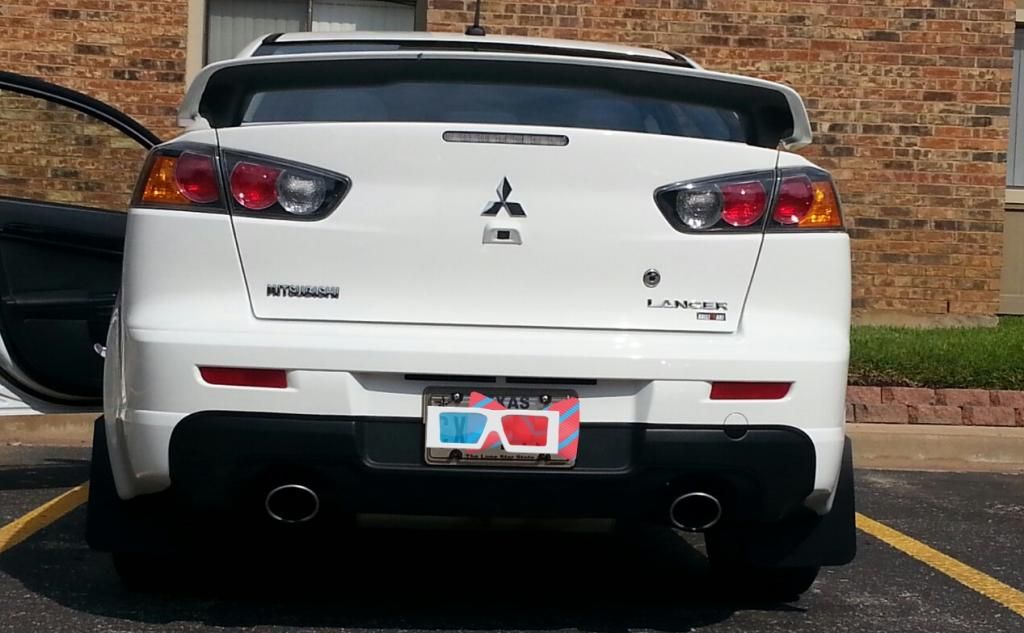
In terms of masking for the license plate, you can either have it cut off in a line or have it go up into the license plate lights, like in mine.
Step 7:
Using the auto zone chrome trim, mold the trim around the area you want done. What I did was follow the arches of the bumper.
DO NOT RUSH THIS STEP. If you take your time and don't apply hard pressure on the tape, you can keep tearing it up and trying again. I probably re-did mine about 8 times before it was absolutely perfect. If you're a super perfectionist like me, use a protractor and tape measure for perfect symmetry on both sides.
Note: You can do your own design, but this is how I did mine:
I began the 75 degree bend at the end of the tip of the rear reflectors, seen here:
I then fed the chrome trim to follow the edge of the bumper, seen here:
Step 8: Mask off your ENTIRE BUMPER. Take your time with this. This took me about 40 minutes to apply FROG TAPE under the edges of the chrome trim (there will be a bit of overlap that you can slip the tape into, when you're doing this you'll see) and then proceed by adding another layer of frog tape over the trip accompanied with newspaper, magazine, plastic bag, etc. The entire bumper must be covered. Plasti-dip overspray is a no no.
In terms of masking for the license plate, you can either have it cut off in a line or have it go up into the license plate lights, like in mine.
Last edited by Albert Ngo; Aug 11, 2014 at 06:30 PM.
Aug 11, 2014, 06:20 PM
#5
Newbie
Thread Starter
Join Date: Dec 2013
Location: Security
Posts: 51
Likes: 0
Received 0 Likes
on
0 Posts
Step 9: Add light coats of plasti-dip. Your first layer should be spots, not fully covering the entire area you want painted. Your second and third layer should focus on filling spots; with your fourth and fifth layers focusing on evening out the entire area. If you take your time and leave about 15 - 20 minutes in between coats, you'll have a very even finish over a relatively large plasti-dipping area.
Step 10: Leave for about 3 - 4 hours to be safe, and unmask your bumper and place it back on.
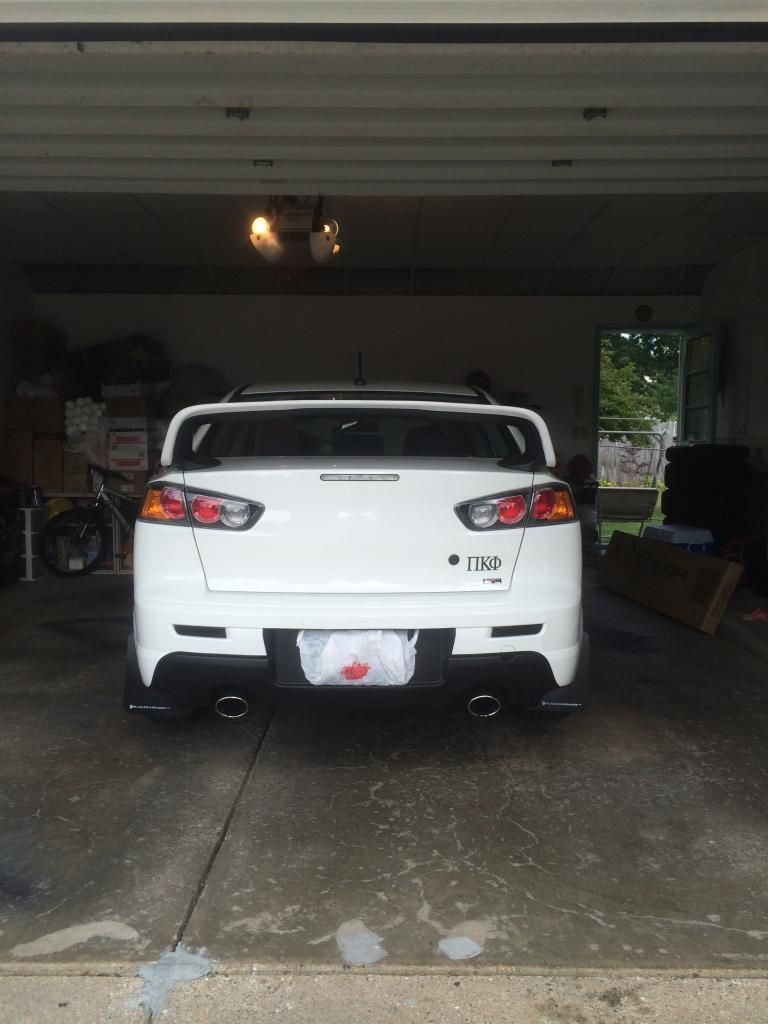
Voila.
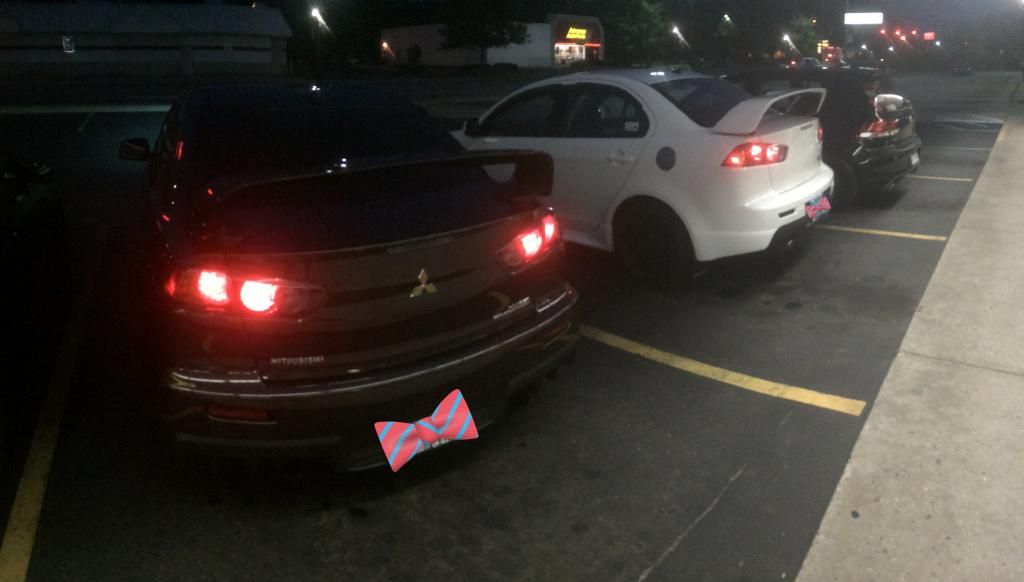
Here's a side by side comparison, I know black doesn't really help highlight the EVO X's diffuser and my car's rear isn't really too visible but it's all I got from a recent meet. Take my word for it, add an EVO X spoiler, rallyarmor mudflaps and remove the middle emblem and it looks really close to the wider EVO X rear look.
Step 10: Leave for about 3 - 4 hours to be safe, and unmask your bumper and place it back on.
Voila.
Here's a side by side comparison, I know black doesn't really help highlight the EVO X's diffuser and my car's rear isn't really too visible but it's all I got from a recent meet. Take my word for it, add an EVO X spoiler, rallyarmor mudflaps and remove the middle emblem and it looks really close to the wider EVO X rear look.
Last edited by Albert Ngo; Aug 11, 2014 at 06:27 PM.
Trending Topics


 Oct 8, 2014, 10:06 PM
#13
Newbie
Join Date: Aug 2014
Location: Seattle
Posts: 3
Likes: 0
Received 0 Likes
on
0 Posts
I think that it shouldn't mess with the paint as long as when/if you want to remove it you do so properly. Just follow the regular instructions like if you wanted to remove any badges. Just use a heat gun to weaken the glue on the 3M tape and pull off gently.
Feb 20, 2015, 09:10 PM
#14
Newbie

Join Date: Feb 2015
Location: Straya
Posts: 1
Likes: 0
Received 0 Likes
on
0 Posts

Thread
Thread Starter
Forum
Replies
Last Post
tlcoll1
Evo How Tos / Installations
6
Feb 24, 2018 10:06 AM
Juan Martinez
Lancer How To Requests / Questions / Tips
11
Jun 1, 2017 10:09 AM
vtluu
Evo How To Requests / Questions / Tips
74
Dec 28, 2015 01:01 PM
mrbkkt1
Evo How Tos / Installations
1
Jul 14, 2005 08:43 AM